Showing posts with label pillow. Show all posts

Thursday, July 26, 2012

{DIY}Selvage Chevron Pillow *West Elm Knockoff*


I've been watching Design Star the past few weeks, and I decided my throw pillows in our living room needed refreshing.  I wanted one or two texturally interesting pillows, then just a few basic knife-edge pillows.  This is one of my pillows to add some texture to our living room - and bonus, by using the selvages it also adds some typography!
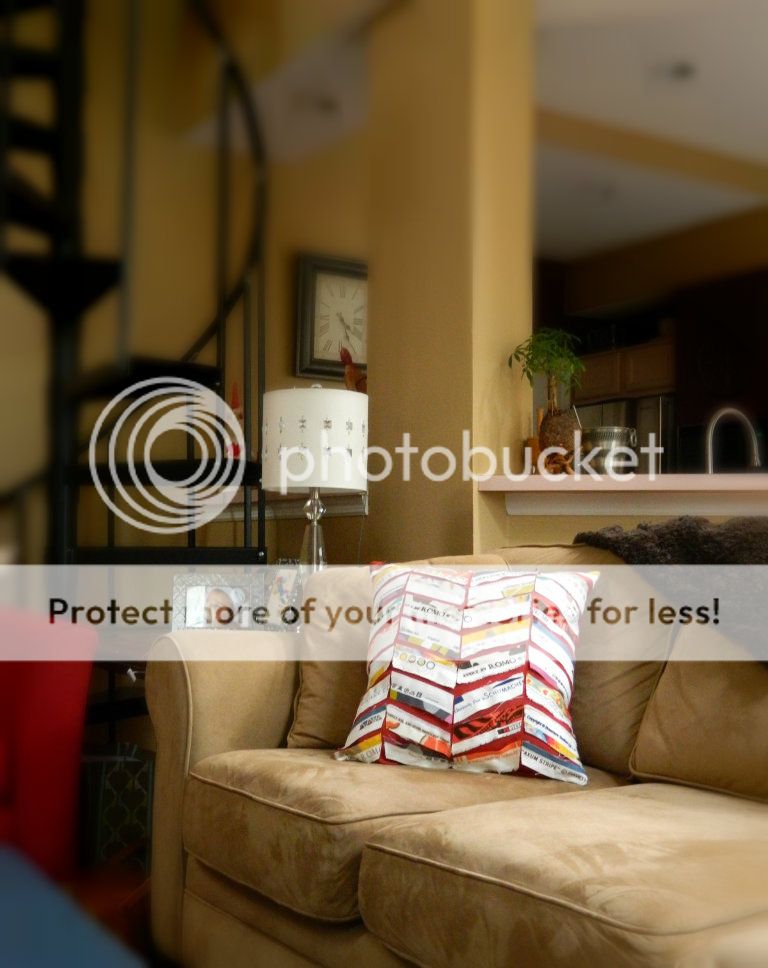

That's my Mom and Dad's house btw - isn't it gorgeous?!
The one from West Elm doesn't use selvages and it still looks great - so you could make yours either way.
Here's West Elm's pillow:
And here's mine:

If you're ready to make your own, here's what you'll need:
various selvage scraps (or any kind of scraps)
1/2 yard of solid color home decor fabric
rotary cutter(not essential, but it makes it A LOT easier)
self-healing mat(for the rotary cutter)
18" pillow form
scissors/pins/thread/sewing machine/etc.

STEP 1:
Cut out 40 strips of fabric 1 1/2" x 6"
Then cut two squares 18"x18" out of the solid for your pillow.
(if you cut the pillow 18"x18" and then stuff it with an 18" pillow form it will be nice and full - use 3/8" seam allowance.)

STEP 2:
Lay the strips out on a self-healing mat, in the design you would like on your pillow.
Overlap the edges, adjusting the angle of your chevron.

Then, use the edge of a ruler to determine the point of the chevron.  Follow the edge of the ruler with the rotary cutter.  Repeat this at each chevron point. 
It should look like this:

STEP 3:
 Pin the strips onto one of the solid squares of fabric.

STEP 4:
Sew the strips on.  Starting at the top of the pillow, sew up the center of the first strip, then down the second strip - just following the chevron pattern.  When you reach the other side, just sew straight down the edge of the pillow(this will be in the seam allowance) until you get to the next row and begin sewing across those back to the other side.

STEP 5:
Pin the back to the front, right sides together and pin - leaving a substantial opening for the pillowform.
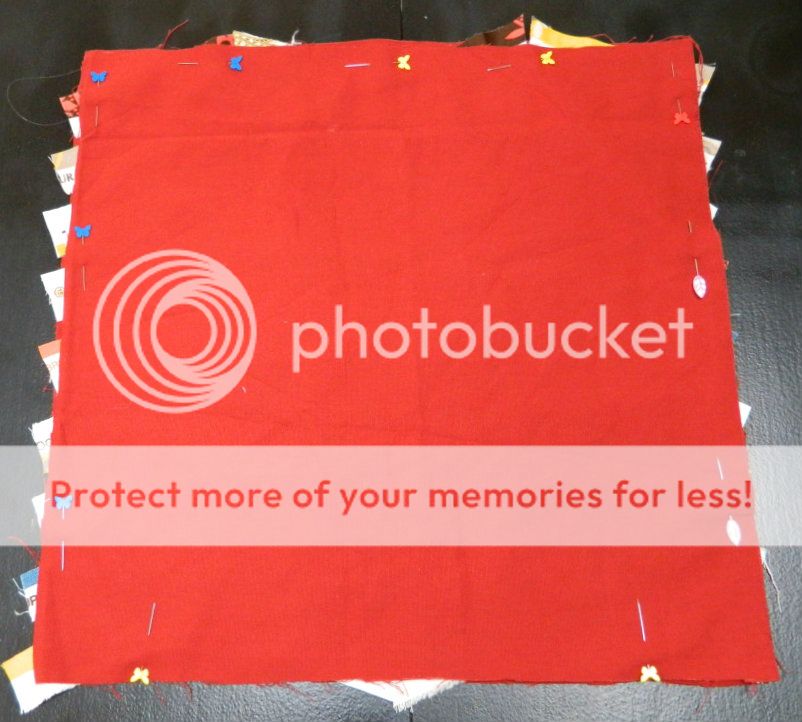


Sew around the edges using 3/8" seam, then clip the corners.

Turn right sides out and stuff with the pillowform. 
Close the pillow on the machine - see my tutorial on that here.
Enjoy your new designer pillow!

Happy Sewing!
xoxo
jessica

Tuesday, March 6, 2012

How to Close a Pillow Using Your Sewing Machine


All of the pillows I've been making for the guest bed are knife-edge pillows.
Simple clean lines, and super easy to sew, but I thought I would demonstrate how to close one of these suckers once you have it stuffed.  You could, of course, close it by hand - but every time I do that it seems to come undone at some point.  
Here's how you can create pretty professional-looking pillows!


Step 1:  Before you stuff the pillow, press the open edges under about 1/2" - 
when it's stuffed it will look like this:


Step 2: Then use a straight pin and pin the center of the opening closed - be sure the head of your pin is facing left(the point will be facing your machine) to ensure easy removal while sewing.


Then pin it closed to the right and left of the center pin.


Step 3:  Lift your presser foot as high as it will go and wedge the pillow underneath it - about 1/4" ahead of the opening, and far enough in that you will get a 3/8" seam.  


Here's the trick.  Keep your left hand on the pillow and apply pressure towards the machine while your right hand guides the pillow through the presser foot.  Go slowly and keep the edge of the pillow lined up with the edge of the presser foot (an easy way to make a 3/8" seam).  


Continue this until you sew about 1/4" past the edge of the opening.  


Then cut your threads and you're done!  


This may take a little practice, because the pillow will want to shoot out towards the left - but that's what your left hand is there for.  
Be firm and count it as your upper body workout for the day.  
Once you master this technique you will love it.  Good luck and if you have any questions feel free to email me: jessica(at)sewhomegrown(dot)com.!!
Happy Sewing!
xoxo
jessica

Thursday, March 1, 2012

{DIY} The Letter Pillow

Today's post is brought to you by...
the letter L!


I mentioned it in my last post - our baby girl's name is going to be Lila.  
Lila Marian to be exact (Marian is my grandmothers name).
Do you remember on the TV show Friends, when Rachel has her baby Emma, they have a large letter E hanging on the wall?  

I've always loved that - so I decided to make my own!
Thankfully the letter L wasn't too tricky - if you have a name that begins with S or R...I'm not sure this is the project for you, but you could always give it a try!

This project was fairly simple - it took me about 2 hours, and I was stopping to take pictures.  If you're game to make your own, here's the stuff you'll need:


My finished dimensions are for a letter L - 21"x17" (those are the long sides of the L).  
Your trim should be only about 3/8" - 1/2" wide.

Step 1: 
Go ahead and heat up your glue gun now - then, with your fabric folded in half, selvage to selvage, begin to take measurements.  From the top left corner measure 8 1/2" and put a mark.  From the center of the bottom edge, measure up 8 1/2" and put a mark.  From the bottom right corner measure up 8 1/2" and put a mark.  Connect the dots by drawing lines to complete the L.  Cut along those lines.  
The top edge of the L will still be a fold - cut along the fold so that you have a front L and a back L.


Step 2:  
Lay the front and back pieces right sides together and pin along the edges.  When you sew, you are going to leave 2 openings.  One at the top of the L and one at the bottom right edge of the L.


Sew along the edge using 1/2" seam.


Step 3:  
Cut every corner diagonally about 1/8" from the seam.  This will make the corners pretty when you flip it right sides out.


Also clip the inside corner of the L to within 1/8" of the seam.
(If you are doing a different letter with more corners or curves be sure to clip all of them)


Step 4:  
Flip the letter right sides out and press it well.  You may need to use a ripper to gently pull the corners right sides out.  

Be sure along the openings to press the fabric in 1/2" to prepare it for closing.


Step 5:  
Stuff the letter with polyfil.  You want to give it some shape, but not make it too poofy.  Another option would be to use batting in the shape of an L - but you would have to insert it back in step 3.


Step 6:  
Pin the openings closed.


Starting at the top corner, sew the opening closed - using 3/8" seam.  Continue sewing around the entire letter.  This little flange or ledge is what you will glue your trim onto.


 This is a little bit tricky.  
The key is to go slowly and really guide the letter through the machine - kind of squeezing the stuffing out of the way as you go.
It should look like this when you're finished.


Step 7:  
Starting at one corner, glue the trim onto the little flange you made.  Go slowly and just use a small amount of glue

 
Step 8:   
Lastly, hot glue little pieces of ribbon or rick rack to the back to use when hanging.  I put one in the center of the top edge, and one in the top corner of the far left edge.


That's it!!  A sweet little letter to hang on the wall or put on a shelf or toss on a bed!!

Happy sewing everyone!!
xoxo
jessica


Monday, February 27, 2012

Baby Nursery Sneak Peak

Well, I'm about 3 1/2 weeks away and the nursery is not done...but it's getting there.
It also serves as our guest bedroom.
I thought I would at least give you a sneak peak, just to give you an idea of my color scheme, etc.  My mom is bringing some of the things when she comes - such as crib skirt/sheets and some extra fabric for more bed pillows.  The main colors are yellow and berry - with a touch of turquoise thrown in.
Once it is completed I will give you a full tour - but this will have to do for now!

I made these drapes from a tapestry that I bought at Urban Outfitters.

I'm going to hang these lanterns above the crib.

The guest bed - needs a few more pillows.

This hand work was done my one of my aunts and was hung in my nursery, Charlotte's nursery, and now Lila's.

The Japanese good luck cat - and how cute are those tiny shoes!?!

This chandelier came from the house where Ryan grew up.  
It is hanging above the changing table.

So that's a little taste.
More to come soon!
xoxo
jessica

Wednesday, October 19, 2011

The Details...

Currently I'm working on the soft furnishings for Charlotte's bedroom - so far I've made the curtains (a tutorial on that tomorrow) and I have cut out the quilt.  
With the scraps, I decided to make this little pillow for the green chair in her room.  

It was inspired by this Anthropologie one.
  
You know, it's the details in a room that make it special and make it look finished.
Well, so that's what I've been up to...I'm trying to really work on the home furnishings while I'm here at my mom's - amidst the mile high stack of military paper work... :)
xoxo
jessica

Friday, June 10, 2011

{DIY} 6 Piece Beach Ball Pillow

 Well it finally feels like summer!  I don't know how it's been where you live, but we've had a pretty cool spring, and I am ready for warm days and balmy nights. Today I want to share my Beach Ball Pillow Tutorial with you. 


Where might you put a  beach ball pillow you ask?  Well, depending on the color palate you choose it could easily find a home right on your living room couch! 

One that I made ended up on my daughter's bed, and is just the thing to make her room feel a bit more summery. 


So let's start with fabric selection shall we?
My tutorial today is for the traditional beach ball - made with the nautical colors of white, red, white, blue, white, yellow.

I choose some lovely Kona cotton solids.

I had never sewn with Kona cotton before, and let me tell you - it makes a difference.  The practice pillows I made don't look nearly as nice as the Kona ones - I've been converted.  I love them.  So - if you want a little more pizazz than the traditional nautical color palate - you can choose either of these rainbow palates:

But really, beach balls can be made in any combination of colors - I even made one in different shades of pink!
So now that you've chosen your fabrics, you'll need 1/3 yard of each color.
Here are the other supplies you will need:
Scissors
Pins
Sewing Machine/Thread
1 bag of polyfil
Needle/Thread
In this tutorial, all seams are 1/4".

Step 1:  Print out the free pattern.  I suggest printing it onto a sturdy piece of cardstock.  Line the straight edge up with the fold on your fabric.  Pin the pattern to the fabric securely, and cut around the pattern.

Cut out 6 pieces.  Three white, one red, one blue, and one yellow.

Step 2:  Pin one white piece and one red piece right sides together.

Using 1/4" seam, sew along the pinned edge, removing the pins as you go.

Step 3:  Press the seam towards the red piece.  
This will prevent the red from showing through the white once you turn it. 


Step 4:  Pin another white piece to the other edge of the red.

Sew along the pinned edge.  

Again, press the seam towards the red piece.

Step 5:  Set what you've sewn aside and sew the remaining blue, white, and yellow pieces together.  Remember to press the seams towards the blue and yellow pieces.
You should now have two halves for your beach ball.


Step 6:  Pin the two halves right sides together - making certain you line up the top and bottom.  


Leave about 5" of the bottom unpinned.  This is the opening you will use to stuff the pillow.

Step 7:  Sew around the pinned edges, remembering to leave the opening for stuffing.  Clip fabric in each seam allowance right up to the seam (but not through it).  This will help your pillow curve gracefully.
Turn your pillow right side out, now you are ready to stuff!

Step 8:  Stuff your pillow so that it is nice and full.  It will take quite a bit of stuffing since it is a sphere.

Step 9:  Close the pillow using a simple blind stitch.  Begin by bringing the needle up through the blue fabric. 


Then down into the white, behind your first entry, and then back up through the very edge of the blue.

Continue doing this until you have closed the entire opening.

Step 10:  Cut out 4 white circles with a 2 1/2" diameter.  That is exactly the size of a 12 oz Mason Jar, so that's what I traced.

Stitch two circles together, all the way around.

Clip the seam allowance.  Then cut a slit in ONE layer of the circle.

Turn the circle right side out and press.  Repeat with the other circles.  
Pin them onto the top and bottom of your pillow.

 Using a blind stitch again sew the circles onto the pillow.


That's it!  
Now, no matter the weather, you have your own little piece of the beach right in your home.
(Ryan made that chair for Charlotte using this plan.  I made the fabric part.)

    Happy Sewing everyone!
jessica

You may also enjoy...

Related Posts Plugin for WordPress, Blogger...