Wednesday, July 27, 2011

*CTSB* - "Grass Babies" a kid's craft with Sunni from Love Affair with my Brother

Hi! I'm Sunni from Love Affair with my Brother. I was so excited when Jessica asked me to contribute to Cure the Summertime Blues. A little about me: I am a mommy of 2 little girls. I write a blog with my dear friend, Melissa. We chronicle our constant love and affection for our sewing machines by showcasing craft and sewing projects. Come by and see us!

It seems like the entire country is experiencing scorching heat, but here in the Pacific Northwest, we seem to be having an extended spring. Lots of rain and low temperatures (60's). So, unfortunately for my girls, we are still spending quite a few days indoors!!
So, I had to come up with a summery activity that anyone across the country could do. This is not my original idea. I have seen it elsewhere, but I am going to give you the details to make your own!! My daughter calls them "Grass Babies" I call it a "DIY Chia-head". Call it what you may, it is cute!!
And they are so cheap and simple to make.


You will need:
pantyhose (I used the freebies from the shoe department)
grass or wheatgrass seeds
soil
rubberbands
tray or jars to put them in
buttons, brads and foam decorations

I'm guess that you have most of this in your home or stash. The only thing I bought was the wheatgrass seeds. I used wheatgrass because stores don't sell tiny packets of lawn seed. So, if you are reseeding your lawn soon, just set aside a little of those seeds.

So, open up a pantyhose sock. I doubled up on a few, because these were so cheap and thin. 


Pour in some seeds.


Pour in some soil. I used a little from my vegetable garden.


Once you have a nice little ball, tie it off with a rubberband or knot.


Using a small rubber band, grab up a little mound and add a nose. I only went around the nose once, because the dirt will get pressed out if you fiddle with it too much.


Add some ears in the same manner. Your little Grass Baby is really coming together!! 


I used brads and buttons to add a face. I thought foam stickers or shapes would be fun to add, too, but we couldn't find any!!

When sewing on a button, I don't recommend using cotton thread. It might get moldy or mildew. Ewww. I used invisible nylon thread and looped it through a couple of times. Then I just tied it in the front with a knot. That should do it!!


Now just water your grass babies in a tray or place them in a jar with the tail sticking in the water. Water should wick up the pantyhose. I checked them every couple of days and added a little water, because I didn't trust the cheap pantyhose to wick it (wick it good).


The best thing about wheatgrass is that it sprouts so FAST! We had sprouts on day 2. As far as gardening goes, this is instant gratification. You can practically see it! It's as fun as watching grass grow!!


The wheatgrass is pretty to have in your kitchen or a windowsill. I sneak it my girls' morning smoothie because it is so nutritious. They will never know!



Thanks Sunni! I know Charlotte will love this!  Leave her some comment love everyone :)
xoxo
jessica

Tuesday, July 26, 2011

*CTSB*: Sweet and Spicy Pork Lettuce Wraps - Tristin from Two Girls Being Crafty

Happy Tuesday friends!  I hope you're enjoying this summer series as much as I am!  Here with us today is Tristin from Two Girls Being Crafty - get ready for a yummy summer recipe!

Hello pals!  My name is Tristin and I'm visiting from Two Girls Being Crafty.  While my blog is dedicated to crafts, my first love is actually food, so I am excited to get to share a yummy recipe for you to enjoy today!

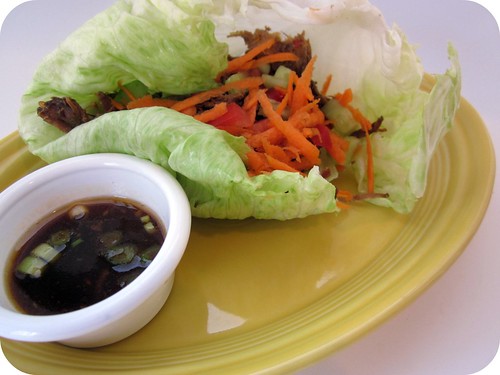
Lettuce Wraps 017

I realize that a slow cooker doesn't exactly scream out "Summer".  When I think of a slow cooker I usually think of thick soups, hearty stews, pot roasts, etc.  Don't you?   Well, friends, slow cookers can make fabulous summer food, too!  Who wants to stand over a hot stove during the summer?  And sometimes grilling outside can become such a hassle to say the least because summer afternoons bring rain showers--not to mention that it's just so dern HOT!  It's fabulous to return from a day at the beach and to have dinner waiting for you.

Lettuce Wraps 019


So, in this case we'll make a light summer meal using our crockpots.  No joke.

Alright, let's make this happen.  You'll need:


  • 1/2 cup soy sauce
  • 3/4 cup brown sugar
  • 2 tablespoons chili-garlic sauce (found in the Asian aisle of the supermarket)
  • 1" knob of fresh ginger
  • 1 teaspoon Chinese five-spice powder (if it's not already in your pantry, just leave it out)
  • a few shakes of black pepper
  • 3 lb. boneless pork roast (I use a Boston Butt) trimmed of excess fat and cut into 2-inch pieces
Combine all ingredients except for the pork in your slow cooker.  Once well-combined, add the pork, tossing to coat.  (It will look like there's not enough liquid, but don't worry, it's plenty!)

Cook on low for 8-10 hours, or on high 5-6 hours.  Remove pork from slow cooker and use two forks to pull it into delicious, tender shreds.  Discard ginger chunk.  Reserve cooking liquid to use as dipping sauce (though I highly recommend skimming the fat off of the top).
Lettuce Wraps 004

To serve, you'll need:
A head of iceberg lettuce separated
Your favorite toppings - this time I simply used shredded carrots, cucumbers, and tomatoes.  Radishes, scallions, sprouts, cilantro, chopped peanuts, etc. also make great toppings!
And don't forget your reserved sauce--it's seriously delicious!

This recipe was adapted from Real Simple's Slow Cooker Sweet and Spicy Asian Pork Shoulder.

Lettuce Wraps 008
I served these yummy lettuce wraps with some steamed and salted edamame and a surprisingly delicious Ramen Cake.

To sum it all up, don't be a slow cooker hater this summer.  And please, stop by Two Girls Being Crafty to see what my blog-mate Sharon and I have been up to.  If you like snarky comments, occasional gangsta talk, and inexpensive crafting, you're sure to enjoy Two Girls Being Crafty.  Or maybe not.  But why not give it a try?  Here's a smattering of our projects...

twogirlsbeingcrafty.blogspot.com

Thanks Jessica, for hosting this wonderful summer series.  I'm off to enjoy a glass of ice-cold lemonade (aka scarf down some leftovers while standing over the kitchen sink) and lounge by the pool (aka tackle mountains of laundry).  A girl can dream, right?

Thanks again Tristin!  Up tomorrow is a fun post for the kiddos by Sunni from Love Affair with my Brother!
xoxo
jessica

Monday, July 25, 2011

*CTSB* - {DIY}Anthropologie-inspired Bracelet - Beverly from Flamingo Toes

Hello Sew Homegrown Readers! I am so happy to be here today!
This Cure for the Summertime Blues series is a blast and I have so many great projects added my to-do lists!
My name is Beverly and I blog over at Flamingo Toes.


I love doing home decor, sewing and jewelry projects - but my favorite things to make are knockoffs!

It's so fun to be able to recreate something that is fun at a fraction of the price in the store!
So when it came time to decide on what I wanted to make for Jessica's series - I went "shopping" at my favorite place to knockoff - Anthropologie!

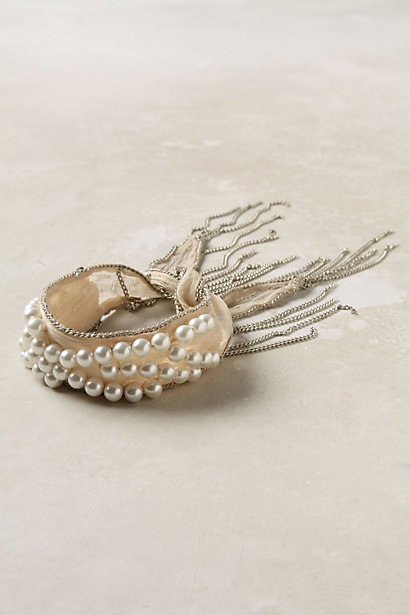
I fell in love with their new Weights and Measures Bracelet and had to recreate it!
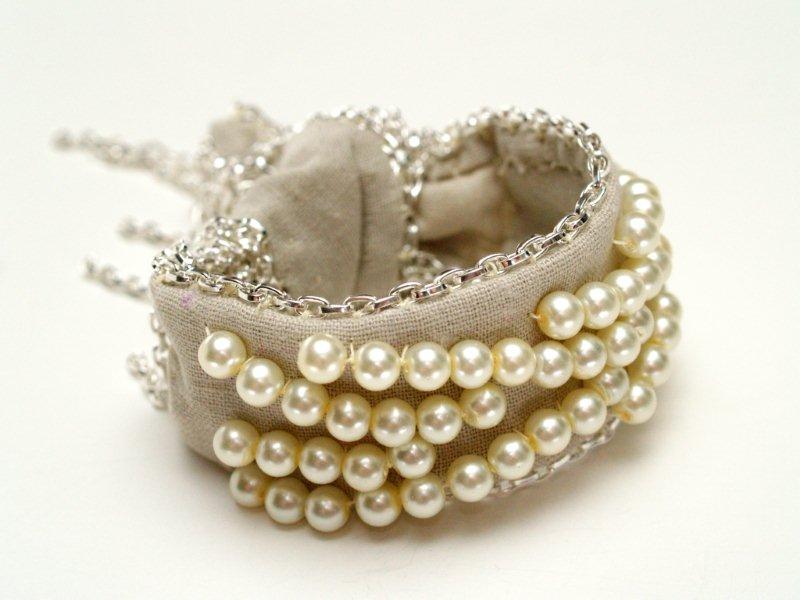
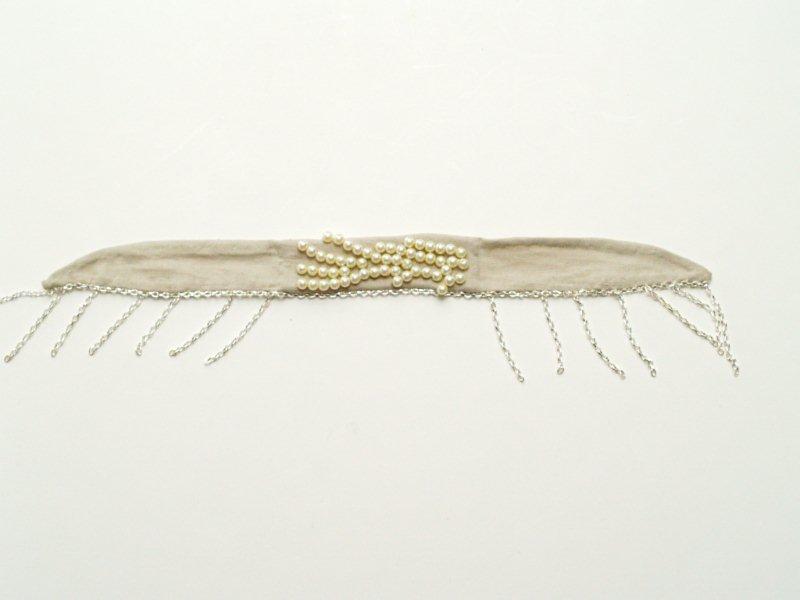
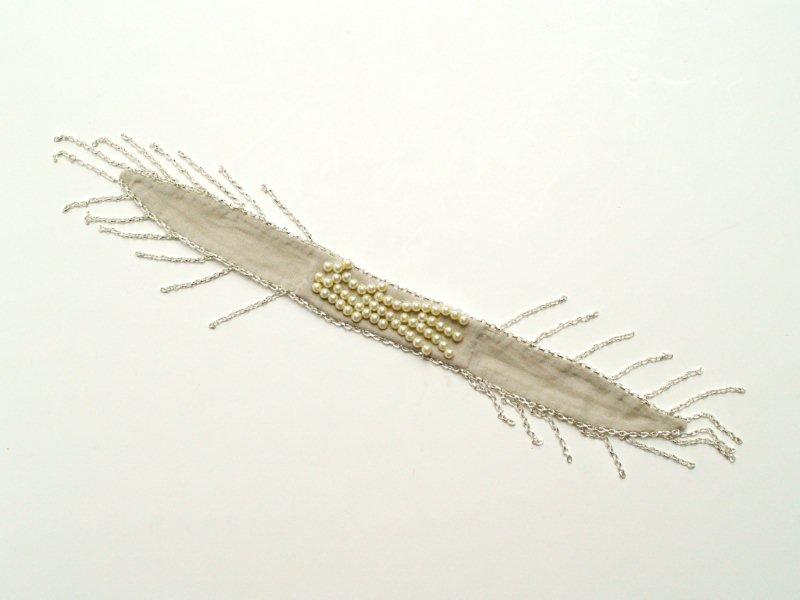
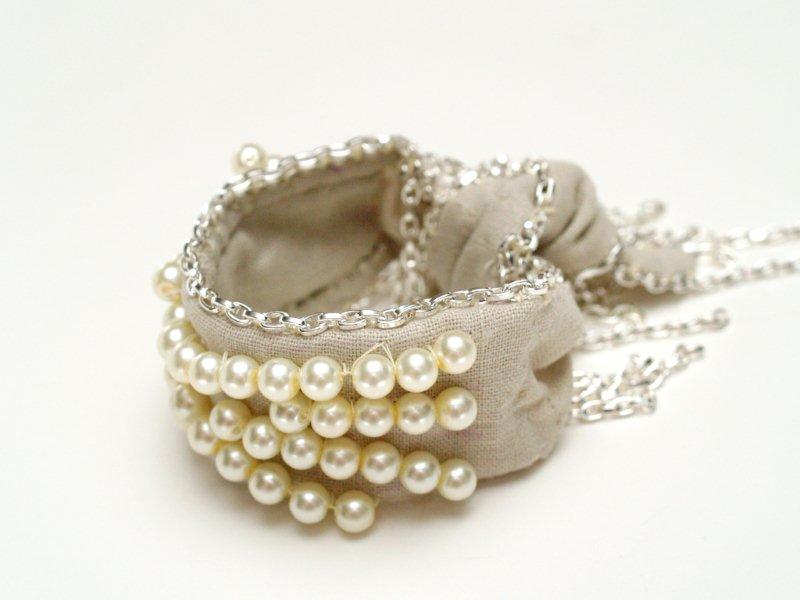
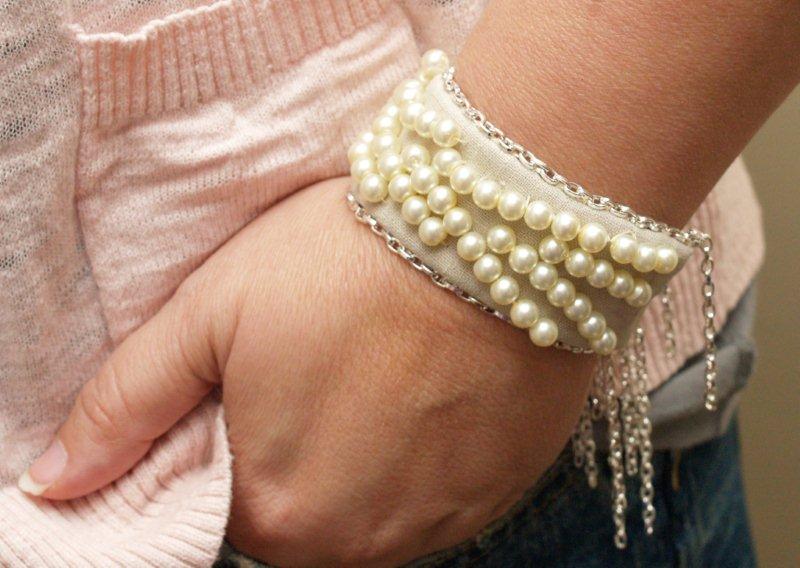
Here is my version . . .

And here is Anthro's!

 
Isn't it great?? I love the combo of the pearls with the chains!
Here's what you'll need to make your very own.
• small amount of fabric (I used linen because I wanted something a little heavier than the chiffon they used)

• pearls (mine were 5mm and I used about 56. You'll need more or less if use a different size of pearls)

• small chain - at least 84" (the smaller the chain, the easier the bracelet will be to tie)

• needle and matching thread
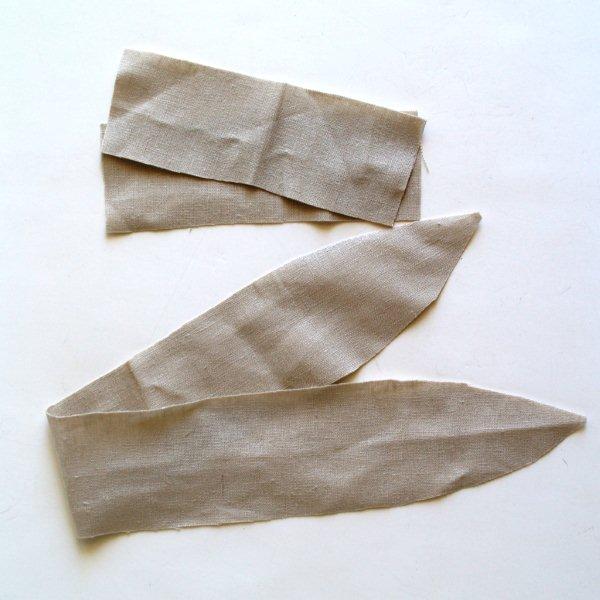
Begin by cutting out the fabric for the bracelet.
You'll need one long piece 2" x 14" and 2 smaller pieces 1 1/2" x 5".
About 3" from each end of the longer piece, trim the ends so they come to a point.
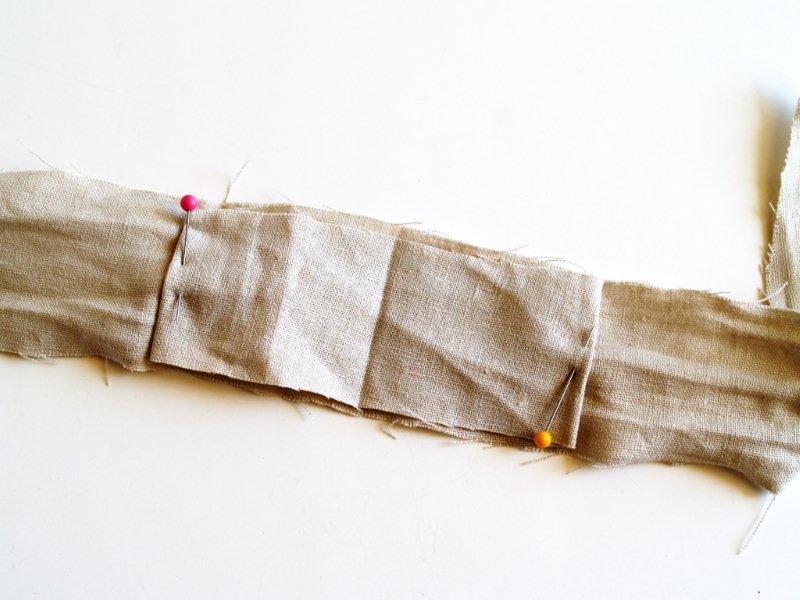
Find the centers of the long piece and one of the shorter pieces. Line them up with the shorter piece on the back of the longer piece.
Tuck the ends under and pin them. This will stabilize the area that you sew the pearls to.
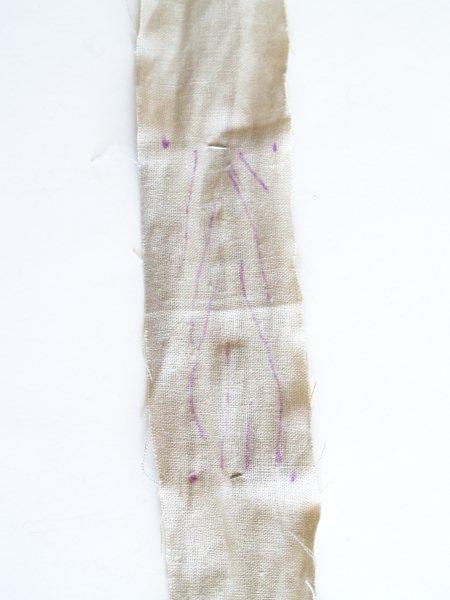
On the front of this section, draw out with a disappearing ink marker the lines that you are going to sew your pearls on. Stay 1/2" away from the edge, this will be part of the hem.

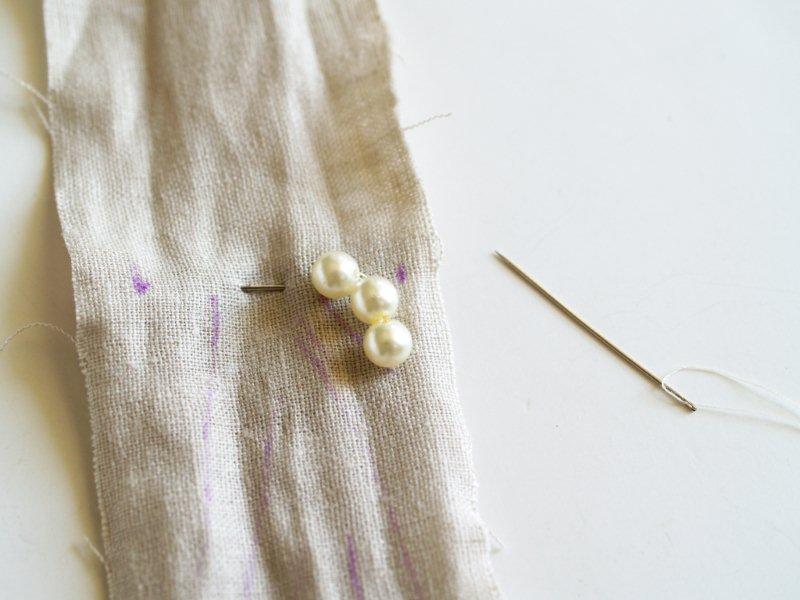
Begin sewing down your strands of pearls. Add the pearls for each row to your thread and sew them down.
Sew down the strand between each pearl also. This will help the strand lay flat.
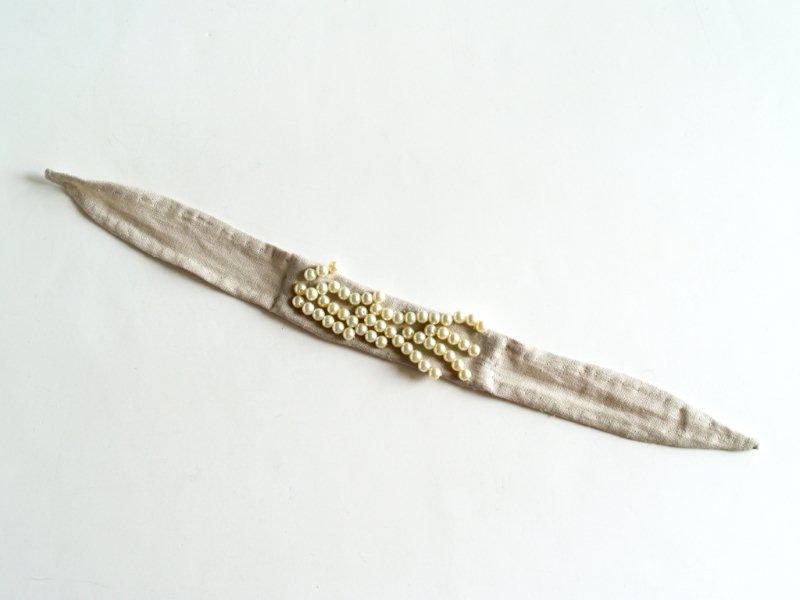
Continue to fill up the center section with rows of pearls.

 
Working on the back side of the bracelet, turn the raw edges over in tiny folds to create a hem.

 
Continue working your way around the bracelet until both sides are hemmed.
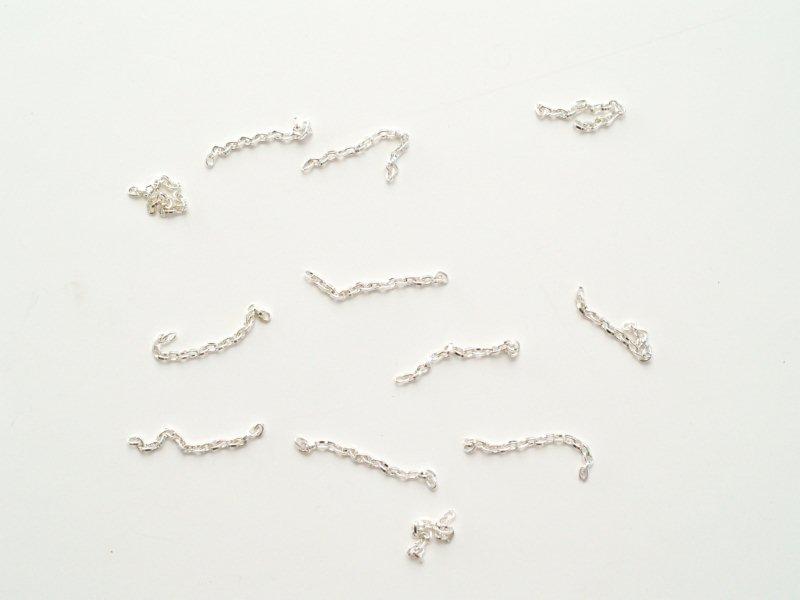
Now we're going to work on the chain. Cut the short pieces for the sides next. You'll need 24 - 2" pieces.
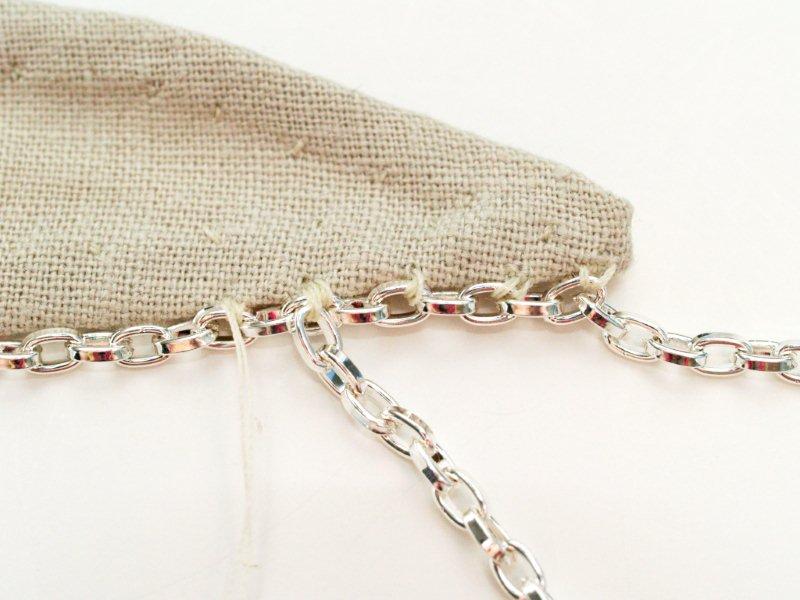
Lay out a longer piece of chain (at least 18") to begin sewing down the long side of the bracelet. Start sewing the chain to the bracelet 2" from the end of the chain.
As you sew this long piece down, you're going to add in the short pieces. There are 6 short pieces of chain on each end of the bracelet, on both sides.
Hopefully that made sense. ;)
Evenly space out these shorter pieces and sew them on as you go, working your way down the side of the bracelet.
When you get to the other end of the bracelet, cut the chain so there is a 2" piece that extends past the end of the fabric.
Repeat for the other side of the bracelet.

And that finishes off your super cute new knockoff!!

 
To wear, just knot the ends loosely!
Isn't it fun? I really like how it turned out. I hope you do too. :)
I'd love for you to come check out Flamingo Toes sometime!
You can see some of my other Jewelry knockoff's here.

And on Sundays I host a fun Link Party where you can show off all your fabulous projects!
Thanks so much for including me in the series Jessica - it was a blast!


Wow - I just love it don't you?!  It reminds me of something a mermaid might create from treasures she found on the ocean floor - I am definitely making this one!!  Hope everyone had a lovely weekend - coming up tomorrow is Tristin from Two Girls Being Crafty- see you then!
xoxo
jessica

Friday, July 22, 2011

*CTSB* - Summer Recipes from Ask Anna...

Cure the Summertime Blues with some {De-licious} Summer Recipes

Hey there!  I'm Anna from Ask Anna.  I'm here today to share with you a few of my favorite summer recipes.  One is an old favorite and two of them are new summer favorites!

Let's start with the main dish. 
Summer is a time for light meals that don't take a lot of effort.
That is why I LOVE this Basil Pesto Pasta.


Ingredients:
1 Large package Cheese Tortellini
1 6oz jar Basil Pesto (you can use fresh or store bought, I'm lazy so I buy it)
8-10 Grape or cherry tomatoes
1/2 cup Pine nuts, toasted
1 1/2 cups Feta Cheese
5 Large Basil leave

Directions:
Preheat oven broiler.
1. Cook tortellini according to package directions
2. While it's cooking spread pine nuts on a cookie sheet and place them in the oven to broil.  Remove them from the oven when they are lightly toasted.
3. Cut tomatoes in half and slice basil into thin strips.
4. Toss all ingredients together and serve.

And now for dessert. 
We all love dessert, which is why I'm including two dessert recipes. :)  These are both new recipes that I discovered this summer but both of them are so delicious and will definitely become summer staples in our house!

The first recipe is for Lemon Ice Cream. 
This is not lemon sorbet, this is creamy, rich, oh-so-yummy ice cream. 
It's honestly the best ice cream I've ever had, and I'm so excited to share it with you!


Here's what you need:
Homemade ice cream maker (electric type, its so much easier)
3 1/2 cups sugar
3 eggs beaten (beat them in a separate dish and then pour in the mixture)
1 tsp vanilla
1 quart whipping cream
2 quarts half and half
1 1/2--1oz bottles lemon extract

Mix together. Fill to fill line in the ice cream maker, if doesn't quite reach the fill line, use regular whole milk to make up difference. If there is no fill line, fill to about 4-6 inches below top of the canister. (Don't fill past that point because the ice cream will expand and make a big mess).

Surround the ice cream maker alternating ice and rock salt.  Make sure to end up with ice at the top  (otherwise the salt spills over when you open the lid and it will make your ice cream taste like salt). Let the ice cream maker mix until it starts to bog down.  Keep adding ice and salt as it churns.  Once the ice maker has finished churning place the tub of ice cream in the freezer for 2-3 hours.

And last, but certainly not least, is a fun twist on an old favorite:
Chocolate Covered S'mores
Yes, they are just as good as they sound!!!
I made these for the 4th of July this year and they were a huge hit!
These taste amazing and they are super easy to make, even the kids can help you make them.


Here's what you need: 
Graham crackers
Marshmallows (you can buy flat ones at Target)
Chocolate for the s'mores
Chocolate for melting and dipping
Popsicle sticks
Sprinkles (optional)

Start by making the s'mores: graham cracker, chocolate, marshmallow, graham cracker.  Next melt them in the microwave for about 25 seconds. Then stick them in the freezer for about 10 minutes. After they have hardened a little remove them from the freezer and insert a popsicle stick.  I bought the larger sticks because I didn't want any of the younger kids to hurt themselves with the smaller ones.
Then place the s'mores in the freezer for about 30 minutes. While you are waiting for them to freeze, melt the remainder of the chocolate in a large bowl for dipping.

Take them out of the freezer and dip them in the the melted chocolate.  Once they are dipped place them on a cookie sheet lined with wax paper.  Sprinkle with sprinkles, if desired.  Put them back in the freezer until the chocolate has cooled.

I hope you enjoy these summer recipes and that they can become summer favorites in your home too!  Thanks for stopping by for Cure the Summertime Blues!  I hope to see you over at Ask Anna sometime.


Wow - don't those look amazing? Especially that Lemon Ice Cream - yum!
Hope everyone has a great weekend - see you back on  Monday with Beverly from Flamingo Toes!
xoxo
jessica

Thursday, July 21, 2011

*CTSB* - Organzing Children's Clothing - Melissa from Love Affair with My Brother

Is the condition of your home giving you the summertime blues?
Today we have Melissa from Love Affair with My Brother to help us get organized! 
Take it away Melissa!


Time to get organized! Because Spring isn’t the only time for big cleaning projects!
Hi, I’m Melissa from Love Affair with My Brother. I have been sewing for 19 years, quilting for 10 years and being crafty pretty much my whole life. I have been a “collector” for much of my life too – my husband uses the word “hoarder” but I don’t like that word! This is where today’s post comes in…

To say that my baby never wanted for clothes would be an understatement! She has always had more clothes than I have ever owned in my life. At times this was completely understandable – after all there were days when she was an itty bitty baby that we went through three or four outfit changes in a day. Now…this just means that I have more baby clothes than I know what to do with. Oh, and did I mention that at 19 months old she is already wearing 3T and 4T clothes?!?

This is a QUEEN size bed and her clothes (everything but what currently fits) fill the ENTIRE bed!!!
Needless to say it’s time to go through everything and get organized.
Here’s what you need – 5 bins, a sharpie and some tape for labeling – oh yeah and the ability to make some tough decisions!

I labeled my boxes Give to Friend, Donate, Keepsakes, First Year Memory Quilt, and Jammy Quilt.

I have two big projects in mind that I want to do with her clothes – I want to make a first year memory quilt – I am using things like my favorite onesies that she wore and cute tops. I will be cutting these apart and sewing them back together – I really needed to sort through her clothes and make decisions because I am the kind of person who will hold on to her entire wardrobe because 20 or 30 years from now she may have her own daughter and if I saved these clothes for her then she wouldn’t need to buy anything. I know…completely crazy right?!? That’s why getting organized and making some tough choices is an absolute must for me.

The other project box is for a “Jammy Quilt”. I am taking all of her fleecy and soft jammies and I am going to cut them apart and make a cuddle quilt for her. I am really excited about this project and I think it is a great way to preserve some of the clothes that she spent the most time in as an infant.

Here are the types of things that ended up in the Keepsake Box:


The dress on the left was handmade for her and the shirt on the right was actually mine when I was a baby.

That was pretty much my criteria for the “keepsake” box. It had to be handmade or something that I couldn’t bear to see cut up or given away. Her Easter, Halloween, and Christmas outfits all ended up in there too. The box looks as though it is going to overflow, but that is because I decided to keep her sleep sacks and winter snow suits as well. We live in the Pacific Northwest and if we have another baby I really don’t want to start at square one with everything.

The "give to friend box" was all of Anne’s 18 month clothes and larger that weren’t going in the keepsake or quilting boxes. This made the donate box even easier to fill because if it wasn’t going in one of the other four boxes it was going there!

Did I mention I had a really cute helper?


Believe it or not this activity entertained her for the entire hour it took me to sort through the mountain that was her clothes. She played with her old shoes, climbed into one of the boxes and for awhile just sat on the bed and handed me clothes one item at a time.

The last item to get packed up was her “going home outfit” from the hospital.


Here’s what it looked like when everything was sorted and packed


And now I can honestly say to my husband “No dear not everything is staying”. Now I just need to get myself to the Goodwill and to the Post Office. I suppose I also need to start cutting up her clothes to make her memory quilts too, but that is another day and another tutorial!

For now things may look like this for a couple of weeks until I can get to the post office and the good will.


My husband was so happy when he came home and saw everything cleaned up and put away!

And here is how my helper looked when we were all done – needless to say nap time quickly followed the end of this project!


What do you need to go through and organize? Do you have a hard time parting with things too? For me it is all about the memory attached to the item. Good luck with your summer cleaning and organizing and don’t be afraid to get the kids involved if it can entertain a 19 month old, then it can definitely keep older children busy!

I would love it if you took a few moments to check out Love Affair with My Brother, we love new followers! We do weekly tutorials and great giveaways on a fairly regular basis! Thanks for spending some time with me today!


You may also enjoy...

Related Posts Plugin for WordPress, Blogger...