


I have a fun summer shorts tutorial for you today! This can be modified to work for boys or girls (mommies of boys are you excited? this is for you :)
 All you will need is a pair of shorts that fits your little one well, wide elastic for the waistband, a half a yard of fabric, and 1/4" elastic for the bottom of the shorts - unless you are making it for a boy in which case I'm thinking no scrunchie hem. I will also note a disclaimer that this project is not super easy, but I have confidence in you! Do not be afraid! Look at the pictures and email me if you get stuck. You can do it.
Find a pair of shorts to use for your pattern.
 Turn them inside out, and reach through one leg to pull the other leg inside it.
 It should now look like this:
 This piece that you can see is one of the back panels that make up these shorts - they are made up of 4 pieces, two identical back pieces, and two identical front pieces. Fold your fabric wrong sides together so that you are cutting two layers at a time. This way you can cut both back pieces at the same time. Lay the shorts, still folded, onto your fabric. Trace around the sides, 1/2' larger from the shorts. Along the top add 3", and along the bottom, add 2" -This will allow for waistband and hem. Cut along your line.
 Watch out for the curve around the crotch - it folded under and I had to measure how much it folded under and continue the curve out on my own. As shown below.
  (My sister is always accusing me of making things up and expecting her to know exactly what I am talking about...are you agreeing with her yet?)
Okay, those are your two back panels. Now, unfold the shorts and pull one leg inside the other so that one front panel of your shorts is showing. You will use this as your pattern for the two front panels. Repeat your process - lay the shorts on the fabric, draw around(3" from the top, 1/2" from the side and 2" from the hem).
Four panels to make up your shorts:
 The back panels should have a bigger curve for the center seam(the crotch) than the front panels. This gives room for your baby's bottom to wiggle.
Before you sew it all together now is the time to finish your raw edges. On each piece (ALL 4 ) Zig-zag or serge the side edges, the inseam edge and the crotch edge.
Sew the two back panels, right sides together, along the center seam. Repeat with the two front panels.

Now pin the front to the back, right sides together along the side seams, and the inseam.
 Sew the side seams, and then sew the inseam -using a 1/2" seam. Turn right sides out.
 Now we are going to do the waistband. Fold the top 1/4" down and press.
Next, fold it over about two inches.

Now, this is important, measure from the crotch to the top of the waistband on the pattern shorts. Charlotte's measured 6". Make sure that the measurement from the crotch to the top of the waistband on this pair is the same.
Stitch around the bottom of the waistband. Leave about an inch opening.
Measure your little one's waist and add 1 1/2 ". Cut the piece of waistband elastic this length.
Pin a safety pin to the elastic. Insert it into the waistband and feed it through.
 Be careful not to twist it.Once you have made it all the way around, stitch the two ends of the elastic together.
  Tuck it inside the waistband and close.
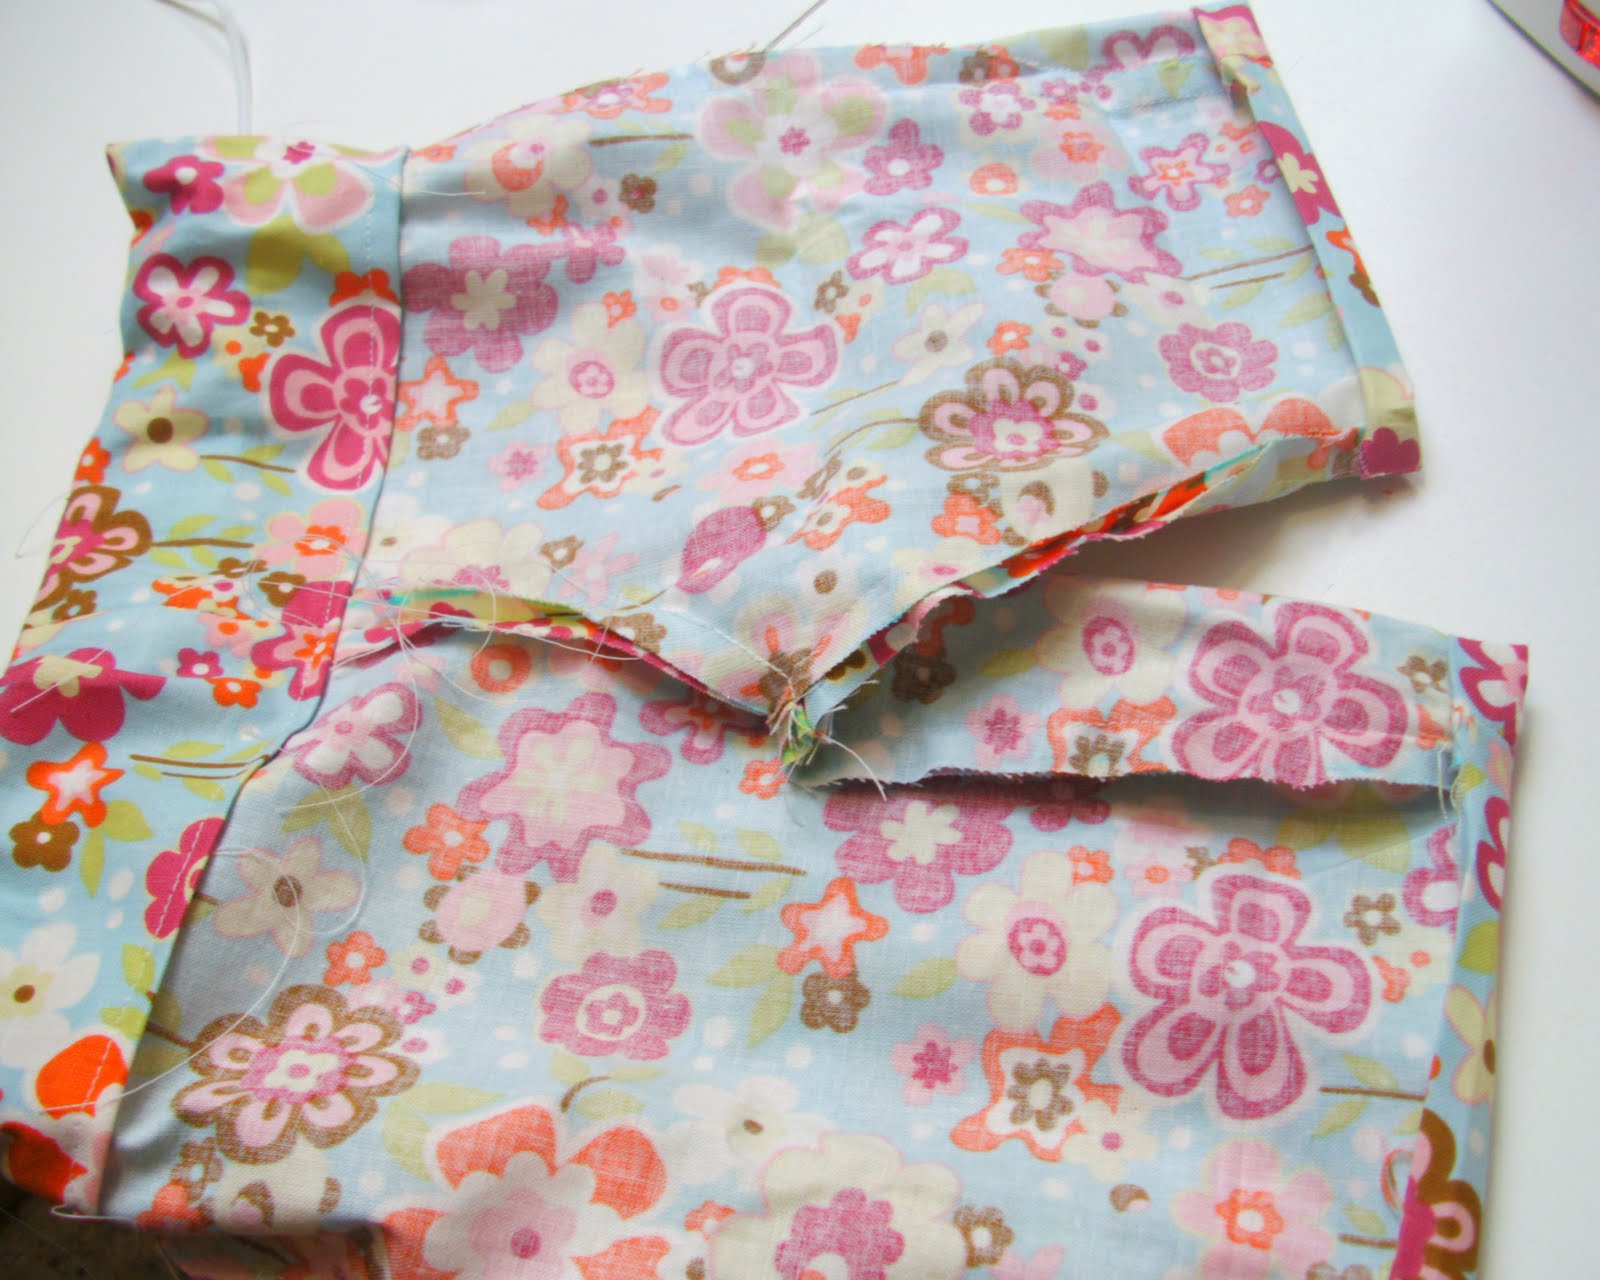 To make the scrunchie hem, repeat this process along the hem, only folding it up 1/4" inch, then a 1/2". To make a regular hem, try the shorts on your little one, and measure the hem. Fold it up a 1/4" and then fold it up again to make it the correct length. Top stitch it into place.
Embellishments:
To quote my mother, the great seamstress, "The details make it look handmade, not homemade." The buttons, bows, trims add so much character to your clothing. I added an extra stitch around the top of the waistband to give it a nice crisp shape.
 Then I sewed on two buttons to the waistband and two buttons on the side of each leg at the hem.
Then we got dressed and played outside in our breezy new shorts!


Those are adorable! Thanks for linking to Wardrobe Wednesday!
ReplyDeleteLeisel
Brown Paper Packages
Adorei! Vou agora mesmo fazer para minha filha!
ReplyDeleteParabéns pela explicação! Você é uma boa professora!
Nataly De Biase
Conheça meu Blog e me siga também
http://mariagirassolcraft.blogspot.com/