


Hey! I'm excited to share this tutorial with you.
This is another great way to use up scraps.

My mom had made a quilt using Anna Maria Horner's new line Loulouthi -
and she had some wonderful scraps leftover.
We found this skirt as inspiration on Pinterest
and she had some wonderful scraps leftover.
We found this skirt as inspiration on Pinterest

(how adorable is that?)
and decided to make our own!
Here are the supplies you'll need (I made a size 3T):
scraps of fabric that equal around 1 - 1 1/2 yards
24" of 3/4" elastic
scissors/pins/iron/thread/sewing machine
Step 1:
Cut the pieces.
You will need a Yoke Waistband, Skirt Fabric, and Contrast Band Hem.
Cut the pieces.
You will need a Yoke Waistband, Skirt Fabric, and Contrast Band Hem.

Okay I know that's kind of a crazy picture.
I pieced a bunch of things because I was working with smaller scraps, but here are the dimensions explained:
I pieced a bunch of things because I was working with smaller scraps, but here are the dimensions explained:
Yoke: 5"x 23" (mine were in two pieces 5"x 12" and I had to sew them together)
Skirt: 8 1/2"x 46" when sewn together. You will need to add an inch for every piece to allow for the seam allowance - when I laid these all out after cutting it measured 53", but after sewing them it measured 46".
Contrast Band: 3" x 46" when stitched together. The same applies here - you may have to piece a few strips, but once you sew it together it should measure 3" x 46".
Step 2:
Sew all the skirt pieces together. You should have a long piece that measures 8 1/2" x 46".
Serge or zig zag all of the seams.
Sew all the skirt pieces together. You should have a long piece that measures 8 1/2" x 46".
Serge or zig zag all of the seams.

Step 3:
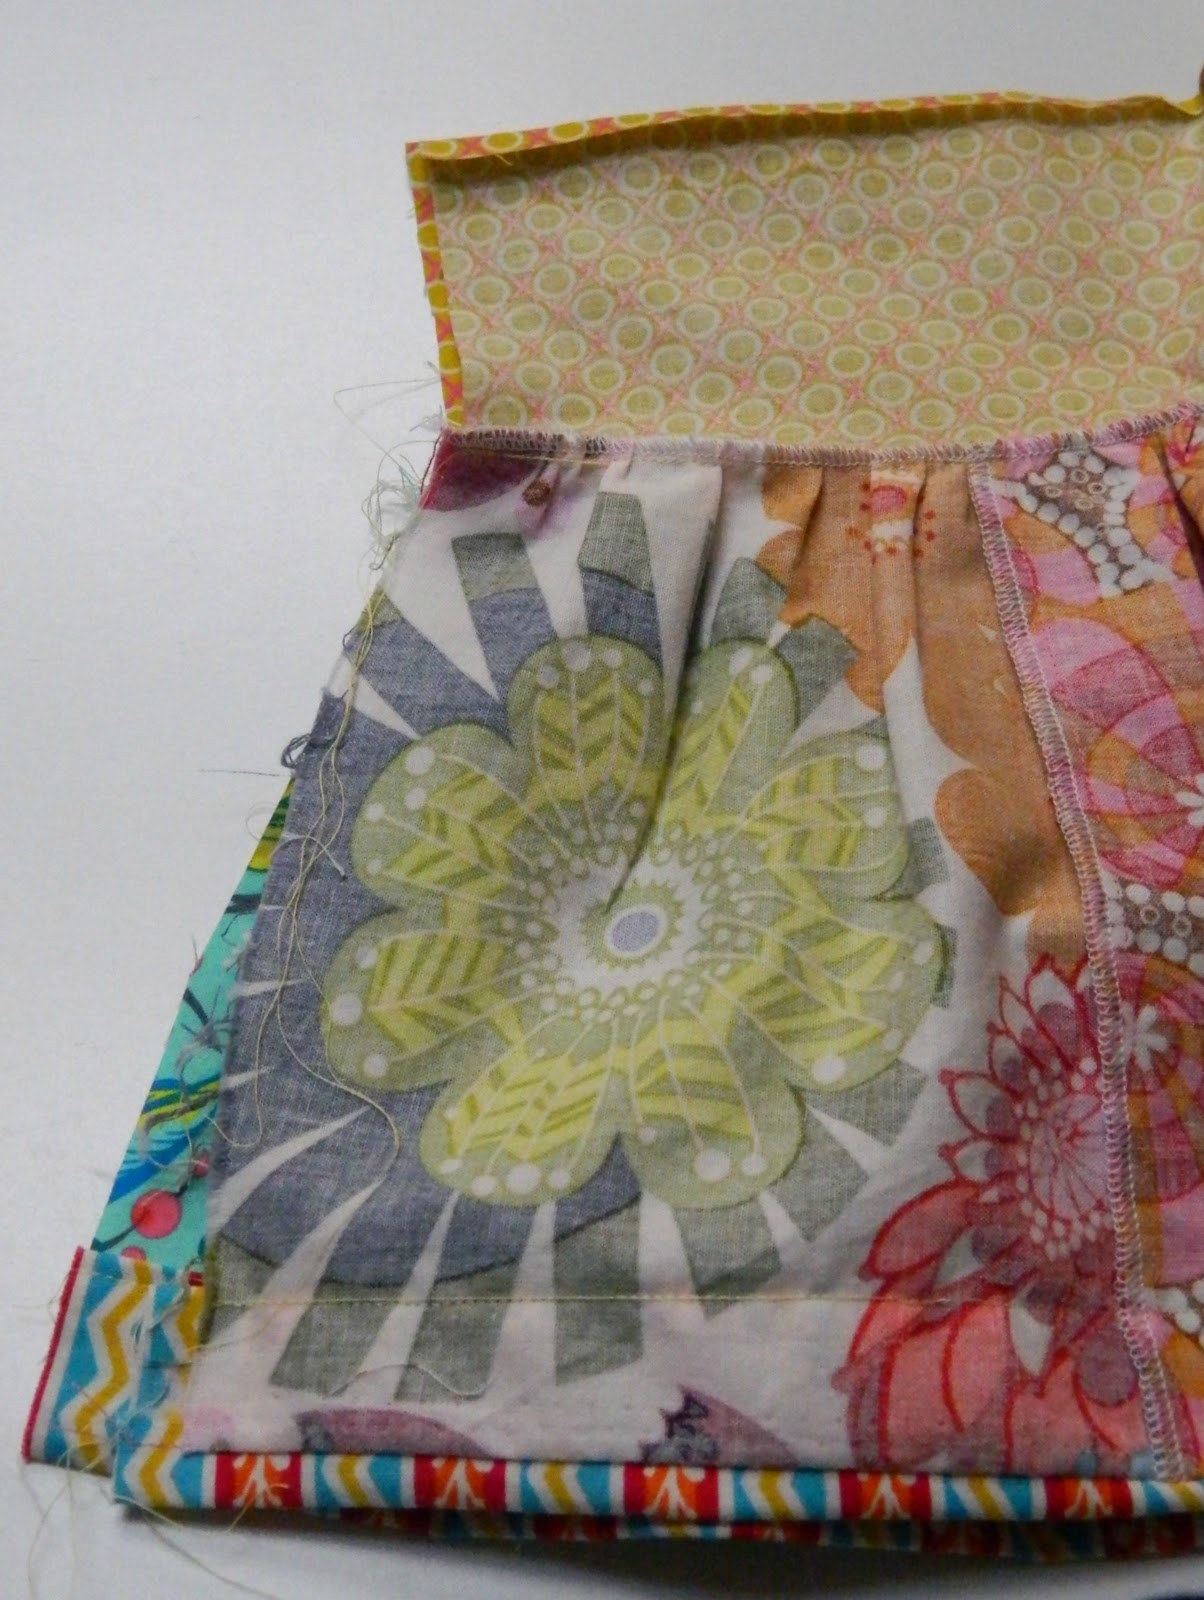
Sew the Contrast Band strips together (right sides together) so that you have on long band 3" x 46".
Lay it's right side against the wrong side of the skirt panel and pin.
Sew the Contrast Band strips together (right sides together) so that you have on long band 3" x 46".
Lay it's right side against the wrong side of the skirt panel and pin.
(This may seem wrong, but go with me here)

Sew along the edge using 3/8" seam.
When you have finished, open it up and it will look like this:
When you have finished, open it up and it will look like this:

Step 4:
Press 1/4" of the band toward the wrong side.
Press 1/4" of the band toward the wrong side.

Then press the band up about 1" and pin it to the skirt panel.

Top stitch it in place.
Here's how it should look: front and back.

Step 5:
Using a basting stitch, sew along the top of the skirt panel twice and gather so that it measures 23".
Using a basting stitch, sew along the top of the skirt panel twice and gather so that it measures 23".

Step 6:
Pin the yoke waistband right sides together along the gathered edge.
Pin the yoke waistband right sides together along the gathered edge.

Stitch in place.
Zig zag or serge the seam then press it towards the skirt.
Zig zag or serge the seam then press it towards the skirt.
It should now look like this:

Step 7:
Press the top of the waistband under 1/4", then pin the edges of the skirt right sides together
and sew the side seam.
Press the top of the waistband under 1/4", then pin the edges of the skirt right sides together
and sew the side seam.
Zig zag or serge the side seam.
Step 8:
Fold the top of the yoke down about 1 1/2".
Fold the top of the yoke down about 1 1/2".

Leave about a one inch opening, and stitch it in place.

Step 9:
Fasten a safety pin to one end of the elastic and run it through the casing.
Fasten a safety pin to one end of the elastic and run it through the casing.

Measure it on your kiddo to get the right size, then stitch the two elastic ends together.

Slip the elastic inside and topstitch the opening closed.
Step 10:
This step is optional but it makes the garment look a little more professional and it will keep the elastic from rolling when you wash it. Scoot the elastic to the bottom of the casing, and top stitch around the top of the yoke, about 1/8" down from the top.
This step is optional but it makes the garment look a little more professional and it will keep the elastic from rolling when you wash it. Scoot the elastic to the bottom of the casing, and top stitch around the top of the yoke, about 1/8" down from the top.

When you are finished, it will look like this:

That's it! Enjoy watching your cutie spin and play in her new skirt!


happy sewing,
xoxo
jessica
Love the skirt!! And Charlotte looks just gorgeous--her hair has gotten so long and pretty. I just love little brunette gals!
ReplyDeleteThat's such a great idea for using up scraps! The skirt looks really cute. I have a whole suitcase of scrap fabric, might try making one too at some point!
ReplyDeleteI love the skirt!! Thanks for sharing!
ReplyDeleteWhat a cutie-patootie skirt that is--though, even more precious is your sweetheart girl! :)
ReplyDeleteGreat skirt idea - I'll definitely use it, but I want the tute for that swing-horse!
ReplyDeleteAdorable! I'll be featuring this later today on The Train To Crazy.
ReplyDeleteI. Love. This. :)
ReplyDeleteMaybe I can make a shorts version for my little boy...
I wanted to let you know that I'm awarding you The Versatile Blogger Award!
I received it recently and it felt great to be recognized, it's also prompting me to reach out and leave messages at some of the blogs I read but don't necessarily comment on.
There are a few provisos to keep the love moving :)
By accepting this award I agree to do the following:
Thank the blogger who awarded me with a link back to him/her.
Share seven things about myself.
Pass the award on to fifteen other newly discovered blogs.
Please stop my my blog and right click on the award picture to save to your computer so you can add it to your post
http://campingout.tracyrosen.com/?p=401
Congratulations :)
Thank you i printed this of this morning and i have finished it!! What a great pattern. Quick and easy to follow! i made this for my neice and now ic an make one for my daughter i have alot of scrap fabric i didn't know what to make with thank you!! Please drop in and see my sister's fabric store on ebay! http://stores.ebay.com.au/mypatchfabrics
ReplyDeleteYou have been featured on a +30 little girls skirt round up- thanks for your great tutorial! http://www.patchworkposse.com/2013/07/30-elastic-waist-skirt-tutorials-little-girl-summer-skirts/
ReplyDelete