Thursday, June 30, 2011

Rug Making Tutorial - my first vlog!

...now you'll know what I sound like :)
Last week I posted about my beginning adventures in rug making, and as promised, I have a tutorial for you today.  AND it's in the form of a vlog - can you believe it?  I seriously thought I would never do a video, but it was actually kinda fun, so if you like it I may do the occasional vlog.  Most of the things I do here are easily demonstrated by pictures, but this project really lends itself to a video.  So here we go - if you have any questions about this process, leave me a comment or email me at jessica(at)makeitlovely(dot)com.

Rug Making from Jessica Broyles on Vimeo.

So that's me. 
I wish you could leave video comments so I could hear what you have to say :)
I hope that you all have a great weekend - if you're here in the states, Happy Fourth!
xoxo
jessica

DIY *Star* Bow


Need a last minute bow for the fourth?
You can whip these up in no time!
Supplies for 2 bows:
1 yard of ribbon
2 strips of red/white/blue fabric 2"x10"
2 ponytail holders
sewing machine/thread or hot glue gun

Step 1:  Cut the ribbon to 18".  Starting at one edge, fold it like a remembrance ribbon.
I use the clip to hold it in place as I fold it
- but if you are using hot glue, you could glue it in the center as you go.
Then fold it again, 
and 3 more times after that - creating a star shape.

Step 2:  Make a small fabric rosette out of the 2"x10" strip.

Step 3:  Slide the star, with the rosette in the center, under the foot of your sewing machine (or hot glue it in place).  Carefully sew it in place - don't go too fast or you will break a needle.

Step 4:  Turn the star over and put the ponytail holder in the center back of the star.  Set your machine's zig zag stitch to a short length and width, so that it will tack it in place (or hot glue it in place).

There you go!

The most adorable patriot I've ever seen.

xoxo
jessica

*Inspired Homemaking* - The song that inspires me today


Hear the full song here.
xoxo
jessica

Wednesday, June 29, 2011

DIY Fabric Tangram with Drawstring Bag


I have to credit my friend Emily with this idea; she has made tangrams out of cardstock, but suggested that since I love fabric, I should make a fabric one for Charlotte.  So that's what I did!

  
If you would like to make one too, here's the tutorial!

Supplies:
Print out this free tangram pattern in large onto cardstock
fabric scraps
batting scraps
scissors
sewing machine/thread


Step 1:  Print out the pattern and gather fabric scraps
Cut each piece out of the cardstock.  
Then select a fabric for each piece and trace around the cardstock onto the fabric.
Cut two out of the fabric, then cut one out of batting.

Step 2:  Layer the pieces in this order: fabric, cardstock, batting, fabric


Step 3:  Stitch around the shape 1/8" from the edge.

Repeat this process with all of the shapes.

Step 4: Cut out a folded piece of fabric about 10" x 14".

Turn it right sides together and stitch up the sides using a zigzag stitch.

Fold the top down 1/4", then another 1". 

Stitch in place, but leave about 1" open

Fasten a safety pin to a piece of ribbon and feed it through the casing.

Step 5:  Rip a few of the zigzag stitches out and feed the ribbon through to the front of the bag, then stitch up the opening.

That's it!  
Make some cute animals!


You can find more fun things to make here.
Enjoy your day!
xoxo
jessica


Tuesday, June 28, 2011

DIY Lavender Wand

The lavender from last week's Lavender Festival is still working it's magical wonders on me and our home. I thought I would create a DIY post for making those magically wonderful lavender wands.They are rather fun, quick, and easy to make.
The wand in this tutorial is not as big as the ones pictured above, however it is still fragrant and just as lovely to scent a drawer or closet.

What you will need:
11 or 13 fresh lavender reeds (picked from a lavender plant). It is quite important that the lavender is fresh and green as the reeds are pliable and not rigid.
1/8 inch wide ribbon (or 1/4 inch, but no wider) I used 1/8 in wide.
scissors

So to get started, cut your lavender reeds where they grow from the foliage of the plant. This will encourage new growth for the plant.You need an odd number of reeds and for your first attempt 11 or 13 is just right.

Strip your reeds of all the little foliage, so that it looks like this.
Next, bundle your reeds, so that the base of the lavender buds on each reed match up in the bundle.
Tie your reeds together at the base of the lavender buds with your ribbon, leaving one tail rather long (about 24 inches or so) for weaving in and out of the reeds.
So cute, right? I know, but it gets better. Now, fold the reeds over the lavender buds, so that the reeds are wrapped around the lavender buds. The reeds will encase the lavender buds. Does that make sense?
 Does that picture help? What about this one?
Are you still with me? Ok, so lets keep going, shall we? Here is where we get to weave the ribbon in the reeds.
Move the reeds around a bit so they are roughly even, all the way around the lavender. As you begin to weave and tighten the ribbon, this will shape up better. Make sure the short tail of your ribbon is tucked in well. Start to weave the long tail of your ribbon over and under each reed. It doesn't matter if you start over or under, just make sure you stay with your pattern.

Kinda looks like a spider, doesn't it? So keep gently weaving over and under each reed. When you reach your starting point, you will start your second row, which will automatically go over the reeds you wove under, and under the reeds you wove over. The beauty of using an odd number of reeds.
So now, all you have to do is keep weaving around, gently tightening as you go. Just keep weaving, just keep weaving, just keep wea-ving, wea-ving. . . (sorry, it just popped into my head). As you weave further down the lavender buds, your weaving will start to get smaller.
Now all we need to do is tie off your ribbon. First wrap the ribbon around the wand base one time and tie a half hitch in the ribbon, securing your woven ribbon.
Next, take your ribbon and make one loop on the right side of the wand, so that the ribbon is trailing behind the wand. The picture makes more sense.
From here, make a second loop on the left side of the wand, with the ribbon trailing on top of the wand.
Now, tie the two loops together like you did when you were learning to tie your shoes.
See how the ribbon tail is up? Pull it down over the first tie of your loops, and then tie your loops again to make a knot.
Trim off the ribbon tail and you are finished!

Set this lovely wand aside to dry for a few days. Give the bulb end a squeeze, inhale the relaxing, peaceful aroma, admire your handiwork, and slip it in a drawer or closet. Or package it up for a gift, or even use it as a gift topper. When you need to freshen the scent, just squeeze the bulb a few times and it will stimulate the lavender aroma again.
I LOVE these, and since I had a wonderful harvest of Lavender this year (thanks to the wonderful merchant at the Ferrell Shop in Oak Ridge), I am making several for gifts and for my linen closets. The more you make, the easier and faster it goes. Do you think you may try one? I would love to see pictures.
Heaps of love,
Shannon

Monday, June 27, 2011

Childproof Tablecloth

If you're new here, you may not remember my spring tablecloth.  
Well, as pretty as it was, it was not childproof.  
And unless I was willing to wash it every other night, it seemed to just stay dirty.
So I came up with a replacement.  

Super super easy.  My favorite local fabric store had some oilcloth on sale 50% off and so I bought 2 yards of this lovely Sandalwood from Amy Butler's Love collection.  
Since it was nice and wide, all I had to do was turn under the edges and stitch them down!   
It cleans up wonderfully, but still looks pretty. 
If you have a toddler, I would highly suggest making one of these!
xoxo
jessica

Saturday, June 25, 2011

*Inspired Homemaking* - Fourth of July Dessert Roundup

I am assigned to bring a cute July 4th dessert to the family party.  
Which should I make?
What are you making?

Loving these Mason Jar cupcakes!
I also think they could be made with angel food cake, strawberries, 
blueberries, and whipped cream.


Cupcake Kabobs.  So adorable.


They're all cute right?
What do you think?
xoxo
jessica

Friday, June 24, 2011

Onions have layers...

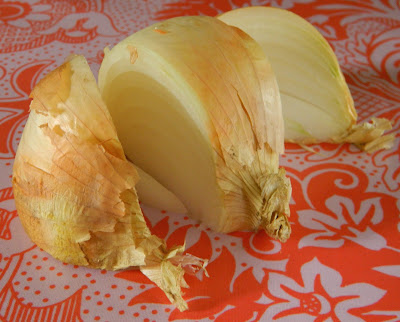
sliced onion

I'm kind of a curious person.  I love to learn new things, and yesterday while I was slicing an onion for dinner I wondered "is there anything good for you in this thing?"  
I mean, I use onions all the time for flavor, but do they provide any nutritional value?  
It's okay if you don't care about this - no offense taken - 
I know not everyone wonders about these sorts of things, but if you do,
or have,
or are wondering now...
here's what I found out.
Onions are in fact good for you!

They have many vitamins and minerals
C, B6, folate, fiber, potassium, chromium, and many more.

They are good for your cardiovascular health - preventing your blood from clotting too much, and lowering cholesterol.

When consumed regularly they can increase bone density, act as an anti-inflammatory, and can even help prevent colo-rectal, laryngeal, or ovarian cancers.
They also contain anti-bacterial properties and powerful anti-oxidants.
Good stuff!  I found that to receive most of these benefits we need to eat onions every day, or at least several times a week - so now you can feel good about that steaming bowl of onion soup (amazingly they don't loose any nutrients when cooked, they just transfer to the water!)
Happy cooking and happy weekend!
jessica 

Thursday, June 23, 2011

Classic Americana - a dress tutorial

It's that lovely time of year - fireworks, berry cobblers, cookouts, and family gatherings.
Hooray for the red, white, and blue!

Charlotte needed a new dress for the 4th of July. 
We had snagged a Tommy Hilfiger dress shirt at our local thrift store,
and I decided it would make the perfect patriotic outfit! 

Lots of cute tutorials have been done using dress shirts to make dresses - I couldn't find exactly what I was looking for, so I made a basic pillowcase dress out of the shirt! 

I made it with the thought that the buttons would go down the back,

but it could really go either way depending on our mood.


It's a pretty simple process. 
You'll need a man's dress shirt and about 6"x 45" of coordinating fabric.

Step 1:  Cut the arms and collar off the shirt.

Straighten up the edges so that you have a rectangle - mine for a size 3T was 19" wide x 20 1/2" long.

Step 2:  Right sides together, sew up the side seams, stopping about 5" from the top. 
I used a zig-zag stitch so I wouldn't have raw edges on the inside. 
Then open the underarm wide and pin the raw edge toward the wrong side of the dress.

Stitch in place with a zig-zag stitch.

Step 3:  Turn down the top edges about 1 1/2" toward the wrong side - making a casing for the straps.
Stitch in place.


Step 4:  Cut the coordinating fabric into two strips:  one 2 1/2" wide and one 3" wide.
Using a basting stitch, gather the 3" strip.  Pin it right sides together with the bottom of the dress and sew on.

Press it well.
Step 5:  Fold the 2 1/2" strip in half, right sides together, and sew along the length - creating a tube.  Try not to say bad words while you turn it inside out.  Attach a safety pin to one edge and guide it through the casing at the top of the dress.

Sew the two edges together.

Adjust the straps so that those edges are hidden in the casing.
And that's it.  Instant cuteness.


Happy sewing, friends!
xoxo
jessica

You may also enjoy...

Related Posts Plugin for WordPress, Blogger...