Thursday, July 26, 2012

{DIY}Selvage Chevron Pillow *West Elm Knockoff*


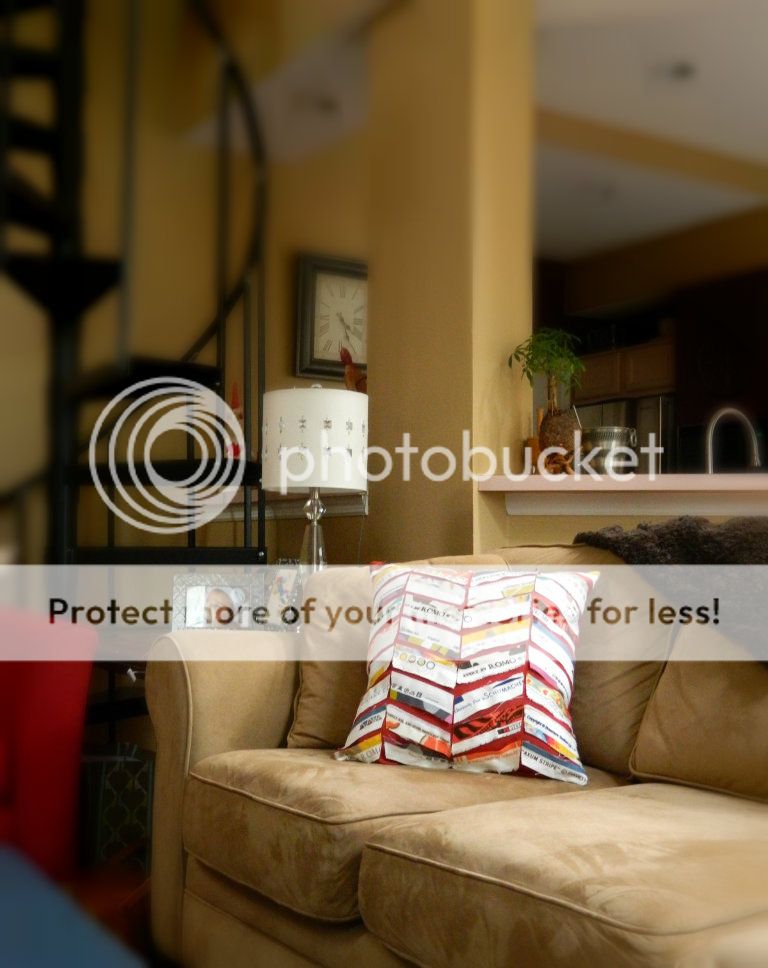
I've been watching Design Star the past few weeks, and I decided my throw pillows in our living room needed refreshing.  I wanted one or two texturally interesting pillows, then just a few basic knife-edge pillows.  This is one of my pillows to add some texture to our living room - and bonus, by using the selvages it also adds some typography!


That's my Mom and Dad's house btw - isn't it gorgeous?!
The one from West Elm doesn't use selvages and it still looks great - so you could make yours either way.
Here's West Elm's pillow:
And here's mine:

If you're ready to make your own, here's what you'll need:
various selvage scraps (or any kind of scraps)
1/2 yard of solid color home decor fabric
rotary cutter(not essential, but it makes it A LOT easier)
self-healing mat(for the rotary cutter)
18" pillow form
scissors/pins/thread/sewing machine/etc.

STEP 1:
Cut out 40 strips of fabric 1 1/2" x 6"
Then cut two squares 18"x18" out of the solid for your pillow.
(if you cut the pillow 18"x18" and then stuff it with an 18" pillow form it will be nice and full - use 3/8" seam allowance.)

STEP 2:
Lay the strips out on a self-healing mat, in the design you would like on your pillow.
Overlap the edges, adjusting the angle of your chevron.

Then, use the edge of a ruler to determine the point of the chevron.  Follow the edge of the ruler with the rotary cutter.  Repeat this at each chevron point. 
It should look like this:

STEP 3:
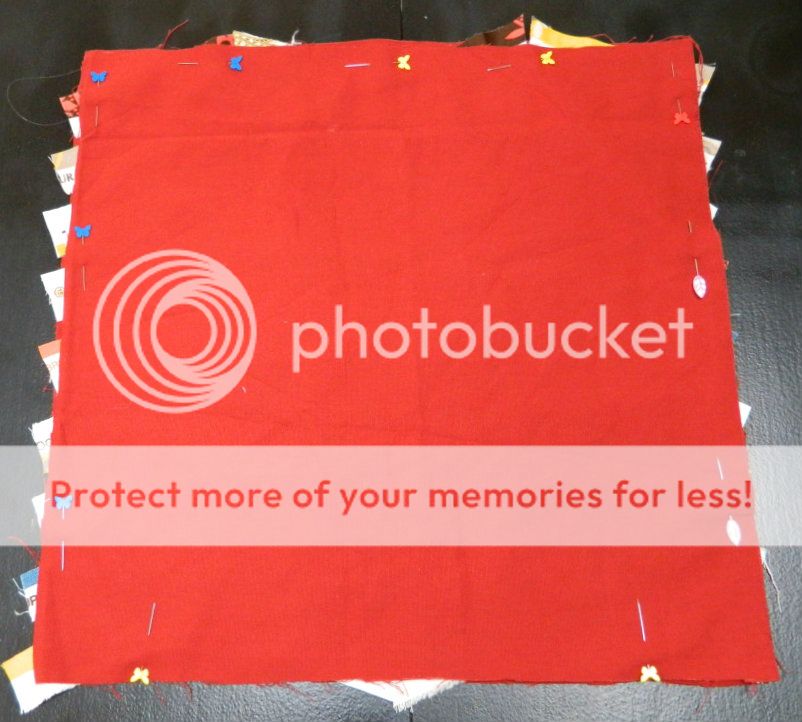
 Pin the strips onto one of the solid squares of fabric.

STEP 4:
Sew the strips on.  Starting at the top of the pillow, sew up the center of the first strip, then down the second strip - just following the chevron pattern.  When you reach the other side, just sew straight down the edge of the pillow(this will be in the seam allowance) until you get to the next row and begin sewing across those back to the other side.

STEP 5:
Pin the back to the front, right sides together and pin - leaving a substantial opening for the pillowform.


Sew around the edges using 3/8" seam, then clip the corners.

Turn right sides out and stuff with the pillowform. 
Close the pillow on the machine - see my tutorial on that here.
Enjoy your new designer pillow!

Happy Sewing!
xoxo
jessica

Friday, July 20, 2012

12 Tips for Traveling Internationally with Young Children

Whew - well, we made it.  
Me and the girls(3yrs and 3 mo.) around the world.  
For the past three weeks we've been visiting our family in the States.  It was a truly wonderful trip, and many members of our family were able to meet baby Lila for the first time.  
BUT this trip meant me flying across the world with our girls.  
by myself.  
truly something, if you had asked me even a year ago, that I would NEVER have thought I could do.
Yet there I was - barreling through the Tokyo Airport, a novelty to all Japanese travelers for sure

sweaty-American-lady pushes giant-luggage-cart with one hand and pulls giant-American-double-stroller with other hand

I got quite a few stares.
  
BUT the Japanese were their usual gracious selves and after recovering from the shock of what I was doing, many offered to help me push the stroller - all the while commenting how "kawaii" (cute) my girls were.


Needless to say I learned a lot.  So I'm here to share it with you!  
Traveling internationally with kids isn't easy, but it can be done without too much grief.
Door to door our travel time was about 24 hrs.  And before you go thinking - "well, she's just one of those people - laid back, doesn't require much sleep, super organized, etc. etc. let me assure you- I'm not.  
I love sleep.  
I'm hardly ever laid back, and organizing is not my strong point.  
It's really just all about attitude and preparation.  I tried to be brief in my tips, so that the post wouldn't end up looking like a novel, but if you have more questions, feel free to send me an email at jessica(at)sewhomegrown(dot)com!


1. Organize, Organize, Organize
Like anything else, having the right tools and organization is key to making your trip a success.  My go to tool - Ziploc Bags.  I get out a bunch of gallon size Ziploc bags and start labeling - *Passports and Boarding Passes, *Change of clothes, *Medicines, *Snacks, *Fun Activities, *Nursing Supplies *Diapers and Wipes
To me these are crucial.  I know where everything is, and it's not a jumbled mess inside the carry-on.
 
2. What Not To Wear 
I like to wear a cross between a cute outfit and a comfortable outfit.  For me, this means yoga pants, a tank top, and a cardigan.  For nursing, this is perfect, because the nursing tank with a cardigan gives you perfect access.  I also have a wonderful nursing cover that my mom made me - I highly recommend one if you're going to be nursing on a plane.


3.Eat, Drink, and Be a World Traveler
These are the types of things I pack in our Snack bag - Chocolate covered pretzels, Cliff Bars, KIND Bars, Starbucks VIA instant coffee, fruit snacks/fruit leather.  There are some great suggestions for grain-free snacking here, if you need that.  In the airport we try to eat semi-healthy.  Fruit is important because of the fiber.  You can also usually find a yogurt parfait thing - which does have more sugar than I usually want in my yogurt, but it's probably better than a candybar...


4. Just please don't throw up on Mommy... - Meds to Bring
In my Ziploc bag for meds I bring the following items: for me - ibuprofen, migraine medicine, anti-nausea medicine, Tylenol pm(usually for jetlag problems) for the kids - children's/infant Tylenol, Benadryl, children's anti-nausea medicine.  Just be sure the liquid medications are within the oz limitations.  You never know what illness could instantly come upon your child - they get sick so quickly, and it's best to be prepared.


5. Just Pack It, Pack It Good
So I believe on international flights you are allowed 2 suitcases per person, but there's no way I could handle all of that luggage by myself - so I packed 1 suitcase with clothing, and 1 suitcase with everything else: shoes, toiletries, gifts, etc.  The BEST way to pack your clothes is to roll everything up as small as it will go.  Worry about the wrinkles when you get there.


6. The Terminal - waiting for the plane
I brought our stroller with us, mainly for use in the airport.  You know how 3 year-olds are - FAST.  One minute they're standing beside you, the next they're hiding in a rack of souvenir clothing.  So I use the stroller to establish boundaries.  Either they sit in the stroller, or walk beside with one hand touching the stroller.  Once we get to the gate - we play all kinds of games, such as: Simon Says, a stretching game where we each think of stretches to make the other person do, or we play with toys(princesses and such).  I try to think of things to do to move around, 'cause there isn't a lot of moving around on a 12 1/2 hr flight to Tokyo.


7. Passport Please
I mentioned this before in the first tip - but I put all of our passports and boarding passes and customs documents in a Ziploc bag.  I get really nervous about these documents.  I check my bag about 50 times between the house and when we need them at the airport - in case our passports sprouted legs and arms and crawled out of the carry on.  Then when it's time for us to use all that stuff, I just whip out the Ziploc bag.  That way I'm not trying to hold 10 documents while wheeling the stroller.
 
8. Activities for the Airplane Ride
The first and most valuable tool I have for this situation is our iPad.  It's a lifesaver(especially when we got stuck on the plane at the gate for 4 hours...).  But if you don't have one, or can't afford one because you spent all your money on tickets to fly overseas, here are lots of other suggestions.  My three year old loves these mosaic activities by The Orb Factory.  She literally will do them for an hour.  Of course coloring activities are great - the Color Wonder markers are a revolution.  and then we always try to sleep some.  This usually doesn't happen until the last 4-5 hrs of the flight.
  
9. Are we there yet? - Disembarkation
 When we land Charlotte is usually two things - thirsty and incredibly tired.  I forgot to pour some juice into her cup the last time the flight attendants came by, so she was really really thirsty until we were able to buy something in the airport.  She is also so tired she usually cries the whole way off the airplane until we get the stroller.  Another plug for the stroller - when they are so tired after the plane ride they don't have to walk through the airport.  So the best things to remember are to snag a drink for them as the flight attendants pass through the last time, and just help them do the best they can.  If they are old enough, talk to them before hand, and prepare them for the tiredness they will feel.  Then at least they'll be expecting it.  When we get off, the first stop is the bathroom where I immediately change everyone's clothes.  It makes us all feel better to be in fresh outfits.  Then we head on to customs.


10. I was like, Baby, Baby, Baby, Oh
 I was really nervous about the whole baby thing.  After all, I was getting ready to trade our days for nights(Japan is 13hrs ahead of Florida).  But overall she did great.  Even better than me or Charlotte.  One suggestion for breastfeeding- don't go too long at night without nursing.  I just let her sleep('cause I wanted to sleep too) but I ended up getting a plugged duct.  It resolved a few days later, but wasn't any fun.  This hasn't been as much of an issue coming home, she's woken up plenty at night.  I didn't want to pay $1,000 for her to have her own seat - a sizable savings. and I just put her in a Baby Bjorn carrier.  That wasn't great, but it worked.  I would suggest bringing at least 3 changes of baby clothes, plenty of diapers and wipes, and if you formula feed bring way more than you think you will need - you never know when you might hit a delay.
 
11. Um, the Sun is Where the Moon Should Be... - dealing with jet lag
This is probably the worst part of traveling with little ones.  After all, the travel part only lasts 24 hrs...but jet lag lasts for a few days.  Here are my tips:  
*plan low key activities - I know if you are sightseeing this may be difficult, but especially the first day you probably need to just relax with your kids.  Here are some of our favorite low key activities -
Artwork:
I love the simple, yet adorable crafts from this website:

Read Books
Watch Movies
Play Outside at least 30 minutes(rain or shine to help your circadian rhythm)

*Drink lots of water - this just helps everything
*SLEEP - The first day I let my 3 yr old take a nap 1 hr longer than she usually does.  The second day, it's 30 minutes longer than usual, and by the third day I try to only let her sleep during the day like she normally would.  At night, it's a little trickier - but we try to have a snack and drink ready before we go to sleep. because she will wake up hungry, then if she has a difficult time going back to sleep, we let her listen to a story on the iPad or from a CD.  Obviously the baby can't do that - I just try to keep her room super dark and if she's awake just rock her.  I don't do anything to give her the idea that it's time to play.  We're still having jet lag right now and it's not fun(it's day 2 for us), but I know it won't last forever.

12.  Attitude is Everything
You control how you feel about this whole thing.  I could choose to get exasperated with my kids, or make up a team name and cheer for them as we go through security or customs(our team name was "The 3 Princesses").  I could choose to spend energy being frustrated at delays, or just take deep breaths and accept the things I can't change.  I gained a lot of confidence too - because I did it!  I survived, and it was worth it to me.

I hope this has been helpful - and I would love to hear any tips you may have!
I'm off to try to rest!
xoxo
jessica


Thursday, July 12, 2012

{DIY} Ombre Seashell Wreath


We just spent four lovely days on Sanibel Island with my family.(which Charlotte called Santa-bell Island)  Sanibel is one of the world's best places to collect seashells - and I confess, I love to be right out there with the leathery old ladies, bent over and almost compulsively stuffing seashells into my bag. 
But here's my problem - I collect these shells, admire their beauty, then stuff them in a bag... which sits in the car... until the end of summer... then stinks of old shells... but I don't have the heart to throw them away... so they get moved to the back of a closet somewhere.  It's such a sad little ending for these pretty shells - lonely and forgotten and longing for the sunlight to transform them into tiny jewels from the sea.
 
This ombre wreath was the perfect solution to my collecting addiction.

Now it may only interest me and the leathery old ladies, but I thought I'd share it anyway, in case you happen to have a bag of shells in your car... from last summer... or last week - whatever.
Here's what you'll need to make your own:
1 Wreath Form
1 Yard of Muslin
Lots of Hot Glue and a Glue Gun
and of course - Sea Shells of all colors, shapes, and sizes

....and here's the simple directions
~wrap the wreath form in torn strips of muslin
~arrange the seashells so that they begin with one color and fade into the next
~hot glue them on

Super easy and a not-so-tacky way to display your little treasures! 
You could also use a strong craft glue and let the little hands in your home help out.
 
happy crafting - and if you're a leathery old lady, I'll see you at the beach soon ;)
xoxo
jessica

The New *Sew Homegrown* in Japan

Well, I'm ready to start blogging again.
 I know I've been an unrealiable writer lately, well actually for the past year, but we've had such major changes I can't even apologize for my sporadic posting. 
If you're new to Sew Homegrown, last year my husband joined the Navy, we moved to Japan, and had our second child.


As many of you know - it takes a lot of time and energy to run a household and take care of two small children.  Of course, as you can imagine, things are a lot different living in Japan - there ain't any drive thru Chick-fil-a if you know what I mean. 
I don't want blogging to compete with my family life, so that's why I've decided upon a "once a week" blogging rule. I'll be writing here four times a month on the subjects of: sewing, living in Japan, crafting, and healthy living.  Limiting my posts will also allow me to create higher quality projects and pictures.

 I really enjoy blogging and am excited to continue; it has connected me with a wonderful community of like-minded people that I otherwise would never have met. I simply need to change my format and frequency of posts in order to integrate blogging into my new life in Japan.
Thanks so much to all of you who read this blog - you keep me motivated to do and try new things.  Looking forward to sharing my adventures with all of you!
xoxo
jessica

You may also enjoy...

Related Posts Plugin for WordPress, Blogger...