Thursday, March 31, 2011

*Inspired Homemaking*

Happy Thursday my friends -  Here are some links to enjoy on this last day of March (can't believe it!).  I think April is going to be just lovely.

Are you ready to spring clean?  Here are some amazing laundry rooms to inspire you:

I love these earthy eggs:
pic from here

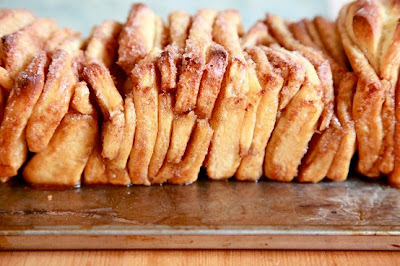
I am dying to make this pizza...Friday night?

And then this Saturday morning...

Then I'll have to do some of this...


We'll end with these wise words.


have a great day!
jessica

Wednesday, March 30, 2011

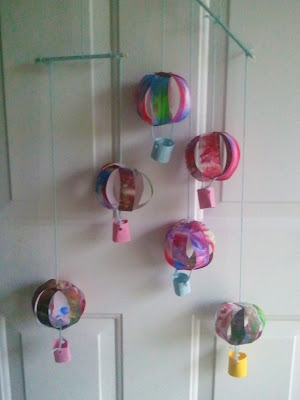
Kid's Craft / Mommy Craft: Hot Air Balloon Mobile


Sooooo this started out as a kid's craft, but the further along I got it really became a Mommy craft :)  Depending on the ages of your kids, they may or may not be able to help with the whole process.  On Mondays and Fridays I watch two other kids for a friend - one is a 3 year old girl - Charlotte's BFF, and one is a sweet little 3 month old boy.  So I've been trying to conjure up activities for us to do, especially on rainy days like we had on Monday.  Since the girls are 3 and 2 1/2 the only part they could really help with was the finger-painting.  But that was great fun. 
So here's how you and your kiddos can make your own hot air balloon mobile!

Supplies for one mobile:
2 pieces of white cardstock
1 piece of colored cardstock 
scissors
finger paint
yarn or string
2 long, thin dowels or skewers (I just cut the pointy ends off)
hole punch
stapler, tape.....glue possibly

Step 1:  Cut the pieces of cardstock in half, so you have four pieces 8.5" x 5.5" inches.  Finger paint both sides of all four pieces of paper.  Let them dry.

Step 2:  Cut the painted pieces of paper into 1" x 5.5" strips.  You will need 6 strips for 1 balloon.


Step 3:  Stack all 6 pieces and punch a hole through one end.  (you may have to do 3 at a time).
Step 4:  Lining up the holes, fan out the strips so they make a star shape.  Staple or tape them in the center - just don't cover the hole. 

Now bend them so that the other ends all meet - forming a sphere shape.  Tape/staple/glue/whatever to get those to stay in place.  ( I only have a tiny stapler, and it wasn't cooperating so I used tape.  If you have a large stapler I would suggest that.)

Step 5:  Make the "basket" by cutting a 1"x4" strip from your colored cardstock.  Roll it into a ring and tape in place.  Punch a hole in each side of the basket. 

Tie the string into a knot on one side of the basket.  Feed it through the balloon and tie it onto the other hole in the basket. 

Step 6:  Feed a piece string through the top hole you punched in the strips.  Use a small piece of tape to secure the string on the inside of the balloon.
Step 7:  Once you have made all the balloons you can begin to hang them on your dowels.  Cut one of the dowels in half so that you have 1 long one and 2 short ones.

{Optional step:  you can wrap the dowels in yarn - I thought it softened the look}

Hang one balloon from the center of the long dowel.  Hang a short dowel from each end of the long dowel.  From each end of the short dowels, hang one balloon.  On one of the short dowels hang the last balloon in the center. 

Enjoy!
xoxo
jessica

Tuesday, March 29, 2011

Demystifying Feng Shui

I've been wanting to write this post for a while now, ever since having a conversation with my sister about what Feng Shui is.
(pic from here - a good post about how to feng shui your bedroom)

Here's wiki's definition:  an ancient Chinese system of aesthetics believed to use the laws of both Heaven (astronomy) and Earth (geography) to help one improve life by receiving positive qi. 

The part I want to focus on is the "improving life by receiving the positive".  When applied to the home, it means that your home should be a positive place. It should make you feel positive.  Not annoyed.  Not exasperated.  Not stressed...........good luck right?  But it doesn't mean your home has to be perfectly clean.  It means your home should work for you.  Many of the aspects of Feng Shui are spiritual and claim to help you be more profitable in your money-making endeavors.  I'm not going to focus on that - the best way I know how to explain how I use Feng Shui is to give examples.  So here are several ways I have "Feng Shui'd" my home lately.

1.  The ironing board.  I was storing it in the laundry room.  Logical place in my mind.  However, every time my husband opened the door, the ironing board fell over on him.  (this never happened to me....must be his masculine muscular structure that forcefully swings the door open...)  Anyway, it bothered him.  Your home shouldn't bother you.  So I moved it.  Now it is over by my crafting area - which works well for me anyway.

2.  My sink.  In our bathroom, we have his and hers sinks.  For about 3 months now there has been a small piece of plastic in my drain that I stare at every time I brush my teeth.  It grosses me out.  Why have I left it there?  Because I am lazy.  But every time I use my sink I get an annoyed feeling.  Bad Feng Shui.  So the other day it took me about 3 seconds to reach in there with a pair of tweezers and take it out.  Now I have positive feelings instead of negative when I use my sink.

Is this starting to make sense?  You might think it seems silly - but start noticing around your house - what is annoying you?  What doesn't work for you?

3.  Last example:  Coffee.  My sister noticed that every morning she had to walk across the kitchen to get the sugar for her coffee.  And every evening she had to move the coffee beans across the kitchen to the grinder.  Not a big deal - but why not have them all together in a common place?  So she rearranged some things and now has a happy little coffee station. 

Again - not a big deal, but those little annoyances of life add up.  You should not get annoyed in your own home. There are plenty of other things to annoy you "out there".  For more information you can go here.  You can find lots of other resources by googling it - just try not to get bogged down with all of the "extra" stuff - just keep remembering YOUR HOME SHOULD WORK FOR YOU!!!! 

(pic from here)

your feng shui guru for the day,
jessica

p.s.  If you have more tips for how you feng shui, please tell us in the comments!

Monday, March 28, 2011

DIY Bunny Pencil Pouch - inspired by West Elm


I knew as soon as I saw these sweet little bunnies on West Elm, that I had to make one for Charlotte.

We are always toting around markers, pencils, crayons, etc - this makes a perfect gift.  Any little girl or boy would love to find one of these in their Easter Basket.  

You could fill it with stickers, crayons, notepad, markers, pencils, whatever!  It's pretty simple to make and should take you about an hour.

Here's what you will need:
2 buttons
embroidery floss
an old sweater (I used one that had been shrunk in the wash)
some lining fabric
printed fabric for the inside of the ears
small piece of velcro (one rough, one soft)
a pom pom for the tail
sewing machine/thread
scissors
yard stick
needle/thread

Step 1:  Cutting the pieces.  
Out of the sweater - cut one rectangle 6" long x 5 1/5" wide for the front
- one rectangle 8" long x 6 1/2" wide for the back
Out of the lining fabric cut one rectangle 14" long x 6 1/2' wide and
-one square 5" x 5" for the face
-cut four ears: two out of sweater material, and two out of a print
about 6" long x 1 3/4" wide at the base.  Taper them to look like ears.

Step 2:  Sew the ears right sides together.  Clip the top point flat and turn right sides out.
Now is the time to make the bunny face.  Sew two buttons on for eyes, and sew a little triangle for the nose.  I just drew a triangle with a water soluble pen and filled it in with stitches going back and forth.

Step 3:  Now it is time to assemble the face, ears, and back.  Lay the ears on the right side of the back, with the print facing up. 

Lay the face right side down on top of the ears.  Make sure all the edges are aligned, and then pin.  Sew along the edge you pinned - using about a 3/8" seam.

hello bunny :)

Step 4:  Lay the bunny wrong side down on top of the lining rectangle.
Trim the lining to match the shape of your bunny.

Now put them right sides together and pin around the edges.  Be sure to tuck the ears in so they won't get caught in the seam. 

Sew around the edge, leaving an opening in the bottom.  Press well and he should look like this:
Don't worry about closing that little opening - it will get caught in the next seam.

Step 5:  Sew the front pouch, right sides together, to the back.  Sew along the sides and bottom only.
Clip the corners, and flip him.  Press well.

Step 6:  Hand whip the velcro on - one piece on the pouch and one piece on the mouth.  

Hand whip the pom pom on the back.

There he is!  

What a cute little bunny.  Hoppy Monday!
xoxo,
jessica

Friday, March 25, 2011

4 hrs in the ER = no DIY for you today...

So yesterday I had to take a trip to the ER for a problem with ovarian cysts.  I won't give TMI, but I will say that I was working on a tutorial for you yesterday, but the pain got so bad I couldn't sew (that's how I knew it was serious...lol).  Everything is figured out and I am on some medicine and resting today - Ryan's home to care for me....such a great hubby.  So I hope you have a lovely weekend, and hopefully I will be back to myself by Monday.  Here are some pretty pics Charlotte and I took the other day walking around our yard.
xoxo
jessica

Thursday, March 24, 2011

*Inspired Homemaking*

Happy linky day!  I found lots of cute things this week - so check them out and have fun!

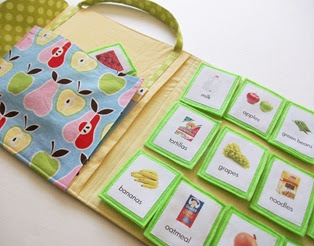
Loving this adorable Kid's Shopping Book tutorial.  Soooo cute.

This is a lovely and detailed tutorial for making your very own reversible Mixer Cover.
This would be a great wedding shower gift.

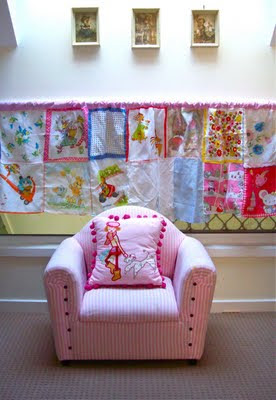
I am IN LOVE with this vintage hankie curtain she made for a little girls room.
Check it out on Beach Vintage.


Super cute fabric hairbow by Jessica from Happy Together on Whipup.

Great ideas for using Lemons to clean
over on Ask Anna

I'm feeling all kinds of linky today...here are some more!

 A cute wreath made from an egg carton - love it!

These recipe cards are sooooo adorable.  I want them all.


Lastly this birthday party is so cool - maybe for Charlotte's 3rd?!?


If you were featured in today's *Inspired Homemaking* grab your button over there on the right sidebar - Have a lovely day my friends!
jessica

Wednesday, March 23, 2011

*New Winner* of the Giveaway!!

The last recipient didn't contact me within the allotted time so...it was time to pick another!!  And the winner chosen by Random.org is...

Shannon

...who I happen to know in person!  A wonderfully creative girl - she's even guest posted here on Sew Homegrown - here here here, and here.  So congrats Shannon!  Send me your address and I'll send you your new bag!
xoxo
jessica

Decorating for the Seasons

So....guess what decorations are still up in my house.  St. Patricks?  nope.  Valentine's Day?  nope.
Snowy wintry snowman?  nope.

Christmas.

That's right.  Christmas.  I would like to tell you that I forgot to take it down because it was adorning some out-of-the-way corner - but it's not true.  It is hanging above my entertainment center. 

I stare at it every day.  When we sit our tired bums down in the evening we are greeted by this:

Cute for December.  Not-so-much for March.  I don't know why I haven't changed it - or at the very least taken it down.  BUT in the spirit of good Feng Shui (more on that tomorrow) I decided it was time.  Seize the moment.  Just do it.  blah blah blah.

So I took it down.  Now what?  Gotta be something cute...I write a blog about homemaking.  So it was off to the Dollar Tree to see what I could find.  Here's what I emerged with:
plus two mermaids, a bunch of play grapes, and a pretend baby bottle ;)

I wrapped some neutral yarn around the moss stones, gathered the flowers into a bunch, and added one of my floral eggs

Then I glued these flowers and moss stones to a piece of cardboard.

I cut around the cardboard so you can't see it from the front. 

I taped it to the window pane.   Lastly I taped a picture of Charlotte's first Easter onto the window, and wrote the word Spring with a dry erase marker.


There.  That's much better. 

So tell me...what's the longest you've left decorations up after the holiday has passed?
xoxo
jessica

You may also enjoy...

Related Posts Plugin for WordPress, Blogger...