Showing posts with label fall. Show all posts

Saturday, September 3, 2016

Reverse Applique Football T

It's football season y'all!
So today I lit a pumpkin spice candle, turned on the game, 
and whipped up this little t-shirt for Charlotte!


Y'all, I am so in love with reverse applique.
It's like regular applique but faster and easier and...reverse.


I'm gonna make one for my other two kiddos too! and maybe myself!
You know you want to try it out - keep reading for the tutorial!

Supplies:
t-shirt
jersey knit material (or an old t-shirt you can cut up)
embroidery floss
needle
scissors

Step 1:
Trace your pattern onto the shirt.
I used cookie cutters, but you could also print something
out that you find online.  This will be the line that you sew along.

Step 2:
Place your colors of knit under your design.
You can either just pin it in place, or use a little
craft glue to baste it.

Step 3:
Sew along the design that you traced with embroidery floss.
You can just use a running stitch.
(be careful to only sew two layers, not the back of the shirt!)

Step 4:
Now carefully separate the top layer from the bottom layer
and make a small slit with your scissors in the top layer.
I highly recommend a pair of tiny applique scissors for this,
but you can use regular fabric scissors in a pinch.


Step 5:
Now slide your scissors in sideways and begin to cut away
the top layer of t-shirt, revealing the color beneath.
This is the most fun step!!


Step 6:
Turn the shirt inside out cut the excess around the edges -
this is most important if your t-shirt is white.


And you just repeat those steps for the football!
I love this heart-shaped one for the girls,
but I'll do a regular shaped one for Hunter's.
I think she liked it!


Happy Football Season!
Jessica

Wednesday, November 16, 2011

Holiday Projects and Recipes

Well hey there.  I'm sorry I haven't posted in a while, there really is so much involved in moving to Japan...and being pregnant - and then I got a cold.  So I haven't made anything crafty , but I thought I would put a few of my links up from last year (I think around this time last year I only had about 150 followers ;)  So here's the list if you weren't around back then - and if you were, thanks for reading Sew Homegrown.  It may be slow here in the next month or so (which is a bummer because it's prime crafting season!) but I promise things will pick up once we're settled.  We're still not exactly sure when we're leaving for Japan, but we think it's around the first week of December.  So that kind of gives you a timeline.  Hope you're all doing well and having fun this very festive time of year!
xoxo
jessica

My absolute favorite holiday side dish.


and delicious and the perfect size to pop in your mouth!

This is a simple tutorial for making this colorful rice bag.

This Anthro knockoff has been one of my most popular posts, 
but in case you haven't seen it here's the link!


Monday, October 31, 2011

Our Halloween

This post is really for my hubby - who's away at training - but of course, I assume everyone will enjoy looking at our beautiful daughter ;)


I'd love to tell you that I made at least part of her costume...but it's just not true.

I don't think she minded.


It's good to be three.  and we are very three.

We ate our traditional chili.  
Every Halloween for as long as I can remember :)


Dora made an appearance on the pumpkin.

We hope yours was full of treats!


xoxo
jessica and charlotte

Monday, October 17, 2011

Hey, Pumpkin!

Lots of pumpkin things floating around these days!  
Really wonderful looking recipes.  
 (although nothing looks as wonderful as that sweet girl)

So you know, I started wondering - what's in pumpkins?  
 Vitamins?  Minerals?  
So here's what I found, plus a roundup of some delicious and healthy recipes!
Pumpkins contain a lot of vitamin A (the orange color is a big hint - think carrots)
They are full of fiber
low in calories (49 in a cup)
also contain vitamin C and potassium
and pumpkins are a fruit.  Did you know that?  I didn't.
So go ahead and try some pumpkin tonight!


Happy cooking, and hope you have a lovely fall day!
xoxo
jessica

Wednesday, October 5, 2011

{DIY} Love You to Pieces Skirt


Hey!  I'm excited to share this tutorial with you.  
This is another great way to use up scraps.  

My mom had made a quilt using Anna Maria Horner's new line Loulouthi -
and she had some wonderful scraps leftover.
We found this skirt as inspiration on Pinterest 

(how adorable is that?) 
and decided to make our own!  
Here are the supplies you'll need (I made a size 3T):
scraps of fabric that equal around 1 - 1 1/2 yards
24" of 3/4" elastic
scissors/pins/iron/thread/sewing machine

Step 1:
Cut the pieces.
You will need a Yoke Waistband, Skirt Fabric, and Contrast Band Hem.


Okay I know that's kind of a crazy picture.
I pieced a bunch of things because I was working with smaller scraps, but here are the dimensions explained:
Yoke: 5"x 23" (mine were in two pieces 5"x 12" and I had to sew them together)
Skirt: 8 1/2"x 46" when sewn together.  You will need to add an inch for every piece to allow for the seam allowance - when I laid these all out after cutting it measured 53", but after sewing them it measured 46".
Contrast Band: 3" x 46" when stitched together.  The same applies here - you may have to piece a few strips, but once you sew it together it should measure 3" x 46".

Step 2:
Sew all the skirt pieces together.  You should have a long piece that measures  8 1/2" x 46".
Serge or zig zag all of the seams.
 Step 3: 
Sew the Contrast Band strips together (right sides together) so that you have on long band 3" x 46".
  Lay it's right side against the wrong side of the skirt panel and pin. 
(This may seem wrong, but go with me here)
 Sew along the edge using 3/8" seam.
When you have finished, open it up and it will look like this:

Step 4:
Press 1/4" of the band toward the wrong side.
  

Then press the band up about 1" and pin it to the skirt panel.


Top stitch it in place.
Here's how it should look: front and back.

Step 5:
Using a basting stitch, sew along the top of the skirt panel twice and gather so that it measures 23".

Step 6:
Pin the yoke waistband right sides together along the gathered edge.

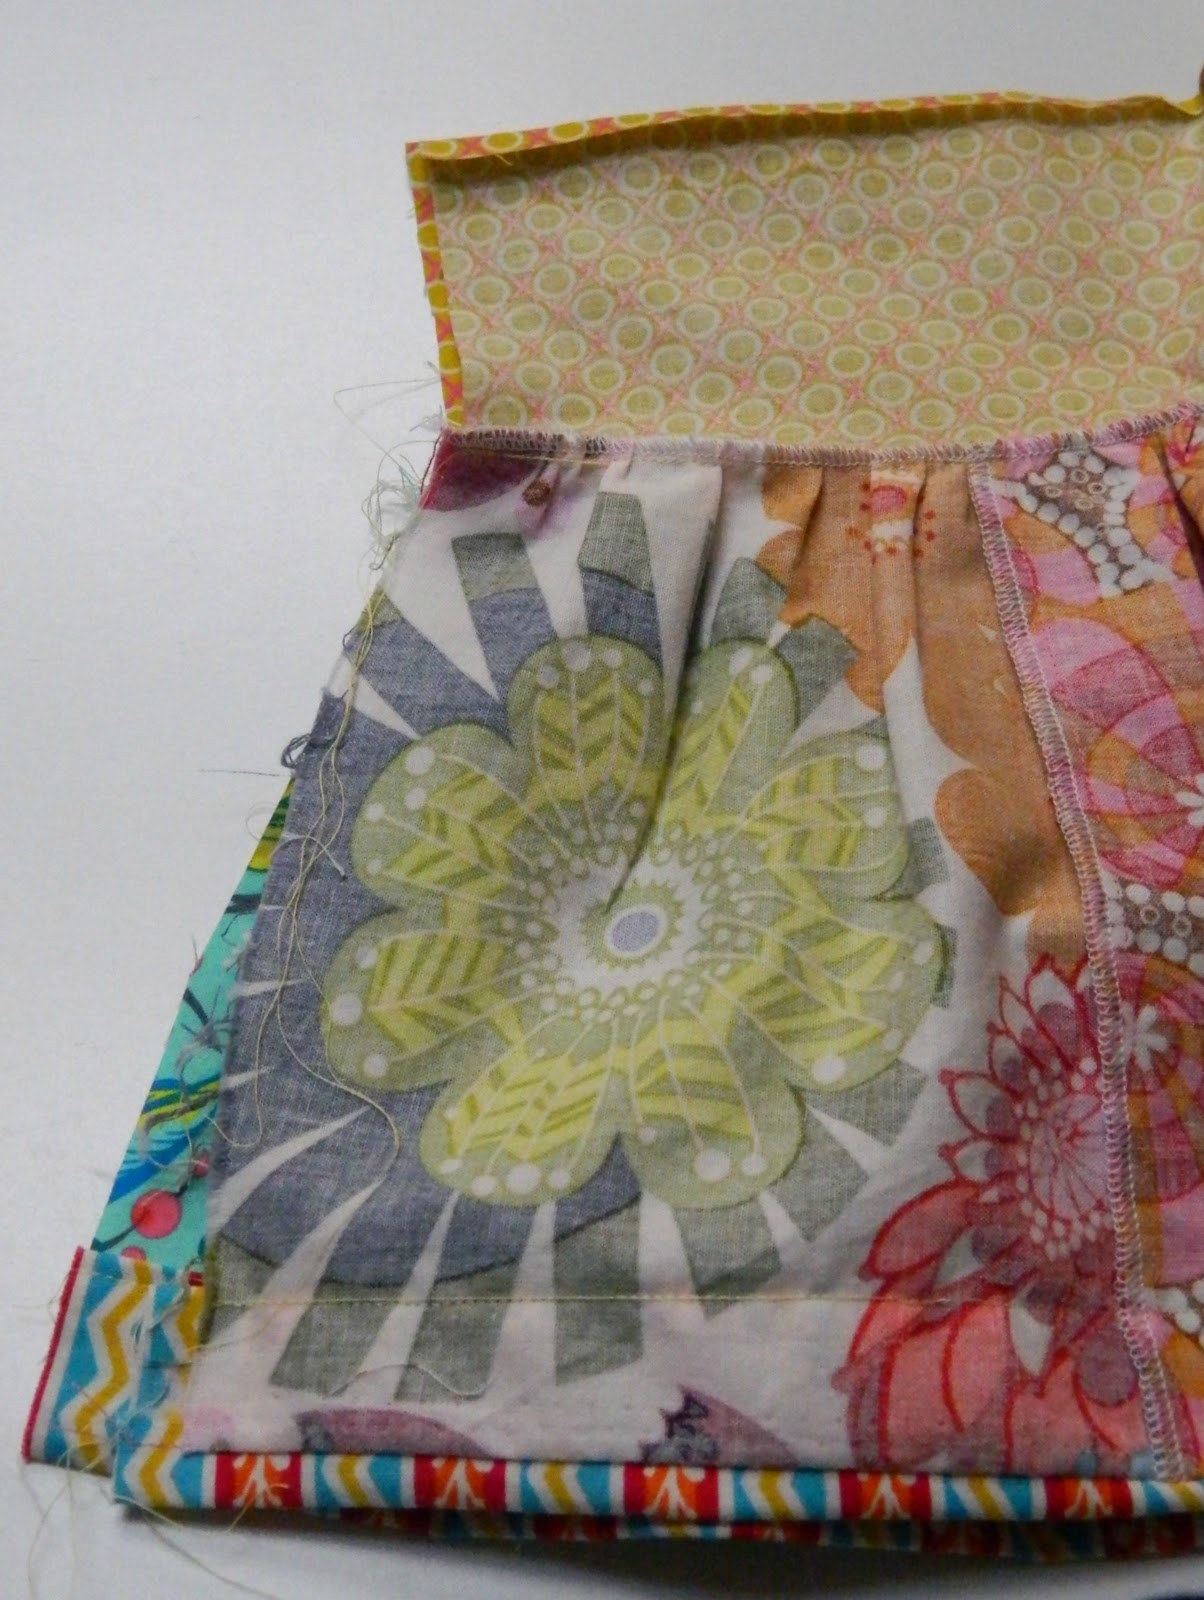
Stitch in place.
Zig zag or serge the seam then press it towards the skirt.
It should now look like this:

Step 7:
Press the top of the waistband under 1/4", then pin the edges of the skirt right sides together
and sew the side seam.
 Zig zag or serge the side seam.  

Step 8:
Fold the top of the yoke down about 1 1/2".  

Leave about a one inch opening, and stitch it in place.

Step 9:
Fasten a safety pin to one end of the elastic and run it through the casing.

Measure it on your kiddo to get the right size, then stitch the two elastic ends together.

Slip the elastic inside and topstitch the opening closed.

Step 10: 
This step is optional but it makes the garment look a little more professional and it will keep the elastic from rolling when you wash it.  Scoot the elastic to the bottom of the casing, and top stitch around the top of the yoke, about 1/8" down from the top.

When you are finished, it will look like this:


That's it! Enjoy watching your cutie spin and play in her new skirt!


happy sewing,
xoxo
jessica

You may also enjoy...

Related Posts Plugin for WordPress, Blogger...