Showing posts with label home decor. Show all posts

Monday, May 13, 2013

{DIY} Faux Boat Wood - how to make painted wood look chipped and old


I have been in love with boat wood for a long time.  The vibrant colors, texture, and the story - salvaged wood that's been a part of countless voyages on the sea...it all appeals to my sense of style.  Unfortunately, it's really expensive.  So, as the Officer and I were discussing our headboard options, I pointed out that I'd really looooooove a boat wood headboard.  We studied several photos and realized we couldn't think of any distressing method that would create the look we desired. 

It doesn't look sanded or faded. 
It looks like it's been chipped away.  Now, for a moment I actually considered painting the wood then taking a chisel and chipping pieces off... it was a crazy DIYer moment.  

Thankfully we did more research and came across a very simple technique that worked perfectly.  Lucy of Lucy Designs demonstrates this method, and even though she's not trying to emulate boat wood - it creates the same effect.  And here's the best part:  the only tool you'll need is a block of wood.  I'm talkin' a hunk of a 2x4.  I think anyone can come across one of those.  

Once you've found a block of wood and selected your paint colors, simply pour one color of paint onto a paper plate, dip the wood block in it, and slide it across your wood in a long sweeping motion.  Follow the length of the board.  It will create this really cool weathered and chipped look.  Once the first layer has dried, paint another layer - continue this method until you are happy with the results.


We painted the boards in groups of 3 or 4 so it would look like some of them came from the same boat.  The entire project only cost us $20, because the wood we used was from reclaimed pallets. 
 
The Officer also fashioned that awesome anchor from some of the scrap wood - he's amazing.
I know this style isn't for everyone - but we really love our eclectic, beachy, colorful bedroom!  Hope you had a great weekend!!
jessica

Wednesday, March 20, 2013

Barndoor Baby Gate

Well, I can't believe it but next week little Miss Lila turns 1!!  She has become extremely mobile...including walking :)  So a few weeks ago it was time to put up the baby gates.  
Our not-so-lovely-but-thankful-we-have-it military housing comes with the really steep stairs.  With really sharp edges.  
So we needed to stop little Miss from climbing them (and she IS a climber!).  I'm really not a huge fan of the plastic baby gates...they don't have a lot of character and are really expensive for what you get.  So my crafty husband searched the internet for a better solution and came across this lovely barndoor baby gate plan from Remodelaholic.  He used mostly pallet wood - so they were very inexpensive.  Like most everything else in our house we decided to add color.  In fact my daughter has been known to punish her dolls by making them wear all white or all grey...the horror!

The gate at the bottom of the stairs had to be hinged in the center - there wasn't enough room to open it all the way.  

It simply folds neatly against the wall.
(don't you love that handrail...?) 

My thanks to the Officer for his mad woodworking skills. 
I love them, and they add just a little more character to this big white box we live in...that I'm very thankful for ;)
xoxo
jessica
p.s. Be happy with what you have and you will have plenty to be happy about.

Wednesday, November 28, 2012

Christmas by the {Faux} Fireside...

 Well hello there.  I really hope all is well with you, and that you had a lovely Thanksgiving holiday!  Ours was spent with some new but dear friends here in Japan.  It was the kind of relaxed, comfortable fun that everyone hopes for.
I love having people over, not only because I enjoy their company but because of the motivation I find to clean and decorate.  The Sunday before Thanksgiving, the Officer and I were discussing possibilities for places to hang our stockings for Christmas.  He remembered seeing plans for a faux fireplace on the Ana White's blog - and I instantly fell in love.  


I'm thankful that we are able to live on base in military housing, but these town homes are basically big white boxes.  Everything is white - floors, walls, ceiling, appliances, closets- no character whatsoever...so my challenge is to bring in color and character in unconventional ways.  
This faux fireplace accomplishes both! 
So there we were - hammering, sanding, cooking Thanksgiving dinner...at one point I running from the kitchen to the backyard - drying cornbread and painting at the same time.  Wednesday night we brought it in and the Officer installed it - anchoring it into the wall with a couple of screws. 

You can find the tutorial for this faux fireplace at Ana's blog here.


This fireplace was pretty easy to build - and the added touch of chalkboard paint provides some whimsy.  So what do you think?  Where do you hang your stockings if you don't have a fireplace?  Hope you're all having fun decorating!!
xoxo
jessica

Wednesday, October 3, 2012

Been doing a little Studying...


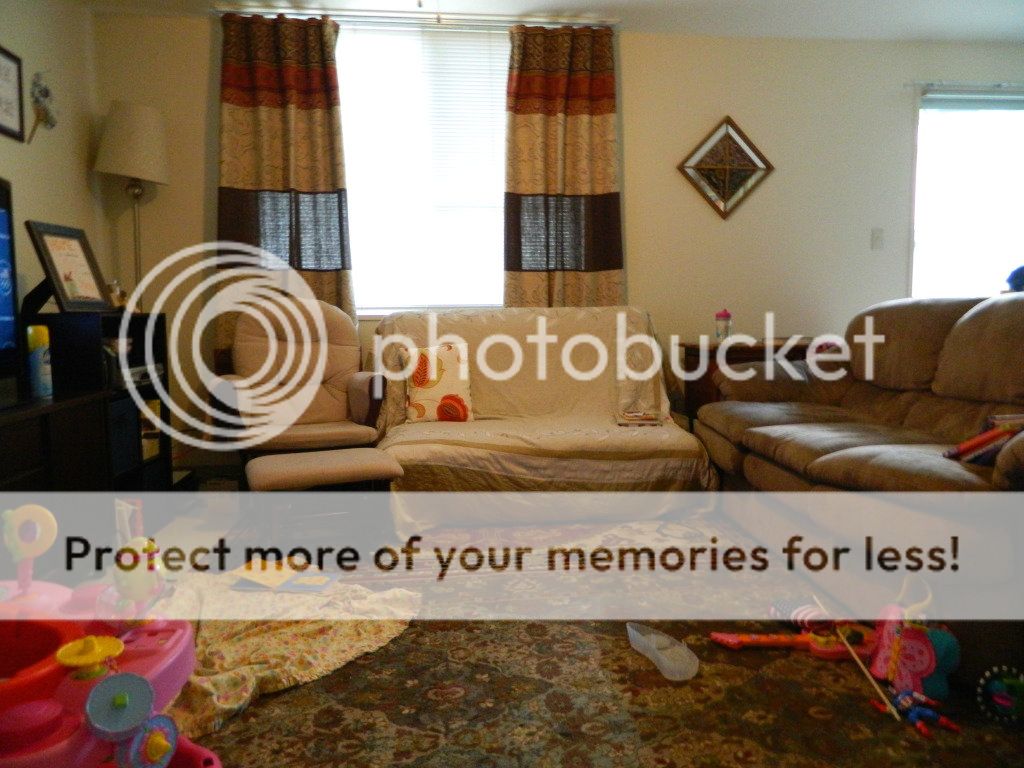
Field Studying that is!  Anna Maria Horner's new line Field Study came out a few weeks ago.  I've been wanting to revamp the futon that's in my living room and this collection was just begging for the job.  I promptly ordered two FQ bundles from Hawthorne Threads (Gypsy and Patina palettes) and then tried to wait patiently for them to come in the mail.  When they got here, last Wednesday, I immediately flew into a cutting and piecing frenzy (take out dinners anyone?) and completed this futon cover in two days :)  


I'm really loving the way it turned out.  It kind of feels like a party in my living room all the time now - which I'm thinking is going to be perfect for these fast-approaching dreary winter days (that's when I miss Florida the most...)  So here's a question - pillows or no pillows?  and should I stick with the yellow pillows or choose another color?  


Thoughts please.  
Have you made anything with Field Study yet?
xoxo
jessica

Wednesday, August 8, 2012

Staging Your Home: The Hostess's Secret Weapon


While I was in college I worked for an interior design firm one summer.  I mostly did things like pickups, deliveries, paperwork - but for a few weeks I was assistant to a decorator who staged model homes.  Or actually re-staged model homes.  We would go into an existing model home - she would survey the situation, and then we would  proceed to rearrange the entire house (great exercise) until it looked new and fresh.  Occasionally we would bring in some new accessories, but usually we just worked with what was already there.  This little skill has come in handy many times in my life - especially when I find myself trying to sew 10 new pillows the night before a party.  
So I thought I'd share this with you.  
If you're getting ready for a party or gathering, don't worry about buying new stuff or making 10 new pillows the night before - simply take things from elsewhere in your home (especially if there are rooms in your house the company won't see) and place them in the main gathering area - giving it fresh new life without spending a dime.  This is what I found myself doing the other day as I was getting ready for a meeting in my home.  So I took before and after pictures.  
The before looks pretty sad, but it certainly create a dramatic change ;)

BEFORE:

AFTER:

So here's what I did: 
  • I brought in a bench to serve as a coffee table - it was by my front door, really not serving any purpose but to collect junk.
  • Most of the pillows on the two sofas are from the guest bed upstairs.  They matched the living room just fine, and no one was going to go upstairs to see the bare bed.
  • I took the blue mason jar from the bathroom and created a floral arrangement with flowers from our bedroom.  They really brightened up the corner.
  • And of course I cleaned and picked up too.

So I didn't do anything too complicated, but those small touches made the room feel complete.  I hope this little tip is helpful the next time you are having a party - don't spend a lot of money, just use the things you have in a new and fresh way.  
Happy Decorating!
xoxo
jessica

Wednesday, April 4, 2012

Colorful, Whimsical Nursery


Both times I've decorated our nursery I've avoided the typical pink.  Nothing wrong with that, but I'm of the persuasion that the nursery should really be more for Mommy than for baby.  After all, you're the one who is stumbling in with one eye open at 2am - might as well make it a happy place to stumble into right?  Charlotte's nursery was green and cantaloupe - don't laugh at my old photography skills..... 
but be thankful I've improved ;)


So this time I chose yellow and berry as the main colors, but more and more colors kept adding themselves...and I kind of love it.  It's really cheerful and baby appropriate, but also Guest-Bedroom-worthy.  Here's the tour - enjoy!


My sister created this artwork based on a print we had seen in Urban Outfitters.  She made sure Japan is in the picture, but Florida is so far away it didn't make it :(


She certainly is the center of our little world right now!  I'll be going on blogger maternity leave now, not sure how long I'll be gone but be sure to enjoy my archives - look at the top of the site for the categories.  Happy homemaking!
xoxo
jessica

Tuesday, March 6, 2012

How to Close a Pillow Using Your Sewing Machine


All of the pillows I've been making for the guest bed are knife-edge pillows.
Simple clean lines, and super easy to sew, but I thought I would demonstrate how to close one of these suckers once you have it stuffed.  You could, of course, close it by hand - but every time I do that it seems to come undone at some point.  
Here's how you can create pretty professional-looking pillows!


Step 1:  Before you stuff the pillow, press the open edges under about 1/2" - 
when it's stuffed it will look like this:


Step 2: Then use a straight pin and pin the center of the opening closed - be sure the head of your pin is facing left(the point will be facing your machine) to ensure easy removal while sewing.


Then pin it closed to the right and left of the center pin.


Step 3:  Lift your presser foot as high as it will go and wedge the pillow underneath it - about 1/4" ahead of the opening, and far enough in that you will get a 3/8" seam.  


Here's the trick.  Keep your left hand on the pillow and apply pressure towards the machine while your right hand guides the pillow through the presser foot.  Go slowly and keep the edge of the pillow lined up with the edge of the presser foot (an easy way to make a 3/8" seam).  


Continue this until you sew about 1/4" past the edge of the opening.  


Then cut your threads and you're done!  


This may take a little practice, because the pillow will want to shoot out towards the left - but that's what your left hand is there for.  
Be firm and count it as your upper body workout for the day.  
Once you master this technique you will love it.  Good luck and if you have any questions feel free to email me: jessica(at)sewhomegrown(dot)com.!!
Happy Sewing!
xoxo
jessica

Thursday, March 1, 2012

{DIY} The Letter Pillow

Today's post is brought to you by...
the letter L!


I mentioned it in my last post - our baby girl's name is going to be Lila.  
Lila Marian to be exact (Marian is my grandmothers name).
Do you remember on the TV show Friends, when Rachel has her baby Emma, they have a large letter E hanging on the wall?  

I've always loved that - so I decided to make my own!
Thankfully the letter L wasn't too tricky - if you have a name that begins with S or R...I'm not sure this is the project for you, but you could always give it a try!

This project was fairly simple - it took me about 2 hours, and I was stopping to take pictures.  If you're game to make your own, here's the stuff you'll need:


My finished dimensions are for a letter L - 21"x17" (those are the long sides of the L).  
Your trim should be only about 3/8" - 1/2" wide.

Step 1: 
Go ahead and heat up your glue gun now - then, with your fabric folded in half, selvage to selvage, begin to take measurements.  From the top left corner measure 8 1/2" and put a mark.  From the center of the bottom edge, measure up 8 1/2" and put a mark.  From the bottom right corner measure up 8 1/2" and put a mark.  Connect the dots by drawing lines to complete the L.  Cut along those lines.  
The top edge of the L will still be a fold - cut along the fold so that you have a front L and a back L.


Step 2:  
Lay the front and back pieces right sides together and pin along the edges.  When you sew, you are going to leave 2 openings.  One at the top of the L and one at the bottom right edge of the L.


Sew along the edge using 1/2" seam.


Step 3:  
Cut every corner diagonally about 1/8" from the seam.  This will make the corners pretty when you flip it right sides out.


Also clip the inside corner of the L to within 1/8" of the seam.
(If you are doing a different letter with more corners or curves be sure to clip all of them)


Step 4:  
Flip the letter right sides out and press it well.  You may need to use a ripper to gently pull the corners right sides out.  

Be sure along the openings to press the fabric in 1/2" to prepare it for closing.


Step 5:  
Stuff the letter with polyfil.  You want to give it some shape, but not make it too poofy.  Another option would be to use batting in the shape of an L - but you would have to insert it back in step 3.


Step 6:  
Pin the openings closed.


Starting at the top corner, sew the opening closed - using 3/8" seam.  Continue sewing around the entire letter.  This little flange or ledge is what you will glue your trim onto.


 This is a little bit tricky.  
The key is to go slowly and really guide the letter through the machine - kind of squeezing the stuffing out of the way as you go.
It should look like this when you're finished.


Step 7:  
Starting at one corner, glue the trim onto the little flange you made.  Go slowly and just use a small amount of glue

 
Step 8:   
Lastly, hot glue little pieces of ribbon or rick rack to the back to use when hanging.  I put one in the center of the top edge, and one in the top corner of the far left edge.


That's it!!  A sweet little letter to hang on the wall or put on a shelf or toss on a bed!!

Happy sewing everyone!!
xoxo
jessica


You may also enjoy...

Related Posts Plugin for WordPress, Blogger...