Showing posts with label baby. Show all posts

Wednesday, March 20, 2013

Barndoor Baby Gate

Well, I can't believe it but next week little Miss Lila turns 1!!  She has become extremely mobile...including walking :)  So a few weeks ago it was time to put up the baby gates.  
Our not-so-lovely-but-thankful-we-have-it military housing comes with the really steep stairs.  With really sharp edges.  
So we needed to stop little Miss from climbing them (and she IS a climber!).  I'm really not a huge fan of the plastic baby gates...they don't have a lot of character and are really expensive for what you get.  So my crafty husband searched the internet for a better solution and came across this lovely barndoor baby gate plan from Remodelaholic.  He used mostly pallet wood - so they were very inexpensive.  Like most everything else in our house we decided to add color.  In fact my daughter has been known to punish her dolls by making them wear all white or all grey...the horror!

The gate at the bottom of the stairs had to be hinged in the center - there wasn't enough room to open it all the way.  

It simply folds neatly against the wall.
(don't you love that handrail...?) 

My thanks to the Officer for his mad woodworking skills. 
I love them, and they add just a little more character to this big white box we live in...that I'm very thankful for ;)
xoxo
jessica
p.s. Be happy with what you have and you will have plenty to be happy about.

Tuesday, October 16, 2012

The Rainbow Brite Hat

As a child of the 80's I definitely remember Rainbow Brite - do you?  Her colorful costume is exactly what came to mind as I was crocheting this little baby hat for my sweet Lila.  


I'm no great crocheter or knitter, but I do have a thing for yarn, and as soon as the weather gets a little chilly I love to curl up with a cup of tea, Norah Jones, and a lap full of yarn.  This is just a simple single crochet hat - nothing fancy.  I used a free pattern you can find here.  I added the ear flaps because it will never stay on her head if I don't tie it on.
  
So how about you - any crochet/knitting projects up your sleeves?
xoxo
jessica

Friday, July 20, 2012

12 Tips for Traveling Internationally with Young Children

Whew - well, we made it.  
Me and the girls(3yrs and 3 mo.) around the world.  
For the past three weeks we've been visiting our family in the States.  It was a truly wonderful trip, and many members of our family were able to meet baby Lila for the first time.  
BUT this trip meant me flying across the world with our girls.  
by myself.  
truly something, if you had asked me even a year ago, that I would NEVER have thought I could do.
Yet there I was - barreling through the Tokyo Airport, a novelty to all Japanese travelers for sure

sweaty-American-lady pushes giant-luggage-cart with one hand and pulls giant-American-double-stroller with other hand

I got quite a few stares.
  
BUT the Japanese were their usual gracious selves and after recovering from the shock of what I was doing, many offered to help me push the stroller - all the while commenting how "kawaii" (cute) my girls were.


Needless to say I learned a lot.  So I'm here to share it with you!  
Traveling internationally with kids isn't easy, but it can be done without too much grief.
Door to door our travel time was about 24 hrs.  And before you go thinking - "well, she's just one of those people - laid back, doesn't require much sleep, super organized, etc. etc. let me assure you- I'm not.  
I love sleep.  
I'm hardly ever laid back, and organizing is not my strong point.  
It's really just all about attitude and preparation.  I tried to be brief in my tips, so that the post wouldn't end up looking like a novel, but if you have more questions, feel free to send me an email at jessica(at)sewhomegrown(dot)com!


1. Organize, Organize, Organize
Like anything else, having the right tools and organization is key to making your trip a success.  My go to tool - Ziploc Bags.  I get out a bunch of gallon size Ziploc bags and start labeling - *Passports and Boarding Passes, *Change of clothes, *Medicines, *Snacks, *Fun Activities, *Nursing Supplies *Diapers and Wipes
To me these are crucial.  I know where everything is, and it's not a jumbled mess inside the carry-on.
 
2. What Not To Wear 
I like to wear a cross between a cute outfit and a comfortable outfit.  For me, this means yoga pants, a tank top, and a cardigan.  For nursing, this is perfect, because the nursing tank with a cardigan gives you perfect access.  I also have a wonderful nursing cover that my mom made me - I highly recommend one if you're going to be nursing on a plane.


3.Eat, Drink, and Be a World Traveler
These are the types of things I pack in our Snack bag - Chocolate covered pretzels, Cliff Bars, KIND Bars, Starbucks VIA instant coffee, fruit snacks/fruit leather.  There are some great suggestions for grain-free snacking here, if you need that.  In the airport we try to eat semi-healthy.  Fruit is important because of the fiber.  You can also usually find a yogurt parfait thing - which does have more sugar than I usually want in my yogurt, but it's probably better than a candybar...


4. Just please don't throw up on Mommy... - Meds to Bring
In my Ziploc bag for meds I bring the following items: for me - ibuprofen, migraine medicine, anti-nausea medicine, Tylenol pm(usually for jetlag problems) for the kids - children's/infant Tylenol, Benadryl, children's anti-nausea medicine.  Just be sure the liquid medications are within the oz limitations.  You never know what illness could instantly come upon your child - they get sick so quickly, and it's best to be prepared.


5. Just Pack It, Pack It Good
So I believe on international flights you are allowed 2 suitcases per person, but there's no way I could handle all of that luggage by myself - so I packed 1 suitcase with clothing, and 1 suitcase with everything else: shoes, toiletries, gifts, etc.  The BEST way to pack your clothes is to roll everything up as small as it will go.  Worry about the wrinkles when you get there.


6. The Terminal - waiting for the plane
I brought our stroller with us, mainly for use in the airport.  You know how 3 year-olds are - FAST.  One minute they're standing beside you, the next they're hiding in a rack of souvenir clothing.  So I use the stroller to establish boundaries.  Either they sit in the stroller, or walk beside with one hand touching the stroller.  Once we get to the gate - we play all kinds of games, such as: Simon Says, a stretching game where we each think of stretches to make the other person do, or we play with toys(princesses and such).  I try to think of things to do to move around, 'cause there isn't a lot of moving around on a 12 1/2 hr flight to Tokyo.


7. Passport Please
I mentioned this before in the first tip - but I put all of our passports and boarding passes and customs documents in a Ziploc bag.  I get really nervous about these documents.  I check my bag about 50 times between the house and when we need them at the airport - in case our passports sprouted legs and arms and crawled out of the carry on.  Then when it's time for us to use all that stuff, I just whip out the Ziploc bag.  That way I'm not trying to hold 10 documents while wheeling the stroller.
 
8. Activities for the Airplane Ride
The first and most valuable tool I have for this situation is our iPad.  It's a lifesaver(especially when we got stuck on the plane at the gate for 4 hours...).  But if you don't have one, or can't afford one because you spent all your money on tickets to fly overseas, here are lots of other suggestions.  My three year old loves these mosaic activities by The Orb Factory.  She literally will do them for an hour.  Of course coloring activities are great - the Color Wonder markers are a revolution.  and then we always try to sleep some.  This usually doesn't happen until the last 4-5 hrs of the flight.
  
9. Are we there yet? - Disembarkation
 When we land Charlotte is usually two things - thirsty and incredibly tired.  I forgot to pour some juice into her cup the last time the flight attendants came by, so she was really really thirsty until we were able to buy something in the airport.  She is also so tired she usually cries the whole way off the airplane until we get the stroller.  Another plug for the stroller - when they are so tired after the plane ride they don't have to walk through the airport.  So the best things to remember are to snag a drink for them as the flight attendants pass through the last time, and just help them do the best they can.  If they are old enough, talk to them before hand, and prepare them for the tiredness they will feel.  Then at least they'll be expecting it.  When we get off, the first stop is the bathroom where I immediately change everyone's clothes.  It makes us all feel better to be in fresh outfits.  Then we head on to customs.


10. I was like, Baby, Baby, Baby, Oh
 I was really nervous about the whole baby thing.  After all, I was getting ready to trade our days for nights(Japan is 13hrs ahead of Florida).  But overall she did great.  Even better than me or Charlotte.  One suggestion for breastfeeding- don't go too long at night without nursing.  I just let her sleep('cause I wanted to sleep too) but I ended up getting a plugged duct.  It resolved a few days later, but wasn't any fun.  This hasn't been as much of an issue coming home, she's woken up plenty at night.  I didn't want to pay $1,000 for her to have her own seat - a sizable savings. and I just put her in a Baby Bjorn carrier.  That wasn't great, but it worked.  I would suggest bringing at least 3 changes of baby clothes, plenty of diapers and wipes, and if you formula feed bring way more than you think you will need - you never know when you might hit a delay.
 
11. Um, the Sun is Where the Moon Should Be... - dealing with jet lag
This is probably the worst part of traveling with little ones.  After all, the travel part only lasts 24 hrs...but jet lag lasts for a few days.  Here are my tips:  
*plan low key activities - I know if you are sightseeing this may be difficult, but especially the first day you probably need to just relax with your kids.  Here are some of our favorite low key activities -
Artwork:
I love the simple, yet adorable crafts from this website:

Read Books
Watch Movies
Play Outside at least 30 minutes(rain or shine to help your circadian rhythm)

*Drink lots of water - this just helps everything
*SLEEP - The first day I let my 3 yr old take a nap 1 hr longer than she usually does.  The second day, it's 30 minutes longer than usual, and by the third day I try to only let her sleep during the day like she normally would.  At night, it's a little trickier - but we try to have a snack and drink ready before we go to sleep. because she will wake up hungry, then if she has a difficult time going back to sleep, we let her listen to a story on the iPad or from a CD.  Obviously the baby can't do that - I just try to keep her room super dark and if she's awake just rock her.  I don't do anything to give her the idea that it's time to play.  We're still having jet lag right now and it's not fun(it's day 2 for us), but I know it won't last forever.

12.  Attitude is Everything
You control how you feel about this whole thing.  I could choose to get exasperated with my kids, or make up a team name and cheer for them as we go through security or customs(our team name was "The 3 Princesses").  I could choose to spend energy being frustrated at delays, or just take deep breaths and accept the things I can't change.  I gained a lot of confidence too - because I did it!  I survived, and it was worth it to me.

I hope this has been helpful - and I would love to hear any tips you may have!
I'm off to try to rest!
xoxo
jessica


Wednesday, April 4, 2012

Colorful, Whimsical Nursery


Both times I've decorated our nursery I've avoided the typical pink.  Nothing wrong with that, but I'm of the persuasion that the nursery should really be more for Mommy than for baby.  After all, you're the one who is stumbling in with one eye open at 2am - might as well make it a happy place to stumble into right?  Charlotte's nursery was green and cantaloupe - don't laugh at my old photography skills..... 
but be thankful I've improved ;)


So this time I chose yellow and berry as the main colors, but more and more colors kept adding themselves...and I kind of love it.  It's really cheerful and baby appropriate, but also Guest-Bedroom-worthy.  Here's the tour - enjoy!


My sister created this artwork based on a print we had seen in Urban Outfitters.  She made sure Japan is in the picture, but Florida is so far away it didn't make it :(


She certainly is the center of our little world right now!  I'll be going on blogger maternity leave now, not sure how long I'll be gone but be sure to enjoy my archives - look at the top of the site for the categories.  Happy homemaking!
xoxo
jessica

Tuesday, April 3, 2012

Our very own little blossom...

I'd love to introduce you to little miss Lila Marian, who arrived 1 week ago today!
March 27th, 2012 
8:22pm
8lbs 6oz
21"


We are enjoying every moment with this sweet, healthy baby.  
I'm sure there will be more pics to come.
xoxo
jessica


Monday, March 19, 2012

A more literal form of nesting...

 In an attempt to make myself sit down more during these last few days of pregnancy, I started making these little amigurumi Easter Eggs.  For some reason I can sit down if I think - "oh I'm going to sit and crochet" instead of "oh I need to sit down and rest"...what that says about me I don't know, but it's obvious I'm not going to be a master at meditation anytime soon.


They are super addicting and very simple - I've made 6, but am pretty sure I'm going to go for the full dozen before delivery.  I love using that variegated yarn, I think it kind of makes them look like dyed eggs.


We think they'll be the perfect squishy soft addition to Lila's first Easter basket :)
  You can find the free pattern here.
Happy crocheting!
xoxo
jessica

Tuesday, March 13, 2012

It's gonna be a bright, bright sunshiney day...


This was the scene on my kitchen counter this morning as I prepared breakfast and worked on my very first amigurumi project - Easter Eggs!  The weather has turned all bright and sunshiney, and we're ready to welcome spring just about as much as we're ready to welcome this baby.  I've been doing a lot of nesting getting ready for baby and for my parents arrival - which is in one week!!!!
I may or may not have a new tutorial for you before baby comes - but just wanted to say hi! I'll post pics of my finished eggs and a link to the pattern soon.
xoxo
jessica

Monday, March 5, 2012

My Top 12 Ways Moving to Japan is like Having a Baby

  
12. Everyone gives you advice about everything.
 
11. You must haul around a lot of extra luggage.
 
10. Upon arrival, you are exhausted.

9. Everything is much smaller.
 
8. You lose days of sleep.
 
7. There's a serious language barrier.
 
6. You are easily disoriented.
 
5. Everyone wants to come visit you.
 
4. You start to shop online - a lot.

3.There's a learning curve.
 
2. No one can imagine what it's like until they've done it.
 
1. It's really scary and totally unknown - but definitely worth it.
 
 
Here is a picture of us visiting the Great Buddah at Kamakura.  
Only about 20 minutes from our house.
 It is probably the coolest thing we've seen since we've been here, and I think it's the oldest thing I've ever seen.  They started building it in the 1200's!  
Hope you're all doing well!  I'm starting to get excited about Cherry Blossom time here - more to come on that later!  
xoxo
jessica

Monday, February 27, 2012

Baby Nursery Sneak Peak

Well, I'm about 3 1/2 weeks away and the nursery is not done...but it's getting there.
It also serves as our guest bedroom.
I thought I would at least give you a sneak peak, just to give you an idea of my color scheme, etc.  My mom is bringing some of the things when she comes - such as crib skirt/sheets and some extra fabric for more bed pillows.  The main colors are yellow and berry - with a touch of turquoise thrown in.
Once it is completed I will give you a full tour - but this will have to do for now!

I made these drapes from a tapestry that I bought at Urban Outfitters.

I'm going to hang these lanterns above the crib.

The guest bed - needs a few more pillows.

This hand work was done my one of my aunts and was hung in my nursery, Charlotte's nursery, and now Lila's.

The Japanese good luck cat - and how cute are those tiny shoes!?!

This chandelier came from the house where Ryan grew up.  
It is hanging above the changing table.

So that's a little taste.
More to come soon!
xoxo
jessica

Monday, February 6, 2012

Spinning Stars Baby Quilt Finished!

Well the evenings these days leave me pretty tired, but I still like to do something a little productive.  
So, I've been snuggled up on the couch, draped in this gorgeous flannel by Anna Maria Horner, as I hand quilt this little beauty for baby girl.
 
It's a small quilt, but full of color and super soft and cozy.

I used this free pattern from AMH's site, but I reduced the pattern (I think by 33%) to make it smaller.
I quilted it using the AMH line of pearl cotton thread - color #98.  

I love hand quilting using the larger stitches.  
The process goes faster and it adds some really nice detail.  

I didn't put any batting in this little quilt because the front and back are both flannel, and I didn't think it needed anything for added warmth.

I highly recommend using this flannel to make something - it is a treat to work with.

Now it's just waiting for a little girl to snuggle!
xoxo
jessica


Friday, November 4, 2011

It's a....

and we couldn't be more thrilled!
I'm already working on her baby quilt - made from those gorg Anna Maria Horner Folksy Flannels!  More on that later.  Hope you have a great weekend!
xoxo
jessica

Wednesday, August 31, 2011

Announcement #2:

Thanks SO much for all of your encouraging and sweet comments yesterday! 
I really appreciate them. 
So, you may or may not have noticed that my posts have not been as frequent lately...but I'm not going to apologize too much because I have a sweet little peanut of a reason...we're pregnant again!!!!
pic from here
So, between morning all day sickness and exhaustion and making huge life-changing-decisions-about-moving-to-foreign-countries..... I have had no energy to make anything (including dinner-ha) 

I'm about 10 1/2 weeks now, and it seems the sickness is easing off - the past couple of days have been pretty good so I should be up and making more things soon :)  Still, I may not get a post  up everyday, but I know ya'll are understanding people so I'm not going to worry too much about it.  I probably will be posting more about baby stuff and maternity things than I have been...but I'll try to throw in some other stuff too :) 

So I think that's it for big news in my life -
pregnant and moving to Japan...sounds like a good name for a blog, haha.
Hope everyone is doing well and have a great Wednesday!
xoxo
jessica  

Wednesday, March 30, 2011

Kid's Craft / Mommy Craft: Hot Air Balloon Mobile


Sooooo this started out as a kid's craft, but the further along I got it really became a Mommy craft :)  Depending on the ages of your kids, they may or may not be able to help with the whole process.  On Mondays and Fridays I watch two other kids for a friend - one is a 3 year old girl - Charlotte's BFF, and one is a sweet little 3 month old boy.  So I've been trying to conjure up activities for us to do, especially on rainy days like we had on Monday.  Since the girls are 3 and 2 1/2 the only part they could really help with was the finger-painting.  But that was great fun. 
So here's how you and your kiddos can make your own hot air balloon mobile!

Supplies for one mobile:
2 pieces of white cardstock
1 piece of colored cardstock 
scissors
finger paint
yarn or string
2 long, thin dowels or skewers (I just cut the pointy ends off)
hole punch
stapler, tape.....glue possibly

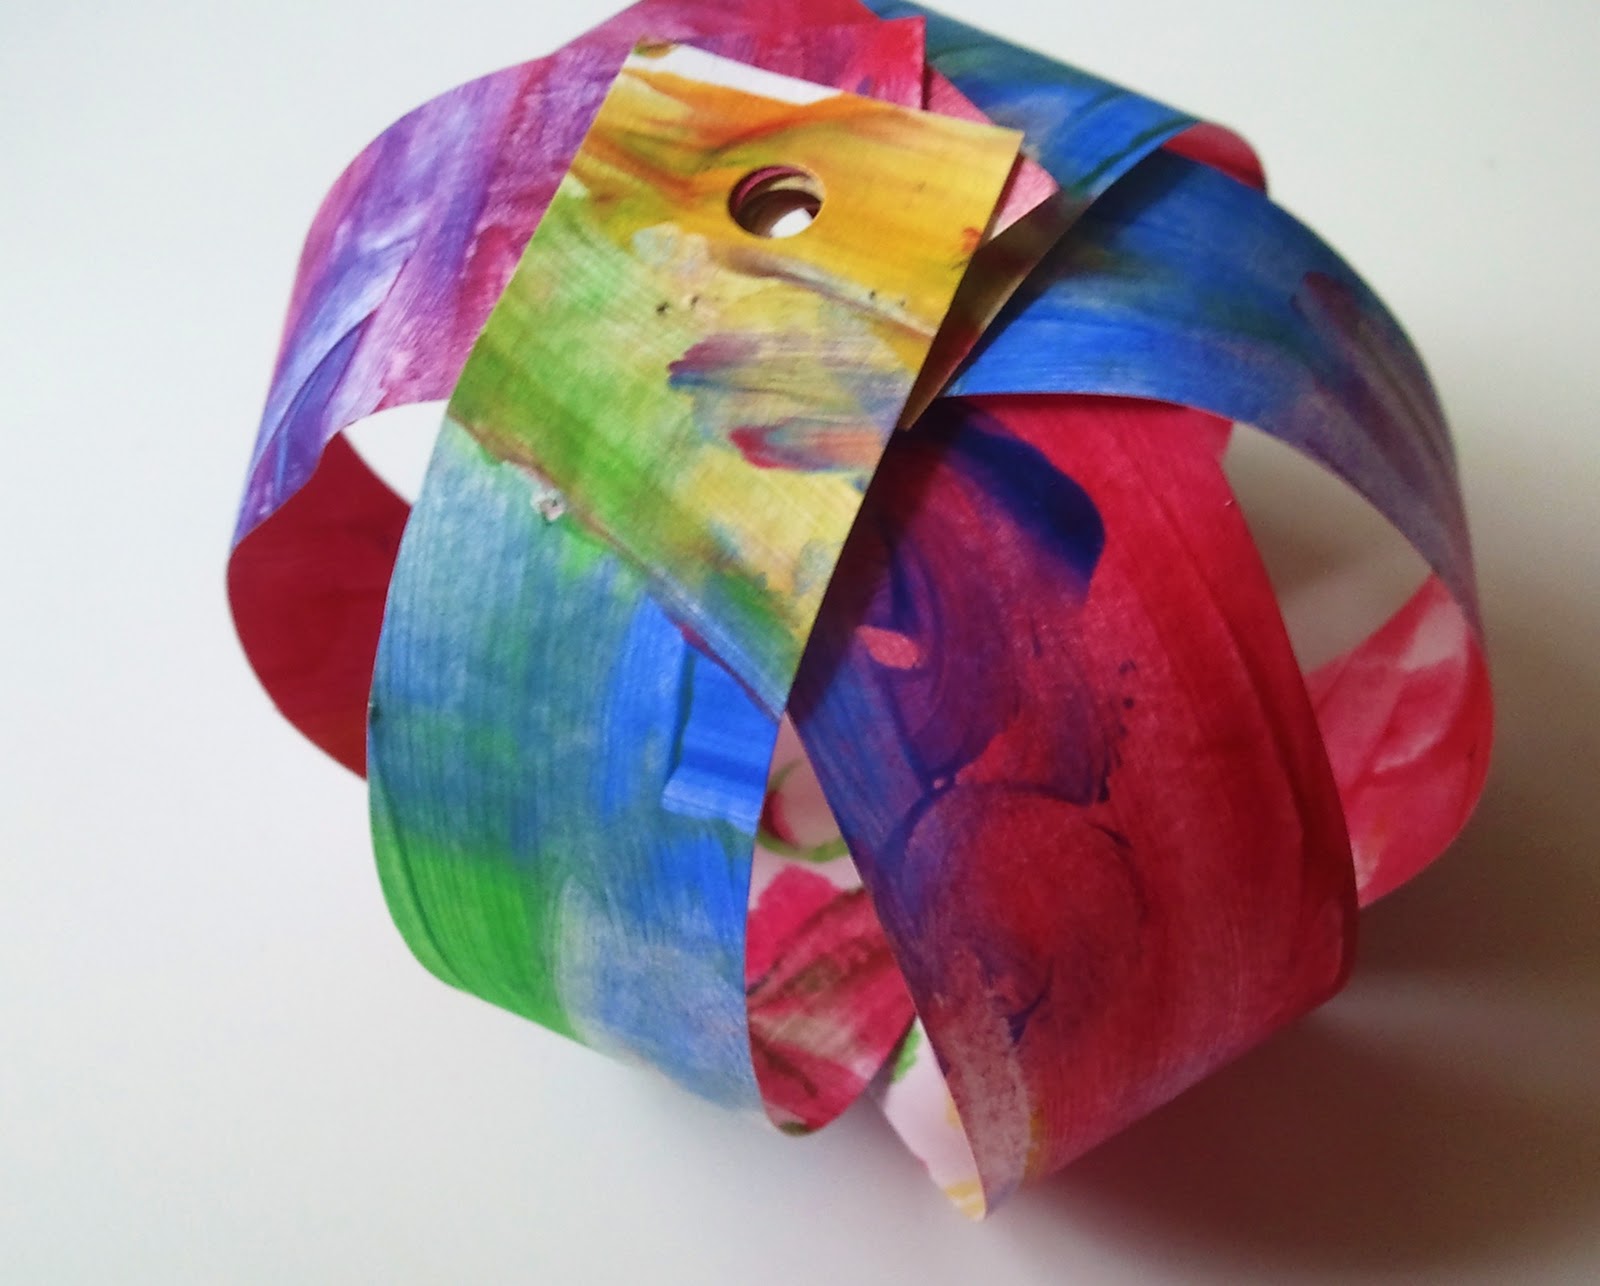
Step 1:  Cut the pieces of cardstock in half, so you have four pieces 8.5" x 5.5" inches.  Finger paint both sides of all four pieces of paper.  Let them dry.

Step 2:  Cut the painted pieces of paper into 1" x 5.5" strips.  You will need 6 strips for 1 balloon.


Step 3:  Stack all 6 pieces and punch a hole through one end.  (you may have to do 3 at a time).
Step 4:  Lining up the holes, fan out the strips so they make a star shape.  Staple or tape them in the center - just don't cover the hole. 

Now bend them so that the other ends all meet - forming a sphere shape.  Tape/staple/glue/whatever to get those to stay in place.  ( I only have a tiny stapler, and it wasn't cooperating so I used tape.  If you have a large stapler I would suggest that.)

Step 5:  Make the "basket" by cutting a 1"x4" strip from your colored cardstock.  Roll it into a ring and tape in place.  Punch a hole in each side of the basket. 

Tie the string into a knot on one side of the basket.  Feed it through the balloon and tie it onto the other hole in the basket. 

Step 6:  Feed a piece string through the top hole you punched in the strips.  Use a small piece of tape to secure the string on the inside of the balloon.
Step 7:  Once you have made all the balloons you can begin to hang them on your dowels.  Cut one of the dowels in half so that you have 1 long one and 2 short ones.

{Optional step:  you can wrap the dowels in yarn - I thought it softened the look}

Hang one balloon from the center of the long dowel.  Hang a short dowel from each end of the long dowel.  From each end of the short dowels, hang one balloon.  On one of the short dowels hang the last balloon in the center. 

Enjoy!
xoxo
jessica

You may also enjoy...

Related Posts Plugin for WordPress, Blogger...