Showing posts with label applique. Show all posts

Saturday, September 3, 2016

Reverse Applique Football T

It's football season y'all!
So today I lit a pumpkin spice candle, turned on the game, 
and whipped up this little t-shirt for Charlotte!


Y'all, I am so in love with reverse applique.
It's like regular applique but faster and easier and...reverse.


I'm gonna make one for my other two kiddos too! and maybe myself!
You know you want to try it out - keep reading for the tutorial!

Supplies:
t-shirt
jersey knit material (or an old t-shirt you can cut up)
embroidery floss
needle
scissors

Step 1:
Trace your pattern onto the shirt.
I used cookie cutters, but you could also print something
out that you find online.  This will be the line that you sew along.

Step 2:
Place your colors of knit under your design.
You can either just pin it in place, or use a little
craft glue to baste it.

Step 3:
Sew along the design that you traced with embroidery floss.
You can just use a running stitch.
(be careful to only sew two layers, not the back of the shirt!)

Step 4:
Now carefully separate the top layer from the bottom layer
and make a small slit with your scissors in the top layer.
I highly recommend a pair of tiny applique scissors for this,
but you can use regular fabric scissors in a pinch.


Step 5:
Now slide your scissors in sideways and begin to cut away
the top layer of t-shirt, revealing the color beneath.
This is the most fun step!!


Step 6:
Turn the shirt inside out cut the excess around the edges -
this is most important if your t-shirt is white.


And you just repeat those steps for the football!
I love this heart-shaped one for the girls,
but I'll do a regular shaped one for Hunter's.
I think she liked it!


Happy Football Season!
Jessica

Tuesday, January 8, 2013

Made with love...

Well about two months ago I turned 30.  
Even though I had to celebrate it on the other side of the world, I felt so much love from my family and friends that it was as if they were all here with me.  My sister created a "box of 30" with something for me to open each day the entire month.  Some days I opened little gifts such as C.D.'s or Starbucks Via. Some days I opened a note from a friend - wishing me well as I turned 30.  I also wanted to showcase the quilt my Momma made me - it's really beautiful and so thoughtfully designed.  
The girl is hand-embroidered, and rising from her coffee cup are 30 appliqued hearts.


Isn't that lovely?
The back is pretty too!

Thanks to everyone who has made my life so beautiful, including those of you who read Sew Homegrown.  Turning 30 has been wonderful.  
During the past 10 years I have been challenged, stretched, and grown more than I ever thought I would, but as a result I feel comfortable in my own skin - something I thought I may never achieve.  My twenties held some really wonderful times and some really dark times, but the love I am surrounded by has carried me through all of it, and I am so grateful.  I truly hope you too can become comfortable with who you are - we each have so many unique things to offer and we can learn so much from one another.  Thanks for your support and I know we're going to have a great year ahead!
xoxo
jessica

Monday, January 16, 2012

{DIY} A Kokeshi Valentine


Well we've fallen in love over here in Japan with the adorable Kokeshi.  
They are super cute little wooden dolls that come in all shapes and sizes.

That's a great little book about them that you can buy here.
 
So since that's our love right now, I decided to make a Kokeshi Valentine t-shirt for Charlotte this year.  Today I have the free pattern for you in case you'd like to make your own!

The supplies you'll need are:
plain t-shirt
scrap fabric/felt
coordinating threads
needle/embroidery floss
sewing machine
scissors
tear-away stabilizer

Step 1:
 Download the pattern and cut out all the pieces.
Decide on your fabrics and trace the pattern pieces onto the correct fabric. 
Step 2:
If the pattern says cut two, then cut one piece using the right side of the pattern and one using the wrong side of the pattern.

I cut out several different dolls, because I wasn't sure what style I wanted. 

I finally decided on this one:

Step 3:
Draw a face on your Kokeshi head.

Assemble the doll.
Sew the hair onto the head using a straight stitch, then the hair ties using a zig-zag stitch.
Sew the kimono together using a straight stitch down the front and a zig-zag along the bottom to attach the base.
Embroider the face onto the head.


 Step 4:
If you have some iron on transfer you could use it to secure the kokeshi onto the t-shirt.  I didn't have any so I just pinned it really well.  Slip the stabilizer into the shirt.  Thread your machine with the correct thread and set your zig-zag stitch to 3.5 width and .5 lenth.  Stitch around the doll, switching thread when needed. Take your time with this - keep the needle down and rotate your shirt often.

Step 5:
The final step is to zig-zag around the heart, and you're all done!
Isn't she so cute smiling at you?

Happy Sewing!
Have fun getting ready for Valentine's Day!
xoxo
jessica

Wednesday, January 4, 2012

Home


Well here we are - new year, new home!
It has been quite a journey getting here, involving 
*airport all-nighters *10 large suitcases 
*Christmas in a small hotel room *jet-lag 
*crying *laughing 
*great ramen noodles *moving in 
*meeting new people *stomach bugs
*an earthquake *my first try at Japanese cooking(it turned out terribly
*cupcakes from neighbors *a broken dryer 
*learning to ride the train *a free couch
...and so many more things packed into the last 3 weeks.
  
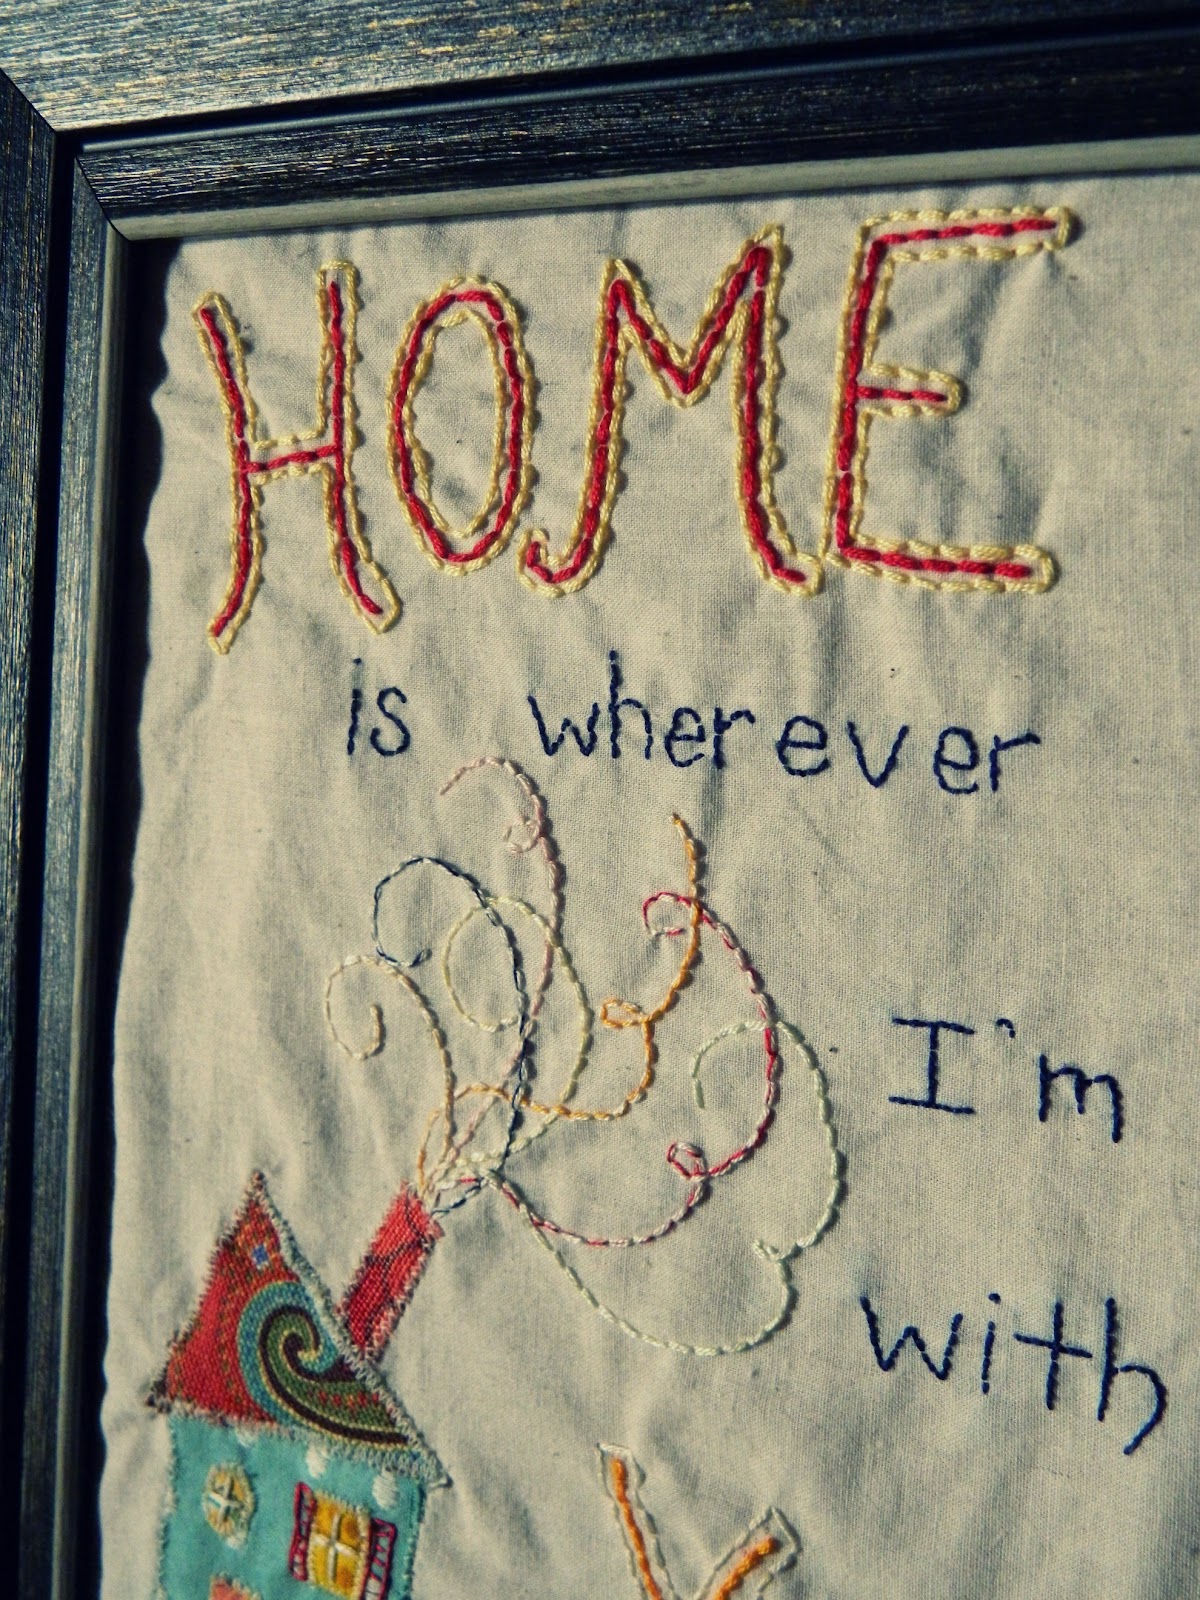
But we've been in our townhome for a week now - the downstairs is beginning to look like humans reside here.  Since I've had no time for craftiness (although my crafting space is nearly set up!), I thought I would share this sweet piece of art my sister made me for my birthday. 


I really love everything about it - the sentiment and the design.  There's no tutorial, but it's great inspiration if you've been thinking about doing something similar. 


She appliqued the fabric pieces on to the background using a zig-zag stitch, then embroidered the words and curly-swirly chimney smoke.  I hope your homes are cozy, happy places this January day - it's not always easy to make them that way.
But when you've got the people you love, you've got a home.
(sheesh my pregnant hormones make me tear up at my own words... )

Happy Homemaking!
xoxo
jessica
 

Friday, September 9, 2011

Halloween Outfit Part One: {DIY} Applique T-shirt


Here's the great thing about this project: there's no construction of clothing. 
It's all embellishments.  That means it's EASY!
The first little dip in temperature had me feeling all fallish and halloweenish(?), so I headed out to the fabric store to scope out the Halloween fabric.  I came upon this adorable stuff from Riley Blake Designs by My Mind's Eye "Boo to You" - orange scatter
I knew those little creatures would make the perfect applique for a Halloween T-shirt for Charlotte!
This is a great way to get a one-of-a-kind look for your little one, and they can help you design it!
Charlotte picked out each little character for her shirts.
I don't know what really gave me the idea for the Tulle Skirted Leggings, but I'm kinda in love with them.  I'll put up a tutorial on Monday for those.
 But today we're going to focus on the shirts.
Here's the supply list.

Let me say - you really need to try to find the Steam-a-seam stuff. It is a.ma.zing!
 Really made this whole process easier.  I'll explain how to use it - keep reading.
I also added that little ruffle trim - it's actually elastic with a ruffle along the edge.  I found it at my fabric store, but I'm not sure what brand it is.

Step 1:  Select some characters from the fabric and cut them out.  Then peel back the paper portion of the Steam-a-Seam and lay your fabric pieces on top - press them into the S.a.S. with your finger.
Cut out each shape exactly the way you would like it to appear on for the applique.
Now you need to peel the paper off the fabric. 
You will see a sticky webbing magically left on the fabric.
Position your appliques where you would like them to live.  You can stick them to the shirt, even try it on, and if you don't like it just peel it off and restick it until you get it right. 
I'm telling you I love this stuff. 
 I put the center applique on first - 2" from the neckline.

Once you have it where you want it, iron it to the shirt.
Step 2:  Okay - now it's time to sew. 
Place the stabilizer behind the appliques and the layer of the shirt they are stuck to.
Set your machine to a zig-zag stitch.  Then adjust the width and length of the stitch.  I found a width of 3 and a length of .5 worked well for me, but I would suggest playing around on your machine first until you find the width you like.

Take  your time and stitch around the edge of each applique.  Be sure that the back layer of the shirt stays out of the way, and that the shirt doesn't bunch.

Step 3:  Clip the threads and gently pull off the stabilizer.
And that's it!!  Personalized, adorable little shirts. 

I'm dying to make more - it's kind of addicting. 
Hope you give it a try!
Have a great weekend.
xoxo
jessica

Monday, November 15, 2010

Warm Heart Rice Bag


Today I have a really fun tutorial for a project that would make a lovely gift.  
A "Warm Heart" therapeutic rice bag!  
Everyone has aches and pains now and then - they can heat this colorful rice bag in the microwave 
and melt their tension away.  
This is also a great project to use up some scraps.
Here's what you'll need:
Several scraps of fabric
1 piece of muslin-type fabric 13"x8"
1 piece of fabric for the back (I used cozy flannel) 13"x8"
1 bag of rice
whole cloves, cinnamon
sewing machine
thread
scissors
iron
yard stick
water soluble pen
needle

Step 1:  Cut out all of your fabric.
the back and front rectangles,
cut out two hearts the same size,
then several strips of fabric of varying widths -
such as 1/2", 1", 1 1/2", 2"

Step 2:  Make the heart applique.  Place the two hearts right sides together and pin.


Sew around the entire heart using a 3/8" seam.  Do NOT leave an opening.
Clip the fabric to the seam (but not through the seam) around the curves of the heart.

Step 3:  Lift up the back of the heart and make a slit in it ( be SURE not to catch the front side).  Enlarge the hole so that you can flip the heart right sides out.

Flip it, use a pencil to push out all the edges, then press it well.

Step 4: Moving along to the top.  Cut the top rectangle into 4 equal rectangles.  You are going to strip-piece these four rectangles.  Here's how you do that.
Lay one strip, right side up on the rectangle, lining up the edges.

Lay the second strip, right side down on top of the first strip, lining up their edge (the one closest to you).

Sew a 1/4" seam along that edge.

Open the top strip, so it is right side up, and press well.

Repeat that process with the next strip:

Press.  Then trim off the excess until your rectangle is nice and neat.

Great!  One block is done.

Repeat this process with the other three blocks.  I made two of mine horizontal and two vertical.

Step 5:  Lay the bottom left rectangle, right side down, on the top left rectangle.
Sew these together, using a 3/8" seam.  Press the seam open.

Repeat with the other two rectangles.

Step 6:  Lay these two right sides together and sew the center seam.  Press seams.

Step 7:  Pin the heart in the center of the top.

Step 8:  The most "invisible" way to attach this is using a slip-stitch.  If you are nervous about that, you can always blanket or zig-zag stitch it on your machine.  I will explain it the best that I can, but if you are still confused you can go here for a video tutorial.
Starting under the fabric, bring the needle up through the top and the heart.

Pull the needle and thread through.  Now, with the thread "on top", work the needle under the heart a little bit.  Push it through the fabric top, then back up - barely catching the edge of the heart.


Step 9:  Once you have the heart attached, lay the top right sides together with the back
and pin around 3 sides - leaving one end open.

Stitch around those sides, flip it and then press.

Step 10:  Mix the rice (not cooked) with whole cloves and cinnamon.

Pour it into the bag - I used almost an entire 32 oz bag.  Work the rice to the closed end of the bag.
Turn the raw edges of the open end in and press.  Top-stitch it closed.

That's it! 
xoxo
jessica

You may also enjoy...

Related Posts Plugin for WordPress, Blogger...