Showing posts with label scraps. Show all posts

Tuesday, June 18, 2013

{Create} Fabric Hairbow


As much as I craft you would think I could make a decent ribbon hairbow.  But the thing is - I really stink at making ribbon hairbows.  I just can't seem to get it right - even when I follow really great tutorials.  So instead, I dug through my fabric stash and created this little bow.


I love it.  
It's so simple to make.  
It will be the perfect accessory to your girl's summer wardrobe(or yours!).  
Just follow the easy instructions below!!!

You'll need:
 a small square of fabric - about 6"x6"
a hair clip
some trim or ribbon for the center
a glue gun
a sewing machine/thread/scissors/etc.

STEP 1:
Cut a 4"x2" rectangle out of card stock for a pattern.  You don't have to do this, but I like to so that I can position it anywhere on the fabric.  Cut out two rectangles.

STEP 2:
Pin the rectangles right sides together.  Place marks 1" apart along one of the long sides.  
Preferably in the center.  This will be your opening for turning.

STEP 3:
Use a 1/4" seam allowance and stitch around the rectangle, leaving the 1" opening.  Clip the corners.

STEP 4:
Turn it right sides out and topstitch the opening closed.  Press well.


STEP 5:
Now, scrunch up the center of the bow.  Just fiddle with it until you like the way it looks, then top stitch right over the folds to hold it in place.  


 STEP 6:
Select your trim and wrap it around the center of the bow - gluing it or hand sewing it in the back.  Lastly, glue the clip to the back of the bow and enjoy!!

Happy Sewing!
jessica

Thursday, July 26, 2012

{DIY}Selvage Chevron Pillow *West Elm Knockoff*


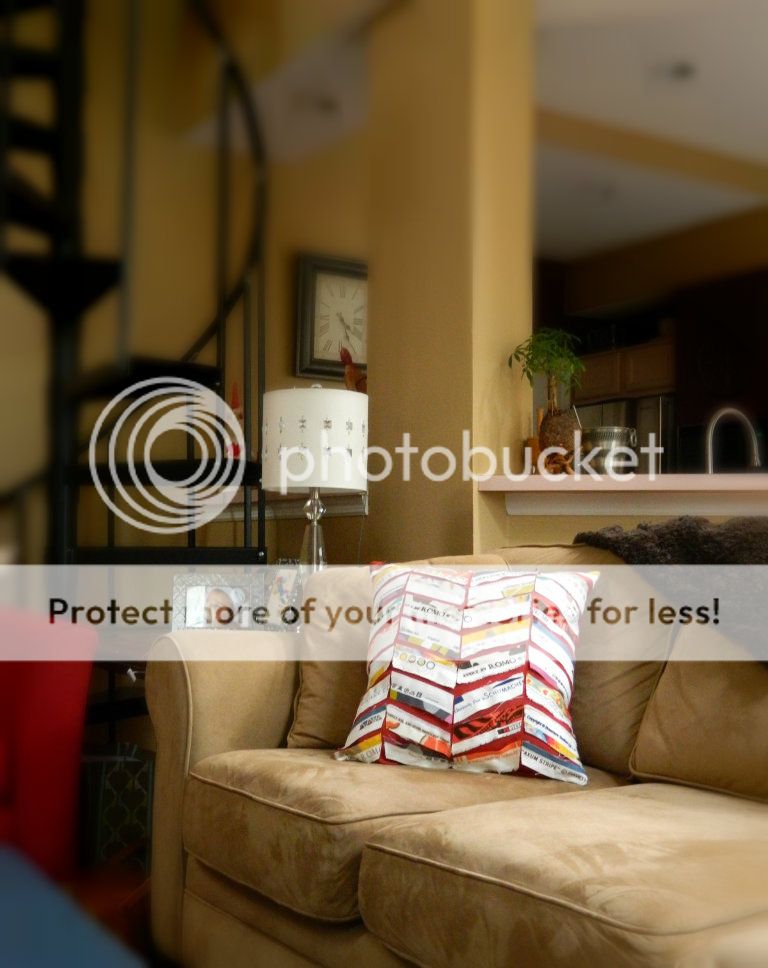
I've been watching Design Star the past few weeks, and I decided my throw pillows in our living room needed refreshing.  I wanted one or two texturally interesting pillows, then just a few basic knife-edge pillows.  This is one of my pillows to add some texture to our living room - and bonus, by using the selvages it also adds some typography!


That's my Mom and Dad's house btw - isn't it gorgeous?!
The one from West Elm doesn't use selvages and it still looks great - so you could make yours either way.
Here's West Elm's pillow:
And here's mine:

If you're ready to make your own, here's what you'll need:
various selvage scraps (or any kind of scraps)
1/2 yard of solid color home decor fabric
rotary cutter(not essential, but it makes it A LOT easier)
self-healing mat(for the rotary cutter)
18" pillow form
scissors/pins/thread/sewing machine/etc.

STEP 1:
Cut out 40 strips of fabric 1 1/2" x 6"
Then cut two squares 18"x18" out of the solid for your pillow.
(if you cut the pillow 18"x18" and then stuff it with an 18" pillow form it will be nice and full - use 3/8" seam allowance.)

STEP 2:
Lay the strips out on a self-healing mat, in the design you would like on your pillow.
Overlap the edges, adjusting the angle of your chevron.

Then, use the edge of a ruler to determine the point of the chevron.  Follow the edge of the ruler with the rotary cutter.  Repeat this at each chevron point. 
It should look like this:

STEP 3:
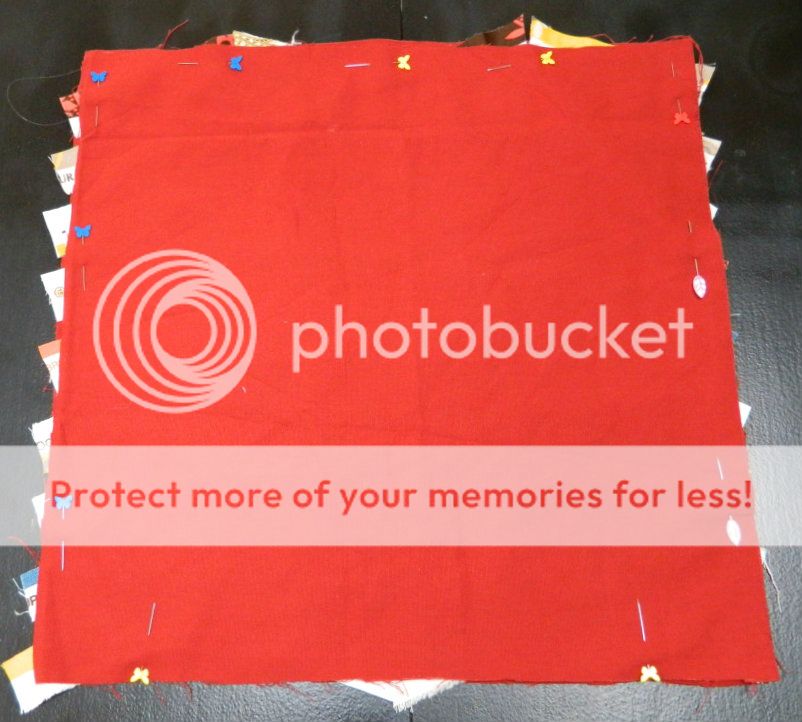
 Pin the strips onto one of the solid squares of fabric.

STEP 4:
Sew the strips on.  Starting at the top of the pillow, sew up the center of the first strip, then down the second strip - just following the chevron pattern.  When you reach the other side, just sew straight down the edge of the pillow(this will be in the seam allowance) until you get to the next row and begin sewing across those back to the other side.

STEP 5:
Pin the back to the front, right sides together and pin - leaving a substantial opening for the pillowform.


Sew around the edges using 3/8" seam, then clip the corners.

Turn right sides out and stuff with the pillowform. 
Close the pillow on the machine - see my tutorial on that here.
Enjoy your new designer pillow!

Happy Sewing!
xoxo
jessica

Wednesday, January 25, 2012

{DIY} The Patchwork Scarf


I'm excited to share this tutorial with you, because I'm kind of in love with this scarf!
You know my constant knitting woes, so I was really pleased to make a scarf that didn't leave me tangled in yarn trying not to say bad words.

I bought a Liberty of London sample pack at the Tokyo Quilt Festival.  When I bought it, I wasn't really sure what I could make with 50 4"x4" squares, but I was so in love with the colors and it was a great price - I couldn't resist.  I'm glad I didn't, because this scarf turned out to be the perfect project for this little sample pack.  It could also be a great way to use up scraps from your stash.


I backed it with warm and fuzzy wool that my Grandma gave me.  
It was the perfect balance to the soft and silky Liberty prints.
Don't you want to make one?
I know you do.
So here we go....


Supplies:
50 4"x4" squares of fabric
1/2 yard fabric for backing at least 44"wide
scissors/pins/iron
sewing machine/thread

Step 1: Design your scarf by laying the squares into two rows of 25

Step 2:  Piece the scarf by sewing 4 squares into one larger square using 1/4" seams, like this:

select the first four squares in the scarf
sew two squares along one edge
be sure to press the seams open

repeat with the other two squares
Sew these four together, matching up the center seam, using 1/4" seam

press the seam open

so pretty!

continue this process until you have 12 large squares and an extra 2 small squares sewn together (that should equal 50).

Step 3: Next, sew the larger pieces to one another, right sides together, to form a long scarf (again use 1/4" seams).

Step 4: Cut out the back - two pieces 44" x 7.5".  Sew them end to end, right sides together, to form one long piece 88" x 7.5"

Step 5: Pin the back to the front, right sides together.

Sew along the edge, using 1/4" seams, but leave about 3" open at one end.


Step 6: Trim any uneven edges (you don't want it making your seams bulky) and cut the corners.

(uneven)

(even)

Flip the scarf right sides out.

Step 7:  Press under raw edges of the opening and pin.  Start there, and top stitch around all the edges 1/4".  I used a contrasting thread for this to make it decorative.  This step will take  your scarf from looking homemade to handmade.


And that's it!  Wrap it around your neck, and you're ready for the snow!  If you live in a warmer climate, but still like to wear scarves in the winter, simply back it with something light like a voile, and it will be the perfect weight.  As always, if you have any questions simply email me at jessica(at)sewhomegrown(dot)com.  Happy Sewing!
xoxo
jessica

Monday, January 16, 2012

{DIY} A Kokeshi Valentine


Well we've fallen in love over here in Japan with the adorable Kokeshi.  
They are super cute little wooden dolls that come in all shapes and sizes.

That's a great little book about them that you can buy here.
 
So since that's our love right now, I decided to make a Kokeshi Valentine t-shirt for Charlotte this year.  Today I have the free pattern for you in case you'd like to make your own!

The supplies you'll need are:
plain t-shirt
scrap fabric/felt
coordinating threads
needle/embroidery floss
sewing machine
scissors
tear-away stabilizer

Step 1:
 Download the pattern and cut out all the pieces.
Decide on your fabrics and trace the pattern pieces onto the correct fabric. 
Step 2:
If the pattern says cut two, then cut one piece using the right side of the pattern and one using the wrong side of the pattern.

I cut out several different dolls, because I wasn't sure what style I wanted. 

I finally decided on this one:

Step 3:
Draw a face on your Kokeshi head.

Assemble the doll.
Sew the hair onto the head using a straight stitch, then the hair ties using a zig-zag stitch.
Sew the kimono together using a straight stitch down the front and a zig-zag along the bottom to attach the base.
Embroider the face onto the head.


 Step 4:
If you have some iron on transfer you could use it to secure the kokeshi onto the t-shirt.  I didn't have any so I just pinned it really well.  Slip the stabilizer into the shirt.  Thread your machine with the correct thread and set your zig-zag stitch to 3.5 width and .5 lenth.  Stitch around the doll, switching thread when needed. Take your time with this - keep the needle down and rotate your shirt often.

Step 5:
The final step is to zig-zag around the heart, and you're all done!
Isn't she so cute smiling at you?

Happy Sewing!
Have fun getting ready for Valentine's Day!
xoxo
jessica

Wednesday, October 19, 2011

The Details...

Currently I'm working on the soft furnishings for Charlotte's bedroom - so far I've made the curtains (a tutorial on that tomorrow) and I have cut out the quilt.  
With the scraps, I decided to make this little pillow for the green chair in her room.  

It was inspired by this Anthropologie one.
  
You know, it's the details in a room that make it special and make it look finished.
Well, so that's what I've been up to...I'm trying to really work on the home furnishings while I'm here at my mom's - amidst the mile high stack of military paper work... :)
xoxo
jessica

Tuesday, October 11, 2011

{DIY} Anthro Pinwheel Pushpins

These little guys are so cute and quick to whip up, they should be at the top of your gift-making list. 
 Plus they use up scraps!  and you don't need a sewing machine.
Anyone can make these!!!

Here's my version:
cost - $.24 (yes a quarter!)


cost - $15

The secret to making these the cutest pushpins you've ever seen, is the size. 
Finished they are only 3/4" across (which you cannot tell by that Anthro pic). 
Teeny tiny and oh-so-adorable.

Here are the supplies you will need:
various scraps of fabric
needle/thread
scissors
small beads (I used little seed beads)
a pack of pushpins
a 1.5" circle template

Step 1:  Cut 8 (or as many as you want) circles, 1.5" in diameter, out of different colors of fabric.

Step 2:  Make them into yo-yos: Thread the needle and tie a knot in the end.   With the wrong side of the fabric facing you, fold the edge over toward you about 1/8" and push your needle through. 

Use a running stitch to gather the edge of the circle - folding the raw edge in as you go.

Push the pin through the center of the circle, then pull the thread tight to gather the yo-yo completely.

Step 3:  Slip 3 small beads onto the needle and thread, and secure them in the center.

Tie a knot in the thread and cut it. 
Repeat with each pushpin until you have the desired amount!

It's a perfect gift for someone with a new job or even a great stocking stuffer!
Happy crafting,
xoxo
jessica


You may also enjoy...

Related Posts Plugin for WordPress, Blogger...