Thursday, January 19, 2012

{DIY} "Stained Glass" Heart Garland

 
Feeling the need to catch every winter sunray?
This sweet little heart garland will help you do just that!


It's a simple kid's craft - melted crayon shavings in between wax paper 
- that I then cut into heart shapes!
You can get the full instructions for melting the crayons from Martha here.

Once you melt it, it will look like this:

not too pretty.  
But just use a heart cookie cutter and trace heart shapes onto the wax paper and cut out.


Then sew the hearts together on your sewing machine.  
Take a few stitches between each heart to create some space.


Then hang it wherever you like!
I hung mine on this frame that I put on my front door.


You can get the tutorial for the frame here.
Happy crafting, and I hope your winter days have a ray or two of sunshine!
xoxo
jessica

Monday, January 16, 2012

{DIY} A Kokeshi Valentine


Well we've fallen in love over here in Japan with the adorable Kokeshi.  
They are super cute little wooden dolls that come in all shapes and sizes.

That's a great little book about them that you can buy here.
 
So since that's our love right now, I decided to make a Kokeshi Valentine t-shirt for Charlotte this year.  Today I have the free pattern for you in case you'd like to make your own!

The supplies you'll need are:
plain t-shirt
scrap fabric/felt
coordinating threads
needle/embroidery floss
sewing machine
scissors
tear-away stabilizer

Step 1:
 Download the pattern and cut out all the pieces.
Decide on your fabrics and trace the pattern pieces onto the correct fabric. 
Step 2:
If the pattern says cut two, then cut one piece using the right side of the pattern and one using the wrong side of the pattern.

I cut out several different dolls, because I wasn't sure what style I wanted. 

I finally decided on this one:

Step 3:
Draw a face on your Kokeshi head.

Assemble the doll.
Sew the hair onto the head using a straight stitch, then the hair ties using a zig-zag stitch.
Sew the kimono together using a straight stitch down the front and a zig-zag along the bottom to attach the base.
Embroider the face onto the head.


 Step 4:
If you have some iron on transfer you could use it to secure the kokeshi onto the t-shirt.  I didn't have any so I just pinned it really well.  Slip the stabilizer into the shirt.  Thread your machine with the correct thread and set your zig-zag stitch to 3.5 width and .5 lenth.  Stitch around the doll, switching thread when needed. Take your time with this - keep the needle down and rotate your shirt often.

Step 5:
The final step is to zig-zag around the heart, and you're all done!
Isn't she so cute smiling at you?

Happy Sewing!
Have fun getting ready for Valentine's Day!
xoxo
jessica

Tuesday, January 10, 2012

Sew come on in...

The ever-inspiring Anna Maria Horner says that if you are going to do any type of sewing in any consistent manner, you must have a space dedicated to it.  It doesn't matter how small, it could be the corner of a closet somewhere, but you must have a space where your machine can always be set up and ready to work.  Well here's mine - it's not extravagant - just a corner of our large family/play room - but I'm happy with it, and I can sew while playing/watching tv/talking to Ryan.  I took pictures of it as it is today - fabric scraps and Starbucks cups included.  Really because that's how it will look most of the time.  My fabric stash is neatly organized (for now) in that white wardrobe in the corner, and that door opens into our kitchen.
Wish I could have a bunch of you over for a big sewing day!


 The cutting area...


 The sewing area...


Happy sewing from Japan!
xoxo
jessica

Monday, January 9, 2012

{DIY} Ribbon Storage


Yes I am unpacking and trying to set up a cute crafting/sewing corner for myself.  
 I have some ribbon...none of it on spools.  
The idea to wrap it around cardboard is not mine, 
but I wanted to display it in a cute way so that it could sit out. 


I'm certainly NO expert on organization, but I think the best way to make things like this look organized, is to make them uniform.  I had lots of varying lengths of ribbon, but by putting them all on the same size cardboard, with the same kind of ribbon to hang by, it makes them look neat.  
Does that make sense?
 
Supplies:
Scrap cardboard
Crafting Scissors
Marker/Pen
Straight Pins
Large Safety Pins
Ribbon for hanging
Small nails
Hammer
Large wooden board - I used some old barn board
(of course you could also do this using pushpins onto a cork bulletin board)


In a nutshell, here's how to make the cardboard spools:
I traced around a mason jar mouth and drew the circles onto a piece of cardboard.
Cut them out.
Then draw lines where you want to cut into the side of the circle.
Cut them out.
Wrap the ribbon around it and secure with a straight pin.


*Once you've organized the ribbon, poke holes in the top of each cardboard spool - I used a large nail to do this.  
*Thread a piece of ribbon through the hole and tie into a knot.  
*Vary the lengths of your hanging ribbon so they will hang nicely.  
*Slide ones of the same color onto a large safety pin.  
*Nail two small nails into the board for every safety pin you want to hang.  
*Slide the safety pin over the nails.  


There you go!  
Pretty and organized - and it can be easily accessed and added to as you acquire more ribbon.
Happy Monday!
xoxo
jessica

Wednesday, January 4, 2012

Home


Well here we are - new year, new home!
It has been quite a journey getting here, involving 
*airport all-nighters *10 large suitcases 
*Christmas in a small hotel room *jet-lag 
*crying *laughing 
*great ramen noodles *moving in 
*meeting new people *stomach bugs
*an earthquake *my first try at Japanese cooking(it turned out terribly
*cupcakes from neighbors *a broken dryer 
*learning to ride the train *a free couch
...and so many more things packed into the last 3 weeks.
  
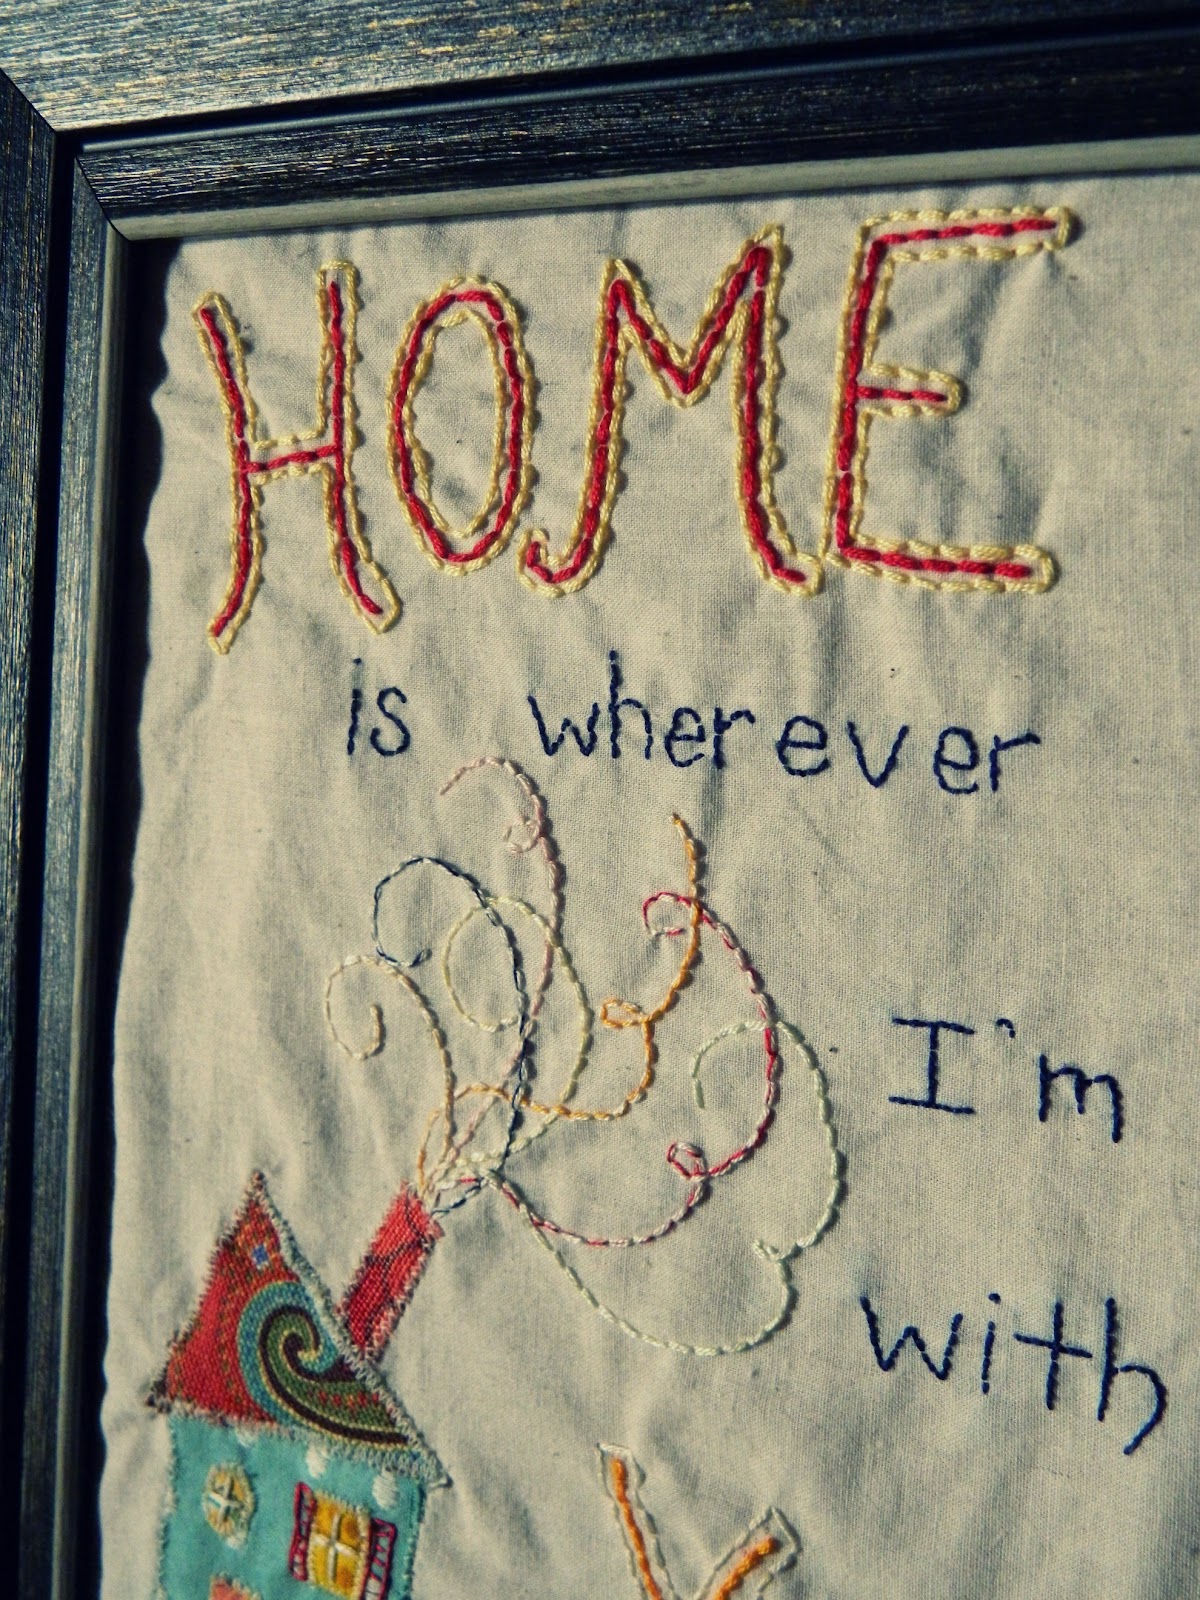
But we've been in our townhome for a week now - the downstairs is beginning to look like humans reside here.  Since I've had no time for craftiness (although my crafting space is nearly set up!), I thought I would share this sweet piece of art my sister made me for my birthday. 


I really love everything about it - the sentiment and the design.  There's no tutorial, but it's great inspiration if you've been thinking about doing something similar. 


She appliqued the fabric pieces on to the background using a zig-zag stitch, then embroidered the words and curly-swirly chimney smoke.  I hope your homes are cozy, happy places this January day - it's not always easy to make them that way.
But when you've got the people you love, you've got a home.
(sheesh my pregnant hormones make me tear up at my own words... )

Happy Homemaking!
xoxo
jessica
 

Saturday, December 31, 2011

The Top 8 of 2011

Happy New Year from Japan!
Here are the top 8 posts of the past year.  It's easy to tell that my life got crazy after June, all of the most popular ones are Jan - June.  It was in July that I got pregnant and we moved and this whole adventure with the Navy began.
Thanks so much for reading Sew Homegrown and I can't wait to start sewing and crafting with you this year!

1. January 6, 2011


2. February 21, 2011


3. February 25, 2011


4. March 14, 2011


5. April 5, 2011


6. June 3, 2011


7. June 17, 2011


8. June 29, 2011


Enjoy the rest of your holiday!
xoxo
jessica


Friday, December 9, 2011

Domo Arigato, Mr. Roboto...

SO I'm not going to lie -
I've been wanting to use that as a blog title ever since we found out we're moving to Japan ;)

 (source)

And the time has come.  We've 5 days left here in the states - all of which will be filled with early Christmases, yummy comfort food, last minute paperwork, laundry, and packing - lots of detailed organized packing. (anyone want to come do that for me?)
  I'll be signing off here until after the New Year. 
Once we arrive in Japan we will be very busy with orientation, housing decisions,
jetlag, eating noodles and drinking tea. 
So I'm sure when I see you again in January I'll have lots to tell!

 (Japanese Christmas Cake - source)

I hope you all have a wonderful, safe, and really happy holiday season.
Enjoy your family and may God bless you!
xoxo
jessica

You may also enjoy...

Related Posts Plugin for WordPress, Blogger...