Tuesday, November 30, 2010

Chocolate Peppermint Cupcakes


One of the favorite flavor combination's of the season - now in a bite-sized cupcake version!  
This is an easy recipe and a sure hit at any holiday party.  
Here's what you will need:
Devil's Food Cake mix
eggs
oil
water
small, bite-sized peppermint patties
mini cupcake liners
mini cupcake pan

Step1:  Follow the directions on the cake box and mix all ingredients together.
Step 2:  Place the cupcake liners in the pan and fill to 1/4" below the edge of the liner.

Step 3:  Bake in the oven.  While they are baking, unwrap all of the peppermint patties.
3-4 minutes before the cupcakes should be done, open the oven and place one patty on top of each cupcake.  Let it continue baking for 3-4 more minutes - enough to melt the patties slightly so that they stick to the cupcake.

Step 4:  Let them cool, then remove from pan.
The best part - no time-consuming, messy frosting!  
Just garnish with little candy canes, or crushed peppermint.
Enjoy!
jessica

Monday, November 29, 2010

Giveaway Reminder!


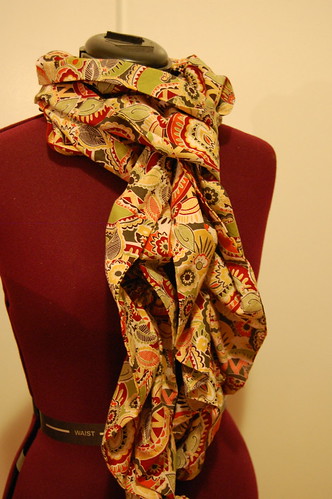
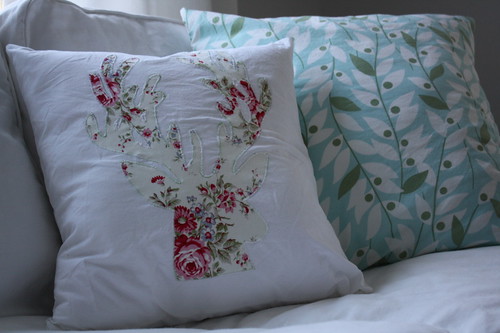
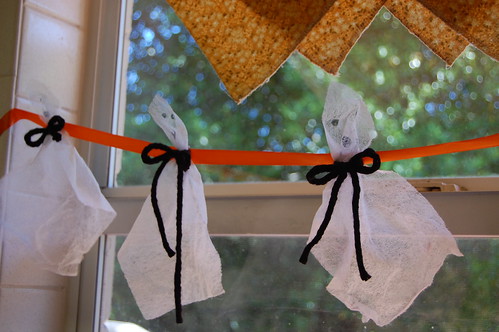
Just a little reminder that you have about ONE WEEK to finish your projects to be entered in the Bridget & Lucy giveaway!  You can make any project from this blog, including recipes, upload a picture of it to the Flickr pool and you will be entered to win!  Here are a few of the submissions so far:


scarf

IMG_9473

family 427

Great work!
Keep it up!
jessica

*Merry Monday* - Linky Edition

Good Morning!  I've been very busy decorating, eating, and crafting this weekend - so today's *Merry Monday* is full of links!  Great little projects that would make wonderful handmade gifts.  Enjoy!

How beautiful are these little

This is a no-sew and very practical gift - they help your clothes dry faster 
and save you from buying dryer sheets.  Pretty too!

I about fell off the couch when I saw these gorgeous dish towels.  
Perfect for the seamstress in your life...

This would be a great gift when you need something small 
- or it could also be attached to the outside of a present.
Some really great ideas out there.  

Here's one more from my archives:

Hope you had a great holiday weekend!
jessica

Saturday, November 27, 2010

New Diaper Bag on Etsy Shop

I was trying to think of a way to improve my diaper bag, and you know what my biggest problem is?  I am always digging through crayons and coloring books trying to find my wallet or phone.  I don't want to put it in the outside pocket, so my solution?  A divided diaper bag. 

The interior is divided into 2 sections - one for baby and one for mommy! 

Hooray! 

Head on over to my Etsy shop and remember to type the coupon code shg20 to get 20% off your purchase now through cyber Monday at midnight!


happy shopping,
jessica

Friday, November 26, 2010

Coupon Code for you!

I hope you all had a lovely thanksgiving!  And now on to the season of gift giving!  In honor of all the holiday shopping, I have a coupon code for you -  shg20  for 20% off anything in my Etsy shop from now until Cyber Monday at midnight. 

YAY! so head on over and check out the store - and keep checking back because I am busy busy, making goodies for you and your friends! Happy shopping!
jessica

Wednesday, November 24, 2010

Anniversary, Anthropologie, and Reindeer

Hey everybody.  This post is just a little update about what we've been up to lately.  My husband and I celebrated our 6th wedding anniversary on Saturday.  The traditional gifts for Year 6 are iron, candy, or wood. 

Seeing as how we haven't perfected our iron welding skills yet, I made candy for him (dark and white chocolate bark with salty peanuts and pretzels mixed in) and he made a coffee table

and side table for me out of wood. 

My grandfather had given us some really cool barnboard a couple of months ago and we hadn't done anything with it yet - so this was the perfect occasion.  I am really happy with the rustic look.  I think they could be in Anthropologie.  Speaking of which, I snapped these photos of Char perusing their catalog the other day - you gotta train 'em young ;) 

And speaking of little Charlotte, I made this reindeer shirt for her the other day with this tutorial on Noodles & Milk. 

How cute is that?  Also a perfect solution for stains on the front of a shirt.  So that's what we've been up to - now on to cooking and eating!  Check back on Friday for new Etsy things and a special coupon code for FREE SHIPPING!!
Have a great day my friends,
jessica

Tuesday, November 23, 2010

Fresh Cranberry Salad: a MUST for your holiday dinners

We've been making this recipe in my family for three generations now.  Some of you may have aversions to creamy "salad" type things, but this one is amazing!!  Here are the ingredients you will need:

1 lb fresh cranberries ( chopped) I usually use the food processor
1 cup of whipping cream, whipped ( you can use cool whip if you are in a pinch)
3/4 cup sugar
1 cup small marshmallows
1 sm can crushed pineapple, drained
1/2 - 3/4 cup crushed pecan

Chop the cranberries in the food processor and pour into a bowl.  Pour the sugar over the cranberries and let it sit for few minutes.  While those are sitting, whip your cream in a mixer (this really doesn't take long at all and is so much yummier than cool whip).  Then pour the pineapple, pecans, marshmallows, and cranberries into the bowl with the whipped cream.  Gently fold all of the ingredients together. Refrigerate then serve cold. Bonus: this can be made the day ahead :)
So now that you have made this yummy fresh cranberry salad, here are some of the benefits you can enjoy while eating it.  Recent research from Rutger's University states that cranberries are
  • Full of antioxidants
  • Block urinary infections
  • Prevents plaque formation on teeth (helpful during a Thanksgiving meal)
  • May increase good cholesterol
  • May protect against wrinkles
  • May prevent tumors from growing rapidly
  • And in a test tube, they stopped the growth of breast cancer cells!
Pretty amazing right? Hope you have fun preparing for Thanksgiving!
jessica

Monday, November 22, 2010

*Merry Monday* Handmade Dude

Okay, you know guys are THE hardest people to make things for.  I mean how do you make a circular saw?  And I'm not about to undertake making a dress shirt.  Of course you can knit a hat or give them a coupon saying you will wash their car.  All good.  All been done.  So I did some research and found a couple of unique ideas
(*spoiler alert* if you are a man in my family - don't read anymore unless you don't want surprises).
  • Beef Jerky:  One site had a quote from a guy saying "If I can't eat it or drink it, don't make it for me".  Well, there you go.  It is easy to make, unique, and not that expensive.  Here are a couple of links to recipes:  Island Cowboy Beef Jerky     Homemade Jerky     Marinated Spicy Jerky
  • Dude Rice Bags:  You know, guys get aches and pains too - why not make a manly rice bag?  I am going to make one from an old flannel shirt
and one from an old t-shirt.
  • You can find my rice bag tutorial here.
                                          
  • Spice Rub:  Does your dude like to barbecue?  How about mixing up a ready to use spice rub?  Put it in a jar with a label and you're done.  A very practical gift.  This is one of Ryan's favorite rubs:  Wild Willy's Wonderful Rub
  • Candy:  Back to the food genre - how about these homemade peanut butter cups or chocolate bark?
So those are a few of my ideas for the guys in my life.  Please, please let me know some of yours!  And remember, as you're making Sew Homegrown projects, upload your pics to the Flickr Pool to be entered to win the adorable Bridget and Lucy Ruffle Joy Kit!
jessica

Friday, November 19, 2010

*Guest Post* - Hand-embroidery lesson

We are so lucky to have my friend Melissa here today.  She does some gorgeous hand-embroidery, something at which I am a novice.  That's why I'm so excited to have her here to give us a basic embroidery lesson!  Use these skills to make a project for the giveaway!  Remember, you are automatically entered just by uploading any project (recipe or sewing) to the Flickr Pool.  The drawing for the winner will be random - so don't worry about making a perfect project.  Good luck and take it away Melissa!


Hi there!  Hope everyone is having a fabulous fall!  This tutorial is to introduce you to hand embroidery.  The great thing about hand embroidery is that you can make a simple project very personalized in just a matter of minutes.  If you are the type of person who likes to have patterns for things, there are a number of different places to find them:  your local fabric store and websites.  Here are some great sites to get patterns from (some are free and some you have to purchase):

Here are the items that you will need for this project: 
2 skeins of embroidery floss (I used two different colors; the number you will need will depend on the size of your project), embroidery (or small) scissors, embroidery needles, something to embroider on (hand towel, dress, cardigan, etc.), a pattern (purchased, free, or hand made), a washable fabric marker, an embroidery hoop (wooden or plastic), a measuring tape
Some optional items include:
Thimble (leather or another kind of flexible thimble), needle threader, needle puller, fusible interfacing, tape, straight pins
The stitches I will be using in this tutorial include:
the back stitch (http://www.needlenthread.com/2006/10/embroidery-stitch-video-tutorial_24.html) and the chain stitch (http://www.needlenthread.com/2006/10/embroidery-stitch-video-tutorial-chain.html).
Both of the stitches are staples in hand embroidery.  Feel free to watch the videos for some live action on how to perform the stitches.  Neither of the stitches is really difficult, but each creates a unique effect.  What I really love about embroidery is that you can make anything look unique, by applying different stitches.  Each stitch creates it’s own texture.  The chain stitch is founded in the “Lazy Daisy” stitch (http://www.needlenthread.com/2006/11/daisy-stitch-video-tutorial.html).  
When I was growing up, my grandmother referred to this stitch as the “Petal” stitch.  The chain stitch is a great fill stitch, but also looks really cool as outline.
The embroidery floss can be used as one complete unit (all 6 strands), or separated into smaller groups of thread (2, 3, 4, or 5) depending on the stitch you are doing and the effect you want.  For the backstitch, I tend to use all 6 strands, as it makes for a fuller effect.  For the chain stitch, I use 3 strands.  Play around with these, and see which you prefer. 
First, measure the center of your fabric in width, and then measure how far down on the item you want the design to be. 
My project is a reversible toddler dress.  

Next, make some marks where the center of your design should be. Then, put your pattern on the front of your fabric, and ensure that you are happy with the placement.  
 
The next step is optional.  I find that it is particularly useful when I choose to fill-in an embroidery project, instead of just doing an outline.  Should you so choose, fusible interfacing (iron-on) can be placed on the wrong side of the fabric in line with the pattern on the right side of the fabric.  What is important here is to make sure that you use enough interfacing to cover the entire area of where the design will eventually be.  I find that on stretchy fabrics, the interfacing really helps.  Some people do not use it, as it is an extra layer to embroider through.  If you are just starting out, I would recommend using it. 

 
Turn your fabric right-side out again, and trace on your pattern.  I tend to use hand drawn patterns, as I always find myself tweaking the purchased ones to fit my needs.  I used some tape to help stabilize my pattern while tracing.  If it is a fabric with less pattern than shown here, you can trace through the fabric and place the pattern below, without having to trace around a cut-out.  I often use a window to help “light” the fabric and the pattern.  Tape the pattern to the window, then tape the fabric over the pattern, and trace with a washable fabric marker. 
Now that you have traced on your pattern, you are ready to get started with the embroidery.  Place your hoop around the design (or around the area of the design you are working on).  I use a wooden hoop, as I feel that for me it helps to keep the fabric from shifting.  After threading your embroidery needle with the 6 strands of floss, make a knot in the floss.  If you are not sure how to do this, there are some great videos on the sites listed below.  Start with the backstitch, and outline your pattern.  You could do this in a contrasting color to make it really pop. 
 
The key with the backstitch is to make it as even as you can.  Some irregularities give it some charm and a really nice home-made feel. 
Now that your outline is complete, you are ready to fill in the design (also optional).  For the fill on this pattern, I chose the chain stitch.  Split your floss into three strands of thread.
 
Once you are finished filling in the design, you can add some extra touches in contrasting threads, as shown here.  Filling in a design can take a lot of time.  It depends on the look that you are going for.  If it is your first project, you may consider just doing an outline and then filling in on a later project.  


For the extra touches, I used the chain stitch in a contrasting color to make it look more like a maple leaf. 
Be creative and come up with your own ideas/patterns!  One of the best tips my grandmother ever gave me regarding embroidery by hand is to take breaks.  If you work for too long, you can stress the muscles in your hands, wrists, and arms.  I use an embroidery brace now, because it helps to stabilize my hand. 
Embroidery is great, because you can do monograms, collegiate logos/mascots (if you’re an SEC freak like I am), and just about anything you could imagine.  It’s also a relatively inexpensive way to spice up some of your projects with a personal touch.  Feel free to check out my Flickr to see some ideas for some other projects: http://www.flickr.com/photos/thehallhappenings/ or on my blog: The Hall Happenings (currently under construction by my fabulous husband, to be returned to working order shortly!).
Here are some great sites for tips on embroidery if you are interested:

Thanks for having me on Sew Homegrown, Jessica!
~Melissa

Thanks for all of your great tips Melissa!  Now everyone get busy so you can win that ADORABLE Bridget and Lucy Ruffle Joy Kit!  Have a great weekend.
jessica

Wednesday, November 17, 2010

I am thankful for color

 Looking out my window this week, at the dreary gray days, I am reminded how thankful I am for color.
I am thankful that even when it is rainy outside, I am surrounded by colors everywhere in  my warm cozy home.  Not only in my decorating but just everyday things in my home add splashes of color in every corner.

I wandered around the house, camera in hand, documenting all the naturally-occurring splashes of color - I really didn't stage anything for the pictures.  So, welcome to my colorful home...


What are you thankful for in your home today?
-jessica

You may also enjoy...

Related Posts Plugin for WordPress, Blogger...