

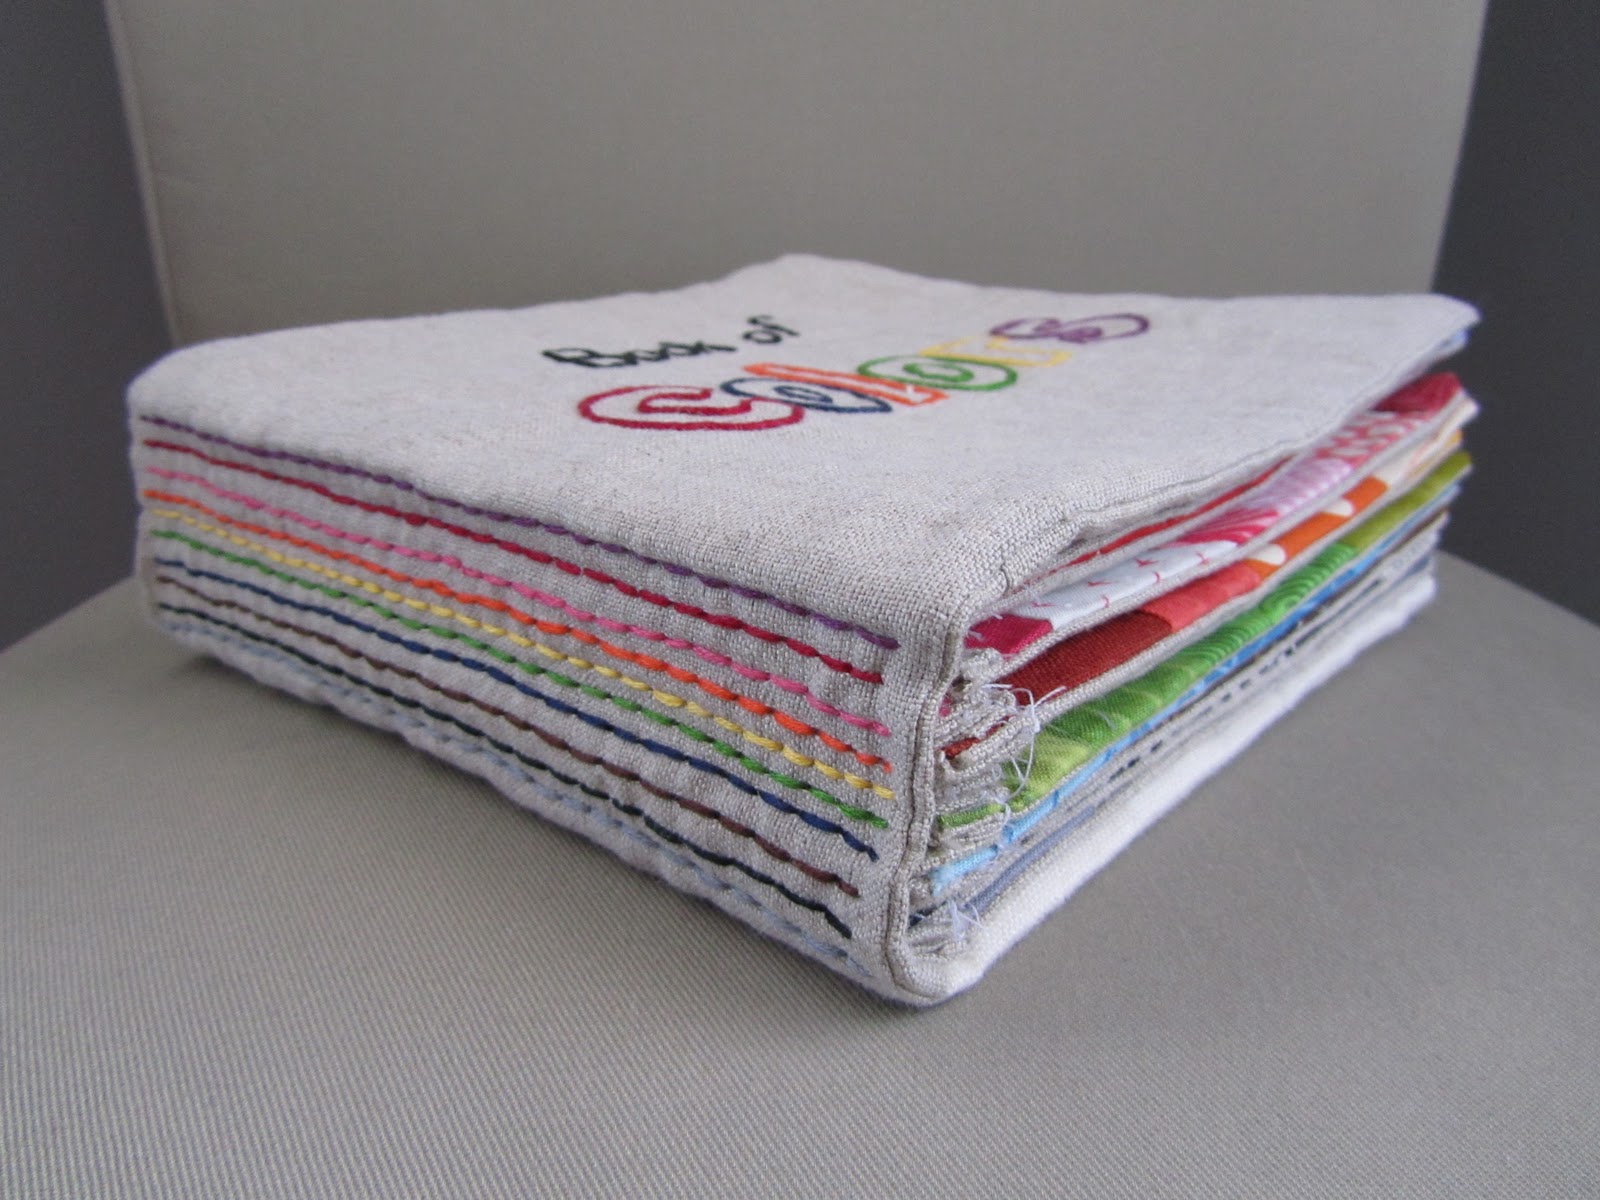
I have a treat for you today friends. The very talented Jessica from Insanely Crafty is here today show us how to make this "Colors Book". She made it for her little boy, and it is just darling. Her attention to detail in this tutorial makes it very easy to follow and understand. Visit her blog for more inspiration and cute pics of her little one. Take it away Jessica!
First of all, I want to thank Jessica for asking me to share a tutorial on her blog!
Assembly Directions
Note: All seam allowances are 1/2’’.

5. From your word print out, cut out the book title to make a stencil, don't worry about keeping the inner detail.

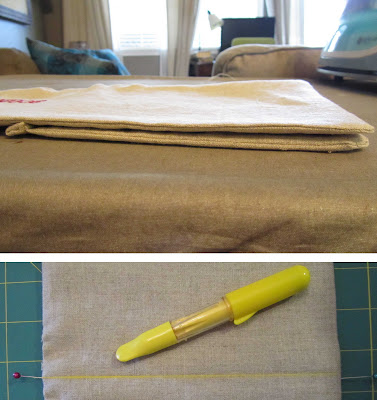
6. Center your stencil on the right side of your Cover fabric as in the example below

7. Use the stencil to draw out your embroidery lines


10. With exception of the purple word page and the white scrap page. Put pages right side together in order (example purple scrap page goes with red word page, red scrap page goes with pink word page, etc.) You will only be sewing three sides. The side to the left of word must be sewn. Lay the pairs out and pin the one side that should be sew.

jessica
First of all, I want to thank Jessica for asking me to share a tutorial on her blog!
I had my first child last year and he may be slightly spoiled with hand made items. On the long list of things I wanted to make for him was a book to learn his colors. That's what I am here to share with you! I hope you enjoy making it as much as I did. I would love to see your completed project so please share by joining my flicker group!


Supplies
1/2 yard linen fabric
1 yard one-sided fusible interfacing
Scrap fabric (purple, red, pink, orange, yellow, green, blue, brown, black, gray, white)
Embroidery floss (purple, red, pink, orange, yellow, green, blue, brown, black, gray, white)
Fabric Paint (purple, red, pink, orange, yellow, green, blue, brown, black, gray, white)
Freezer paper
X-Acto knife
fabric marker
small embroidery hoop
Printed word template
optional: plastic bag
Cutting directions-
Linen
(11) 8” x 8” – Pages
(1) 17” x 8” – cover
(1) 8” x 3.5” - spine
(10) 8” x 3” – binding
Interfacing
(10) 7.5”x7” - pages
(1) 16” x 7” – cover
Assembly Directions
Note: All seam allowances are 1/2’’.
1. Create and 8”x8” block for each of the 11 colors from your scrap pieces. Try to add at least one textural fabric to each page, I used minky, felt, fleece, and flannel to achieve this. In some cases I appliquéd additional fabric to the top of my block for added interest.

2. Trace each of the colors onto freezer paper using your word template. Following your traced lines, cut out each letter with an X-Acto knife.

2. Trace each of the colors onto freezer paper using your word template. Following your traced lines, cut out each letter with an X-Acto knife.
*helpful hint - Any letters that have little pieces like an 'e' that will need to be used leave them just slightly attached until your ready to iron so you don't have to worry about loosing the pieces

3. Iron a piece of freezer paper to the back of the page and then center the cut out word on the front of the page and iron it on. Make sure the iron is on a high heat setting so the wax makes a good seal to your page. Repeat for all pages.

4. Paint each word with it's corresponding color. Then let dry and heat set per paint bottle instructions.
*tip always heat set from the back of the fabric it keeps paint from transfering to the hot iron and ruining your project.
3. Iron a piece of freezer paper to the back of the page and then center the cut out word on the front of the page and iron it on. Make sure the iron is on a high heat setting so the wax makes a good seal to your page. Repeat for all pages.

4. Paint each word with it's corresponding color. Then let dry and heat set per paint bottle instructions.

5. From your word print out, cut out the book title to make a stencil, don't worry about keeping the inner detail.

6. Center your stencil on the right side of your Cover fabric as in the example below

7. Use the stencil to draw out your embroidery lines

8. Use a running stitch over the top of the outline.

9. Layout the book in order purple, red, pink, orange, yellow, green, blue, brown, black, gray,
white.

10. With exception of the purple word page and the white scrap page. Put pages right side together in order (example purple scrap page goes with red word page, red scrap page goes with pink word page, etc.) You will only be sewing three sides. The side to the left of word must be sewn. Lay the pairs out and pin the one side that should be sew.

Sew around the top, side and bottom of the page (1/2" seam allowance). I like to double check my measurements before sewing along the bottom- you want your pages to be 7 inches top to bottom and 7.5 inches from sewn to unsewn side edge.
Once three sides are sewn clean up you edges and snip the corners


12. Flip page right side out and iron

13. Bind your page edge.
First fold each binding piece in half and iron, fold down the top and bottom of each binding piece to make a 7" strip, pin to the unsewn side of the page and sew with a 3/8" seam allowance. Press seam. Snip page edges and fold in binding corners, pin in place.
 Sew down. repeat for all pages

14. Sew the spine (8"x 3.5")between your purple word page and your white scrap page.

15. Put right side together with the cover and sew around the outside leaving a 3" opening for turning.
16. Trim the edges, clip corners and iron on interfacing

17. Turn right side out, iron, and hand stitch closed.

18. Position 1st and last pages on your "book spine" making sure they will be covered when the book is closed. Put a pin where the page will need to be sewn in at the top and bottom. Use a ruler and draw a straight guide line down the cover.
19. Use a running stitch to attach the first and last page to the book. Use the corresponding color to the page you are sewing in.

20. Once the front and last page are sewn in place evenly divide the area between them among the 8 remaining pages. Draw guidelines again to keep your page and stitches straight.
Sew in remaining pages.


Wow! How amazing is that?!? Give Jessica some love and leave her a comment! The more you comment, the more chances to win the tote!! Have a great day!Once three sides are sewn clean up you edges and snip the corners

11. Iron on the interfacing to the inside to your page.
**Optional add plastic bag in some of your pages to make a crinkle page. (thank you Jennifer for this idea!)
12. Flip page right side out and iron

13. Bind your page edge.
First fold each binding piece in half and iron, fold down the top and bottom of each binding piece to make a 7" strip, pin to the unsewn side of the page and sew with a 3/8" seam allowance. Press seam. Snip page edges and fold in binding corners, pin in place.


14. Sew the spine (8"x 3.5")between your purple word page and your white scrap page.

15. Put right side together with the cover and sew around the outside leaving a 3" opening for turning.
16. Trim the edges, clip corners and iron on interfacing

17. Turn right side out, iron, and hand stitch closed.

18. Position 1st and last pages on your "book spine" making sure they will be covered when the book is closed. Put a pin where the page will need to be sewn in at the top and bottom. Use a ruler and draw a straight guide line down the cover.

19. Use a running stitch to attach the first and last page to the book. Use the corresponding color to the page you are sewing in.

20. Once the front and last page are sewn in place evenly divide the area between them among the 8 remaining pages. Draw guidelines again to keep your page and stitches straight.
Sew in remaining pages.
jessica

I love this idea. One thing I have found with the plastic bag is that is can hold water after you have washed the item a couple of times. To prevent this, overlock the edges or zigzag stitch around or just use a single piece so there is no pocket for water to get trapped.
ReplyDeleteThanks so much for a great tutorial I am sooo looking forward to making one of these for my children. Maybe one each if the first one turns out as beautiful as yours.
Love it!
ReplyDeleteThat is wonderful! I want one/need some spare time to make one!
ReplyDeletenow that is really amazing, perfect idea, its colorful and just.. perfect!
ReplyDeleteThe book is very cool and the tutorial is well done!
ReplyDeleteLove, love, love it!
ReplyDeleteThis is adorable and SO well done! I have a few baby gifts to give and they are ALL for boys, so I can use this as my hand made gift (I usually sew dresses). I'm kinda sad that my girls didn't have one of these when they were little. I want to go make one right now!
ReplyDeleteI love this!!! Wow - it is so creative. The stitching on the spine is just too adorable!
ReplyDeleteThis book is so amazing and easy to make. I'm going to recommend this to my friend who's about to have her first child. She'll love it.
ReplyDeleteGreat book. It is such a wonderful idea to show all the shades of each color!
ReplyDeleteImpressive! What a great thing for her child to someday pass on to the next generation!
ReplyDeleteWhat a wonderful idea to teach children as well as use up those scraps I cannot bear to throw away.
ReplyDeleteI'm so excited to make this for my niece/nephew that's going to be born in August!
ReplyDeleteWhat a nice blog! I love your creations.
ReplyDeletehttp://createdbykaty.blogspot.com
Super cute! Thank you for sharing! I love the rainbow spine...such a nice detail!
ReplyDeleteFrom one Jessica to another and another!
This is an amazing idea! Thank you for the detailed tutorial. Now all I need is time...and scraps!
ReplyDeleteWhat an amazing book! Now I need to beef up my stash of colorful scraps so I can make one of these for my niece.
ReplyDelete